How to Season a New BBQ Grill: The Definitive Guide for Flavor and Longevity
Introduction: Why Your New Grill Needs a “Baptism by Fire”
You’ve done the research, compared the Weber vs. Napoleon grills, and finally brought home that gleaming stainless steel or cast-iron beauty. It sits on your patio, pristine and untouched. Your instinct might be to immediately throw on a ribeye or a rack of ribs. Stop right there.
Before you even think about firing up the burners for your first cookout, there is a critical step that stands between you and BBQ nirvana: seasoning your grill. Just like a high-quality cast-iron skillet, a barbecue grill requires a protective layer of carbonized oil to perform at its peak. This process, often called “curing” or “burning in,” isn’t just a suggestion—it is a mandatory ritual for any serious pitmaster.
Seasoning achieves two primary goals: it cleanses the unit of manufacturing solvents and creates a non-stick, rust-resistant surface. Without it, you risk a metallic taste in your food, stubborn sticking issues, and the early onset of corrosion. Whether you have purchased the best barbecue grill on the market or a budget-friendly starter unit, the laws of chemistry remain the same.
In this comprehensive guide, we will walk you through exactly how to season a new BBQ grill, covering everything from the science behind the process to specific instructions for gas, charcoal, and pellet smokers.
The Science: What is Seasoning, Really?
To understand why we season, we must look at the microscopic level of your grill grates. Even smooth-looking stainless steel or porcelain-coated cast iron has microscopic peaks and valleys. If left untreated, proteins from your meat sink into these valleys, bond with the metal, and tear when you try to flip your burger.
Seasoning is the process of polymerization. When you apply a thin layer of oil to the metal and heat it past its smoke point, the fats break down and bond to the metal, transforming into a hard, plastic-like layer. This layer fills in those microscopic pores, creating a slick surface that helps you learn how to keep chicken from sticking to the grill and protects the raw metal from moisture and oxygen, the parents of rust.
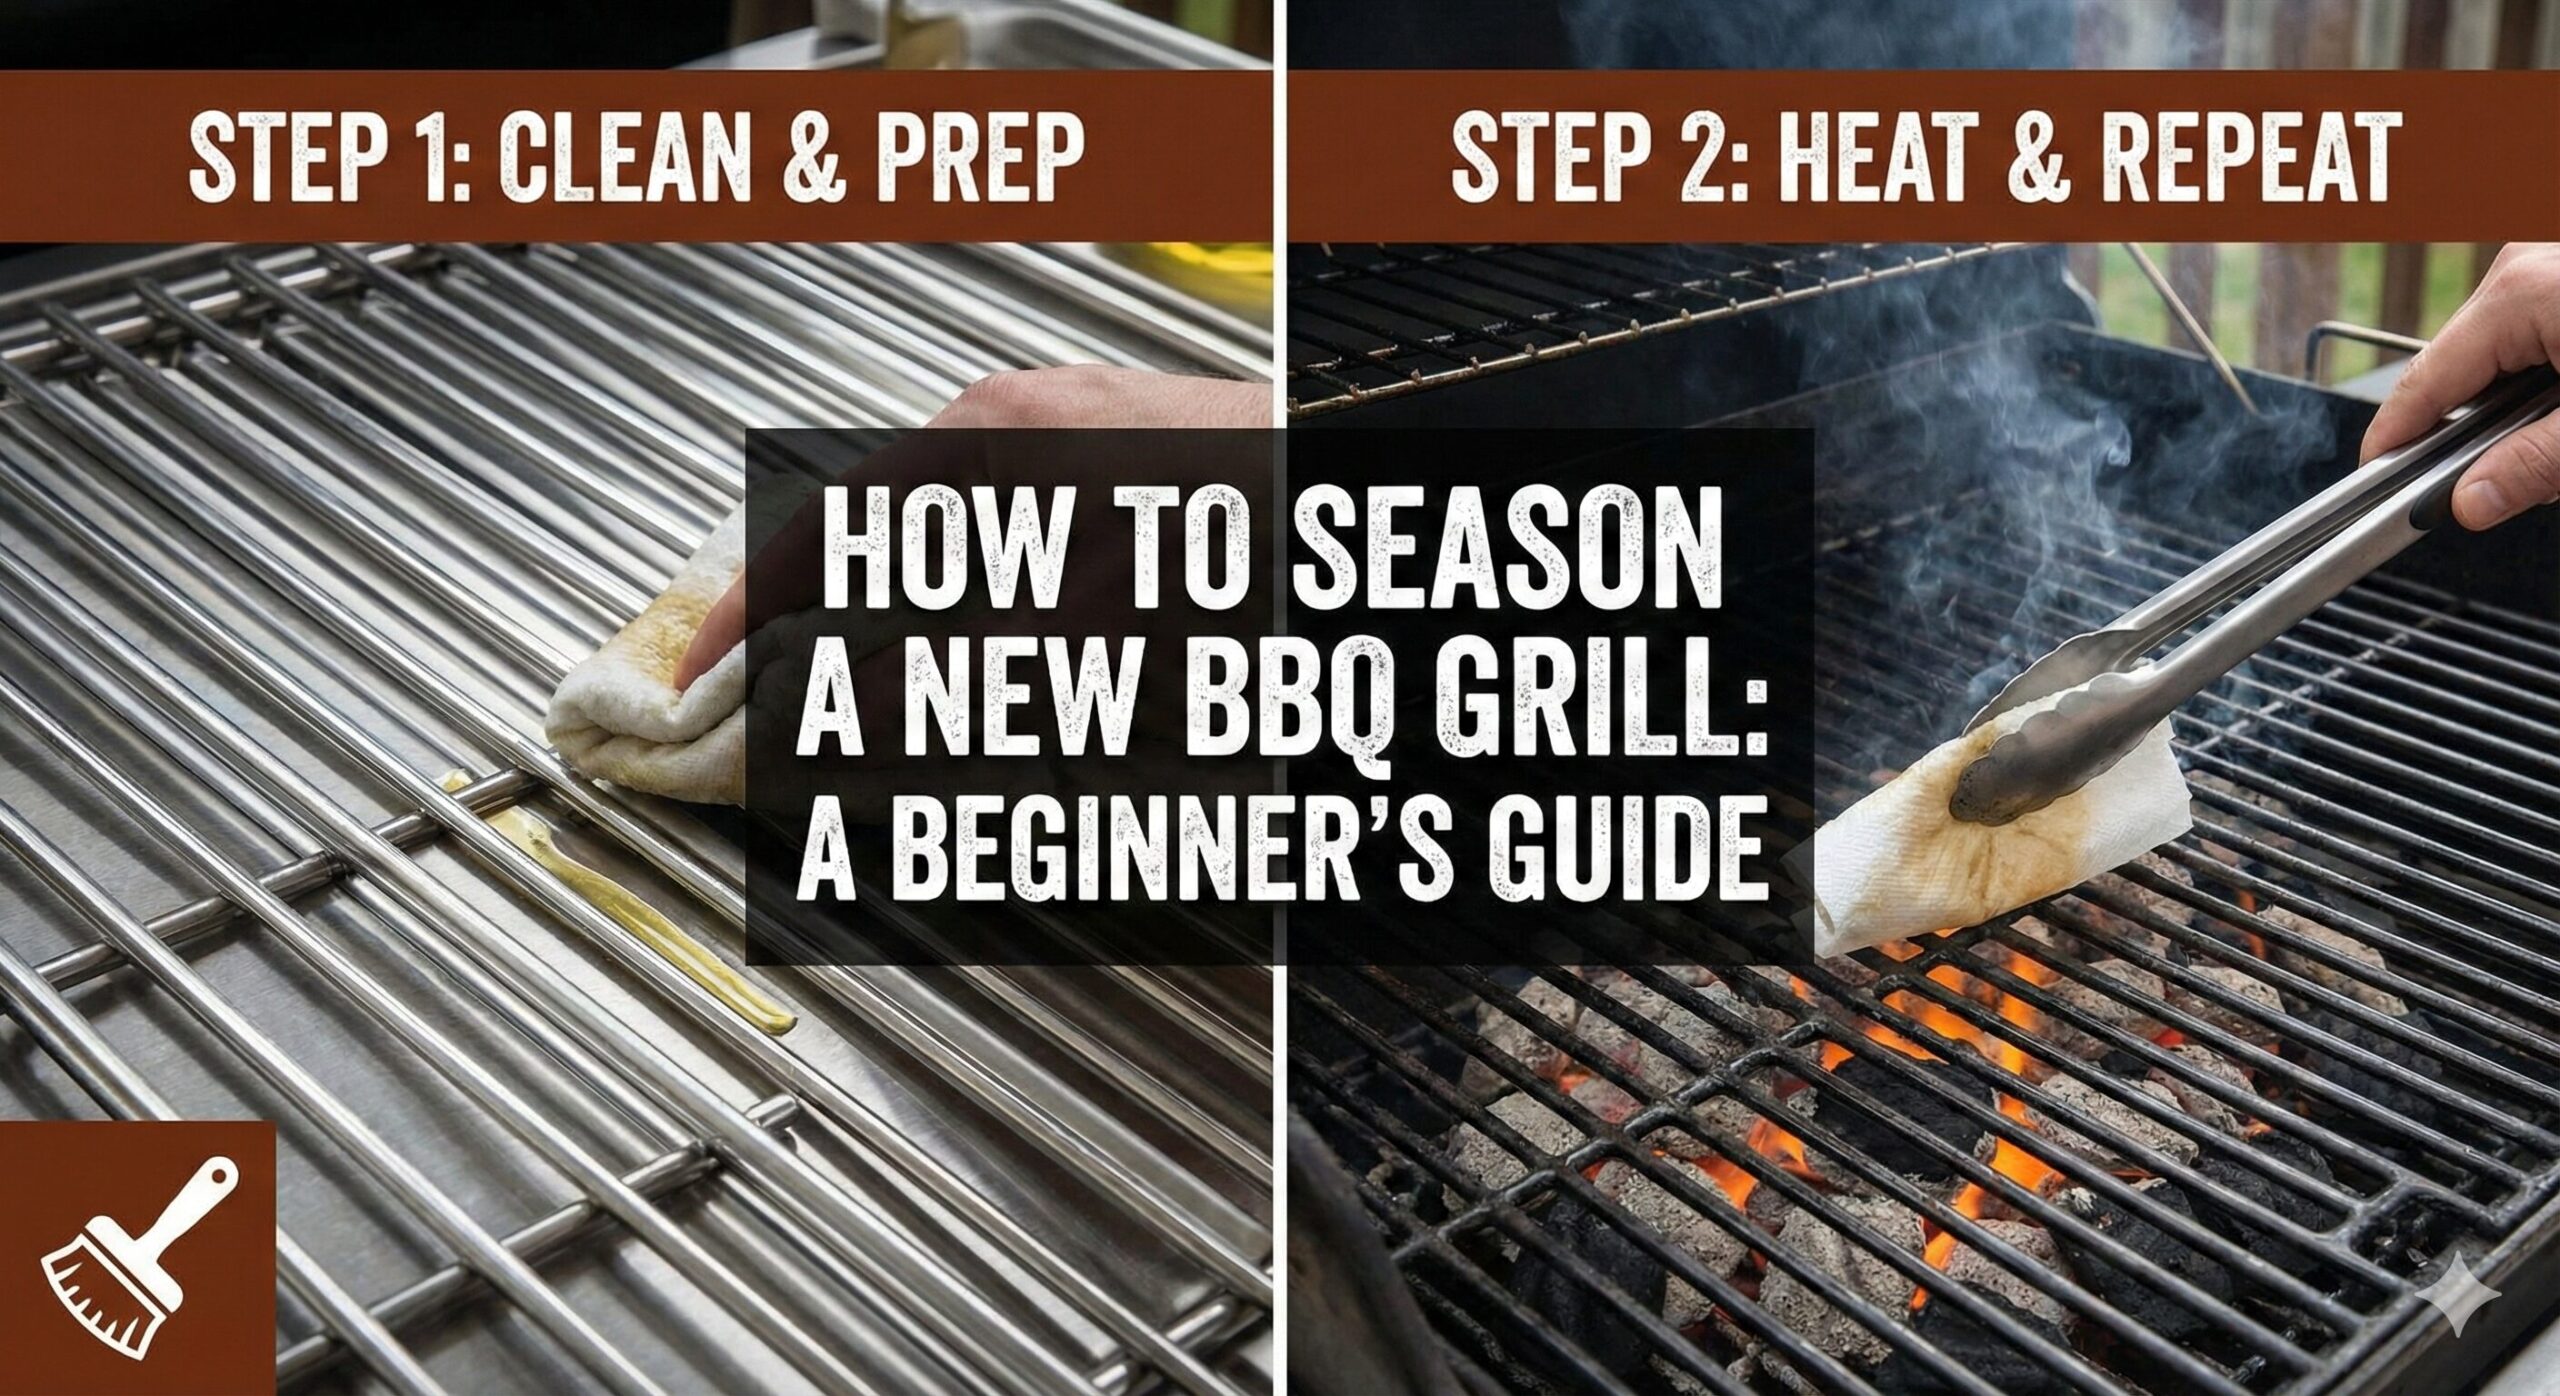
Phase 1: The Pre-Clean (The Burn-Off)
When a manufacturer ships a grill, they coat the internal components in machine oils and solvents to prevent them from rusting in the warehouse or during shipping across the ocean. You do not want these chemicals imparting flavor into your brisket or ribs.
Step-by-Step Pre-Cleaning:
- Assembly Check: Ensure all grates, emitters, and heat tents are installed correctly according to the manual.
- Cold Wipe Down: Before turning on the heat, take a damp cloth and wipe down the grates to remove any dust or Styrofoam bits from the packaging.
- The Initial Burn-Off: Turn your grill on high. If you are using charcoal, build a large chimney of coals. Close the lid and let it roar for 20 to 30 minutes. You will likely smell chemical fumes—this is the machine oil burning away.
- Cool Down: Allow the grill to cool completely. This is essential before applying your seasoning oil.
Once the grill is cool, you are ready to prepare the surface. If you see any residue ash, now is the time to use a specialized cleaner. For recommendations, check out our guide on the best barbecue grill cleaner.
Phase 2: Choosing the Right Oil
Not all oils are created equal. For seasoning, you need an oil with a high smoke point. Since you will be heating the grill to high temperatures to trigger polymerization, using an oil with a low smoke point (like extra virgin olive oil or butter) will simply burn, taste bitter, and degrade the seasoning layer.
| Oil Type | Smoke Point (°F) | Verdict for Seasoning |
|---|---|---|
| Avocado Oil | 520°F | Excellent – Best for high heat longevity. |
| Grapeseed Oil | 420°F | Great – Neutral flavor and bonds well. |
| Canola Oil | 400°F | Good – Cheap and effective standard. |
| Vegetable Oil | 400-450°F | Good – Readily available. |
| Olive Oil (EVOO) | 325-375°F | Avoid – Burns too quickly, creates bad taste. |
| Bacon Grease | 325°F | Avoid – Contains salt/water, can go rancid. |
If you are looking for specialized products, there are specific barbecue rubs and seasoning sprays designed for cast iron that work wonders on grill grates.
Top Rated High-Heat Grill Spray

Ensure a perfect non-stick coating with a professional-grade high-heat oil spray.
Check Price on AmazonPhase 3: The Seasoning Process (Universal Method)
Whether you have a charcoal grill or a high-end gas unit, the core methodology remains consistent. Here is the foolproof workflow.
1. Apply the Oil
Once your grill has finished the “burn-off” and cooled down, it is time to oil. You can use a spray bottle (easiest) or a rag dipped in oil. Use tongs to hold the rag if the grill is still slightly warm.
- Coat Everything: Don’t just oil the top of the grates. Oil the bottom, the sides, and the emitter plates if you have an infrared grill. If you have a smoker, coat the entire inside of the cooking chamber (walls and door) to prevent rust.
- Thin is In: This is the most common mistake. Do not slather it on. You want a microscopically thin layer. If it’s dripping, you’ve used too much. Wipe off the excess. Thick oil layers turn into a sticky, gummy mess rather than a hard coating.
2. The Heat Cycle
Now, fire it up again.
- Temperature: Aim for a temperature around 400°F to 500°F. You want to be just above the smoke point of your chosen oil.
- Time: Let it cook for 30 to 40 minutes. You will see smoke; this is good. That is the oil bonding to the metal.
- Visual Cue: The grates will start to turn a darker color (bronze or black). This discoloration is the seasoning taking hold.
3. Cool and Repeat
Turn off the burners or let the coals die down. Allow the grill to cool completely. For a brand-new grill, we highly recommend repeating this process at least twice, preferably three times, before cooking food. Multiple thin layers are infinitely stronger than one thick layer.
While you wait for the grill to cool, you might want to inspect your inventory. Do you have the must-have BBQ accessories ready for the first cook?
Type-Specific Instructions
While the general steps apply to all, different fuel sources require slight adjustments.
Gas Grills (Propane & Natural Gas)
Gas grills are the easiest to season because of precise temperature control. Focus heavily on the heat tents (flavorizer bars) over the burners. These take the most abuse from dripping grease and are prone to rust. If you are comparing Weber vs. Napoleon, note that stainless steel grates may not turn as black as cast iron, but they still need the oil protection.
Tip: If you plan on using a smoke box, season that too. Check out the best smoke boxes for gas grills here.
Charcoal Grills (Kettles & Kamados)
With charcoal, you are managing a live fire. Ensure you aren’t using “match-light” charcoal for the seasoning process, as the chemical additives can embed in the seasoning. Use natural lump charcoal or standard briquettes. You need to create a two-zone fire to ensure you can control the heat if it gets too hot (over 600°F can actually burn off the seasoning you are trying to create).
Many people worry about health effects; if you are wondering is charcoal grilling bad for you, rest assured that a properly seasoned grill helps prevent charring and sticking, which can reduce carcinogen formation.
Pellet Smokers (Traeger, Pit Boss, etc.)
Pellet grills have an interior that acts like a convection oven. You must season the entire barrel, not just the grates. This usually involves a “primer” stage where you ensure pellets are feeding through the auger.
- Remove the grease tray and grates initially to ensure the fire pot ignites.
- Replace components and coat the large drip tray (grease deflector) heavily, as this sees the most heat.
- Run at 350°F-400°F for 45 minutes.
For a detailed breakdown of models, see our Pit Boss vs. Traeger comparison.
Electric Grills
Even the best electric barbecue grill needs love. While they don’t produce open flame, the cooking surface is usually cast iron or non-stick metal. Follow the manual, as some non-stick coatings (like Teflon) should not be seasoned with high heat oil sprays.
Maintenance: The “Post-Cook” Seasoning
Seasoning isn’t a “one and done” event. It is a lifecycle. To maintain that non-stick surface, you need to perform a mini-seasoning after every cook.
The Routine:
- Cook: Enjoy your juicy burgers.
- Burn: Turn the heat up for 10 minutes to burn off food residue.
- Scrape: Use a wooden scraper or a safe brush. (See our review on best BBQ tool sets).
- Oil: Apply a very light coat of oil while the grill is warm (not hot).
- Cover: Once cool, cover it up.
This routine is one of the key maintenance requirements for barbecues.
Essential Maintenance Kit

Keep your seasoned grates clean without damaging the coating using a coil-free brush.
Check Price on AmazonCommon Troubleshooting
My Grates are Sticky!
This means you used too much oil or didn’t heat it high enough / long enough. The oil turned into a gum instead of a polymer. To fix this, fire up the grill to high heat and let it burn until the stickiness turns to ash and carbon, then scrape and re-season.
I See Rust Spots
Don’t panic. If you live in a humid area or forgot to cover the grill, rust happens. Scrub the rust spots with steel wool or a stiff wire brush to expose raw metal. Clean it, dry it thoroughly, and immediately run through the 3-step seasoning process described above. Using grill mats can also help protect the surrounding area, but a good cover is essential for the grill itself.
The Paint on the Inside of the Lid is Peeling?
This is a common illusion. It is almost certainly not paint. It is a buildup of carbonized grease and smoke that is flaking off. It looks like black paint chips. Simply scrub it off with a ball of aluminum foil or a brush. To prevent this, wipe down the inner lid with a mild soapy solution (when cool) periodically. Learn more about how to clean mold and buildup from grills.
Grates: Cast Iron vs. Stainless Steel
The material of your grate dictates how aggressively you need to season.
Cast Iron: These are porous sponges. They require the most seasoning. If you strip the seasoning, they will rust overnight. However, they hold heat beautifully for searing. You might want to explore the difference between indirect and direct grilling to maximize cast iron’s potential.
Stainless Steel: These are less porous and more rust-resistant naturally. Seasoning helps with non-stick properties, but the “black” layer may flake off easier than on cast iron. This is normal. Just keep applying oil after cooks.
Porcelain Enamel: These often don’t require heavy seasoning as the glass coating is already non-stick. However, oiling them prevents food from sticking to any micro-cracks in the enamel.
Expert Tips for the First Cook
Now that your grill is seasoned, what should you cook first? Avoid lean meats like chicken breast or white fish. They will stick.
The Best First Foods:
- Fatty Burgers: The dripping grease helps reinforce the seasoning.
- Bacon: As the old saying goes, bacon makes everything better, including your grill grates.
- Sausages/Bratwurst: High fat content is your friend here.
- Pork Shoulder: If you are using a smoker, a long smoke creates a great patina inside the chamber.
If you are looking for flavor inspiration, check out our list of the best barbecue sauces to accompany your inaugural feast.
FAQs About Seasoning Grills
Do I need to season the outside of the grill?
Generally, no. The outside is usually powder-coated or stainless steel designed for aesthetics. However, wiping stainless steel exteriors with a specialized stainless cleaner helps prevent surface rust. Do not use cooking oil on the outside; the sun and heat will turn it yellow and sticky.
Can I use pam spray to season my grill?
You can, provided it is high-heat Canola or Vegetable oil based. However, be careful with sprays containing soy lecithin or flour (baking sprays), as they can burn at lower temperatures. A pure oil spray is safer.
How often should I completely re-season the grill?
You should do a full, deep season (the 3-coat method) at the start of every grilling season (Spring) or if you notice significant rust or sticking. During the season, the “maintenance” oiling after cooks is usually sufficient.
Why is my new grill smoking so much during seasoning?
This is normal! The “smoke point” is literally the point where the oil stops shimmering and starts smoking. This chemical reaction is what creates the hard polymer layer. If it smells like burning plastic, ensure you removed all packing materials before starting.
Does seasoning affect the taste of the food?
Yes, in a good way. It removes the metallic taste of raw iron and the chemical taste of factory oils. It does not add a “grease” taste if done correctly; it creates a neutral base. For flavor, rely on your rub and smoke wood.
Can I grill frozen meat on a newly seasoned grill?
Technically yes, but it increases the chance of sticking because the frozen meat drops the grate temperature rapidly. It is better to thaw meat first. Read more about grilling frozen meat here.
Conclusion
Seasoning a new BBQ grill is the single most important thing you can do to ensure years of delicious meals. It transforms a cold piece of metal into a living, breathing cooking instrument. It requires a little patience—cleaning, oiling, heating, cooling, and repeating—but the payoff is a surface that releases food effortlessly and resists the elements.
Treat your grill with respect, keep it seasoned, and it will reward you with perfect sear marks and incredible flavor. Now that your equipment is ready, it’s time to think about the cook. Whether you need the best barbecue gifts for a fellow pitmaster or just want to upgrade your setup, explore our other guides to become the master of your backyard.
Happy Grilling!
Ready to Upgrade?
Looking for the best gear to start your journey? Check out the top-rated grills of the year.
Check Price on Amazon