There are few upgrades in the backyard barbecue world more transformative — and more misunderstood — than properly seasoning a cast iron grill grate. The moment you nail the process, everything changes: food releases cleanly, rust stays at bay, flavors deepen, and cleanup drops to a two-minute rinse. Yet countless pitmasters skip this step entirely, or worse, execute it incorrectly and wind up with sticky, flaking grates that do more harm than good.
This guide covers every dimension of the process in painstaking detail. Whether you’re breaking in a brand-new grate, rescuing a rust-encrusted veteran, or simply trying to understand why your seasoning never seems to stick, you’ll find the answer here. We’ll walk through the chemistry, the methods (oven, on-the-grill, and open flame), the best oils, and the long-term maintenance habits that keep cast iron performing beautifully for generations.
If you’ve already seasoned a new BBQ grill before, you’ll recognize some of the principles — but grates present their own quirks and challenges that deserve a dedicated deep-dive. Let’s get into it.
1. Why Seasoning a Cast Iron Grill Grate Matters More Than You Think
Seasoning is not a suggestion. It is the foundational maintenance practice that determines whether your cast iron grill grate becomes a lifelong cooking companion or a rusted liability you replace every season. Understanding why it matters so deeply will motivate you to do it correctly every single time.
Rust: The Relentless Enemy
Cast iron is an iron-carbon alloy. Unlike stainless steel, it contains very little chromium, which means it has no built-in corrosion resistance. Expose bare cast iron to moisture — even humidity alone — and iron oxide (rust) begins forming within hours. A seasoned grate, by contrast, is protected by a polymerized oil coating that acts as a barrier between the iron and the atmosphere. It’s essentially a thin, hard, non-stick polymer shell that you bake directly onto the metal.
For a comprehensive comparison of how cast iron stacks up against the alternatives on corrosion and cooking performance, see our detailed piece on cast iron vs stainless steel grill grates.
Non-Stick Performance
A well-seasoned cast iron surface approaches the non-stick performance of PTFE coatings — without the temperature limitations or chemical concerns. The polymerized oil fills the microscopic pores in the iron’s surface, creating a relatively smooth plane that food releases from cleanly. This is why a perfectly seasoned grate lets you flip a salmon fillet without leaving half of it stuck to the metal.
This non-stick quality is also why keeping chicken from sticking to the grill starts with surface prep — and surface prep starts with seasoning.
Flavor Enhancement
There’s a reason cast iron cookware has been cherished for centuries. The iron itself subtly influences flavor, and a properly seasoned grate has had countless cooks’ worth of accumulated drippings, smoke, and oils polymerized into its surface. Over time, this “patina” builds genuine depth of flavor that no new grate — stainless or otherwise — can replicate.
Heat Retention and Distribution
Cast iron’s density means it stores heat extraordinarily well. Once up to temperature, it doesn’t fluctuate the way thinner stainless grates do when cold food is placed on them. This consistency produces better sear marks, more even cooking, and a more controllable grilling experience. But a rusted or poorly maintained grate loses its thermal uniformity — another reason to keep the seasoning intact.

2. The Science Behind Cast Iron Seasoning: Polymerization Explained
To season cast iron correctly, you need to understand what’s actually happening at the molecular level. The word “seasoning” sounds culinary and vague, but it describes a specific chemical transformation called polymerization.
What Is Polymerization?
When you coat cast iron in a thin layer of oil and apply heat, the fatty acid molecules in the oil begin to cross-link with one another. This process is driven by oxidation — the same chemical reaction that dries a coat of linseed oil paint on a fence or creates a skin on a bowl of old cooking oil. In the presence of heat (typically 400–500°F / 204–260°C), these cross-linked fatty acid chains bond tightly to the iron surface and to each other, forming a hard, smooth polymer layer.
The resulting material is neither oil nor metal — it’s a hybrid polymer that is:
- Chemically bonded to the iron surface
- Water-resistant (not waterproof, but highly resistant)
- Thermally stable up to very high temperatures
- Increasingly non-stick with each additional layer
- Dark in color (which is why well-seasoned cast iron turns almost black)
Smoke Point: The Critical Variable
Every oil has a smoke point — the temperature at which it begins to break down and smoke. For seasoning purposes, you want to use oils with a high smoke point and a high polyunsaturated fat content. Polyunsaturated fats cross-link more readily than monounsaturated or saturated fats, which is why flaxseed oil has historically been a favorite among cast iron enthusiasts (though it can sometimes flake if applied too thickly).
Why Thin Layers Are Non-Negotiable
This is the most commonly violated principle of cast iron seasoning. Too much oil = a sticky, gummy, uneven result. Why? Because only the oil molecules in direct contact with the iron (or the previous seasoning layer) receive enough heat to polymerize completely. Excess oil just sits on top, partially polymerizes into a tacky mess, and eventually peels off in flakes. The rule is: apply just enough oil to coat the surface, then wipe nearly all of it off before heating.
The Role of Temperature
Temperature is the catalyst. Too low and polymerization is incomplete — you get a gummy layer. Too high and you risk burning off the seasoning before it bonds. The sweet spot for most oils sits between 400°F and 500°F (204–260°C). For grilling applications, where your grate regularly sees 500–700°F, this means the seasoning will be tested every cook — which is actually beneficial, as the heat continues to strengthen and cure the polymer over time.
3. Best Oils for Seasoning Cast Iron Grill Grates & Tools You’ll Need
The oil you choose has a direct impact on the quality and durability of your seasoning. Let’s break down the top contenders and the tools that make the job easier.
Oil Comparison Table
| Oil | Smoke Point | Polyunsaturated Fat % | Seasoning Quality | Cost | Notes |
|---|---|---|---|---|---|
| Flaxseed Oil | 225°F / 107°C | ~70% | ⭐⭐⭐⭐⭐ | Medium | Best cross-linking; can flake if too thick |
| Grapeseed Oil | 420°F / 216°C | ~72% | ⭐⭐⭐⭐⭐ | Medium | Top practical choice; durable results |
| Avocado Oil | 520°F / 271°C | ~14% | ⭐⭐⭐⭐ | High | High smoke point; great for grill seasoning |
| Canola Oil | 400°F / 204°C | ~28% | ⭐⭐⭐⭐ | Low | Budget-friendly; widely available |
| Vegetable Shortening | 360°F / 182°C | ~25% | ⭐⭐⭐ | Low | Traditional; good but not ideal |
| Coconut Oil | 350°F / 177°C | ~2% | ⭐⭐ | Medium | Mostly saturated; poor cross-linking |
| Olive Oil | 375°F / 190°C | ~11% | ⭐⭐ | Medium–High | Too low smoke point; not recommended |
| Butter / Lard | 300–370°F | Low | ⭐ | Varies | Not suitable; will burn and smell |
Tools You’ll Need
Essential Seasoning Kit
- Lint-free cloths or paper towels — For applying and removing excess oil. Avoid terry cloth that leaves fibers.
- Stiff-bristle brush or chainmail scrubber — For initial cleaning and rust removal. See our guide to cleaning barbecue grates.
- Wire brush (brass or stainless) — For stripping old seasoning or heavy rust.
- Sandpaper (80–120 grit) — For severe rust remediation.
- Tongs — To safely handle hot grates during on-grill seasoning.
- Heat-resistant gloves — Essential for safety throughout the process.
- Aluminum foil or baking sheet — To catch oil drips during oven seasoning.
- Mild dish soap — For the initial pre-season cleaning only.
- White vinegar (optional) — For soaking heavily rusted grates.

While you’re stocking your kit, make sure you have high-quality barbecue tools for ongoing grate maintenance. Good tongs, a reliable brush, and heat-resistant gloves are investments that pay off over years of use.
4. Preparing Your Cast Iron Grill Grate Before Seasoning
Proper preparation is the phase most people shortchange. Whether your grate is fresh out of the box or has been sitting in the garage for two winters, what you do before applying oil determines how well everything else works. Seasoning applied over rust, grease, or old flaking coating will not bond properly — it will peel, blotch, and eventually fail.
Assess Your Grate’s Current Condition
Before reaching for the oil, take stock of what you’re working with. New grates typically have a light manufacturer’s coating (sometimes described as “rust-preventive oil”) that needs to be washed off. Used grates may have anything from minor surface rust to heavy oxidation, baked-on grease residue, or flaking old seasoning. Identify which scenario applies before proceeding.
Clean Off Factory Coatings (New Grates)
New cast iron grates come with a light protective oil applied at the factory to prevent rust during shipping and storage. You want to remove this entirely before seasoning. Wash the grate thoroughly with warm water and a small amount of mild dish soap. Use a stiff brush to scrub all surfaces including the underside and the ends of the bars. Rinse completely, then immediately dry with a clean cloth and place in a low oven (200°F / 93°C) for 15–20 minutes to drive off all residual moisture. Even a small amount of remaining moisture will cause rust to form under your new seasoning.
Remove Rust from Used Grates
If you’re rehabilitating a rusty grate, the rust must come off completely before you season. Surface rust (light orange discoloration) can be removed with a stiff wire brush or chainmail scrubber along with some elbow grease. For heavier rust, soak the grate in a 50/50 mixture of white vinegar and water for no more than 30–60 minutes. Check it every 15 minutes — over-soaking can pit the iron. After the soak, scrub vigorously with a brush, rinse thoroughly, and dry immediately. For extreme cases, sandpaper (80 grit) works, but be aware you’re removing metal and will need to build up several seasoning layers.
Dry the Grate Thoroughly
Water is the enemy of bare cast iron. After washing or rust removal, use a clean cloth to remove all visible moisture, then place the grate in an oven set to 200°F (93°C) for at least 20 minutes, or on a warm grill with the lid open for the same duration. The goal is to drive off every last trace of water. Any moisture that remains will instantly cause flash rust — a thin film of rust that forms on bare iron within minutes of water exposure. You’ll be applying oil immediately after this drying step, so have your oil and cloths ready.
5. Step-by-Step: The Oven Seasoning Method
The oven method is the gold standard for initial seasoning of cast iron grill grates. It provides the most uniform, consistent temperature environment and allows you to do multiple seasoning rounds in a single session. This is the method we recommend for new grates or any grate undergoing a full strip-and-re-season.
Preheat Your Oven
Set your oven to 450°F (232°C) — the sweet spot for most oils. If you’re using avocado oil (smoke point ~520°F), you can go up to 500°F (260°C) for a more aggressive polymerization. Place a sheet of aluminum foil on the bottom rack to catch any oil drips. Allow the oven to fully preheat before placing the grate inside.
Apply an Ultra-Thin Layer of Oil
Apply a small amount of your chosen oil (grapeseed or avocado) to a lint-free cloth. Rub it all over the grate — every bar, every surface, every crevice. Then take a clean, dry cloth and wipe most of it off. You want the absolute thinnest possible film remaining. If you hold the grate up to a light source, you should barely be able to tell it’s been oiled at all. This seems extreme, but remember: thin layers polymerize fully; thick layers become sticky and peel.
Bake the Grate Upside-Down
Place the oiled grate in the preheated oven upside-down. Putting it inverted means any excess oil drips down and away from the cooking surface rather than pooling on top and creating uneven thicknesses. Bake for 1 hour at 450°F (232°C). Do not open the oven during this time. You may see some smoke — this is normal as the oil polymerizes. Ensure good kitchen ventilation.
Cool, Repeat, and Build Layers
After 1 hour, turn off the oven and allow the grate to cool completely inside the oven — this slow cool-down helps the polymer set fully. Once cool, repeat the entire process: apply thin oil, wipe off excess, bake for 1 hour, cool. For a new grate or a bare grate from rust removal, do a minimum of 3 seasoning rounds in a single session. Each round builds another polymer layer, and each layer makes the next one bond more effectively. After 3–4 rounds, you’ll have a dark, smooth, protected surface ready for its first cook.

6. The On-the-Grill Seasoning Method: Speed and Convenience
The on-grill method is ideal for maintenance seasoning — quick touch-up rounds after heavy cooking sessions, or a fast initial layer when you don’t want to heat up your kitchen oven. It doesn’t achieve quite the same consistency as the oven method, but executed correctly it produces excellent results and is far more practical on a day-to-day basis.
Preheat the Grill to High
With the grate already installed, fire up your grill and preheat to high — typically 500–550°F (260–288°C) for gas grills or until charcoal is fully ashed over for charcoal setups. The initial high heat burns off any residue from the previous cook and opens the iron’s pores slightly, improving oil absorption. Let it run at high heat for 15 minutes with the lid closed.
Apply Oil to the Hot Grate
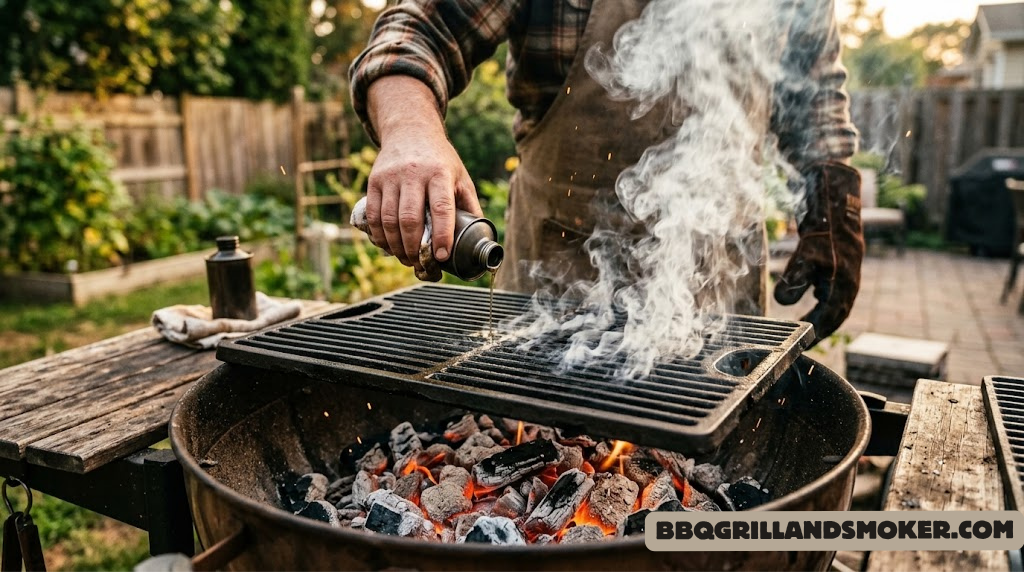
Using tongs and a folded paper towel or cloth dampened with high-smoke-point oil, carefully wipe the hot grate bars. Work quickly and apply only a thin film — the heat will cause the paper towel to smoke slightly, which is exactly what you want. That smoking indicates the oil is beginning to polymerize on contact. Apply to the top surface and, carefully, the sides of each bar. Do not try to oil the underside while on the grill — do that during oven sessions.
Cook or Allow to Cure
After applying oil, either begin cooking immediately (which further polymerizes the oil through the cooking process) or turn off the grill and allow the grate to cool with the lid closed. Cooking directly after oiling is actually an excellent maintenance strategy — the food juices and additional heat reinforce the seasoning. This is why cast iron improves the more you use it, provided you oil it briefly before each session.
This method pairs perfectly with the advice in our complete barbecue maintenance essentials guide. Seasoning is just one piece of a comprehensive maintenance routine.
7. The Open Flame & Charcoal Seasoning Method
If you’re working with a charcoal grill, an offset smoker, or a wood-burning setup, the open flame method gives you a direct, primal approach to seasoning that many traditional pitmasters still swear by. It’s less precise than the oven method but highly effective when done with the right technique.
Burn Off Previous Residue
Light a full chimney of charcoal and let it get fully ashed over (approximately 20–30 minutes). Once ready, distribute the coals evenly across the firebox and set the grate over the coals. With the lid open, burn at high heat for 15–20 minutes. This burns off any remaining food residue, rust, or old flaking seasoning. You’ll see smoke and possibly small flames as residue combusts — this is expected. Brush the grate with a stiff wire brush while hot to remove all carbonized debris.
Apply Oil and Let It Smoke Off
Once the grate is clean and extremely hot, apply your oil via the tongs-and-cloth method described in Method 2. With charcoal heat, the oil will smoke and polymerize very quickly — in some cases in under a minute per application. Apply 2–3 thin oiling rounds, allowing each to smoke off before applying the next. This quick-cycle approach is how many traditional cast iron enthusiasts built their best grates over decades of fire cooking.
This process is particularly satisfying on charcoal setups. While you’re at it, check our guide on charcoal grill temperature control to get more out of every fire you build.
8. What to Do Immediately After Seasoning: First Cooks & Curing
The first few cooks after a fresh seasoning session are particularly important. They serve as a “curing” phase that reinforces and tests the new polymer layers you’ve built.
The First Cook: High-Fat Foods First
For your first cook on freshly seasoned cast iron, choose high-fat foods. Bacon, fatty sausages, skin-on chicken thighs, or a fatty burger patty are all excellent choices. The rendered fat acts like a continuous seasoning agent, filling any micro-gaps in the polymer coating and bonding further layers. See our guide to making juicy grilled burgers for technique details that pair beautifully with a freshly seasoned cast iron grate.
Temperature Management During First Cooks
Bring your grill up to temperature gradually for the first 2–3 cooks after seasoning. A rapid temperature spike from cold to 600°F can stress the new polymer layers and cause micro-cracking. Instead, preheat over 10–15 minutes to your cooking temperature. After several cooks, the seasoning will be robust enough to handle aggressive temperature changes.
Post-Cook Care: The Critical Window
How you treat your grate in the 5–10 minutes immediately after each cook is hugely important. While the grate is still hot:
- Brush off any food debris with a stiff grill brush. Hot debris brushes away easily; let it cool and it can weld to the grate.
- Apply a very thin wipe of oil using tongs and a cloth — just enough to leave a protective film.
- Allow the grate to cool with the grill lid cracked slightly open. This prevents trapped moisture.
This 5-minute post-cook ritual is the single most effective habit for maintaining excellent cast iron seasoning long-term. For a full cleaning process overview, our comprehensive guide on how to clean barbecue grates covers every scenario.

9. Long-Term Maintenance: Keeping Your Seasoning in Peak Condition
Seasoning is not a one-time event — it’s an ongoing relationship with your cast iron. The good news is that maintenance is simple once you’ve established good habits, and each cook you do reinforces the seasoning rather than degrading it (when done properly).
The Every-Cook Ritual (5 Minutes)
Establish these habits as non-negotiable bookends for every grilling session:
🔥 Pre-Cook (2 minutes)
- Preheat grill for 10–15 minutes with lid closed
- Brush grate to remove any dust or debris from storage
- Apply a thin oil wipe to the hot grate just before cooking
🧹 Post-Cook (3 minutes)
- While still hot, brush off food debris with a stiff brush or quality grill cleaner
- Apply a whisper-thin wipe of oil to the hot surface
- Allow to cool partially before closing lid fully
Monthly Deep-Check Seasoning
Once a month (or after 4–6 heavy cook sessions), do a quick visual inspection of your grate’s seasoning. Look for: dull or grayish patches, any orange rust spots, flaking or peeling areas, or sticky sections. Any of these signs indicate a spot re-season is needed. For isolated patches, you can do a targeted oven round just on the affected areas. For widespread degradation, a full strip-and-re-season may be more efficient.
Seasonal Storage Procedure
If you’re storing your grill for winter or an extended period, follow these steps before the grate goes into storage:
- Do a full oven seasoning round (3 layers) as described in Section 5.
- Allow to cool completely.
- Apply a slightly heavier-than-usual coating of flaxseed oil or grapeseed oil as a storage protective layer.
- Wrap in a layer of wax paper, then store in a dry location. Avoid plastic wrap, which traps moisture.
- If storing outdoors, add a grill cover with ventilation to prevent condensation buildup.
Our pellet grill maintenance guide covers storage best practices in broader context if you have multiple pieces of grilling equipment to winterize.
Dealing with Humidity and Weather
In high-humidity environments, cast iron can develop surface rust between uses within just a day or two — even on a well-seasoned grate. If you live in a coastal or tropical climate, apply a fresh oil wipe after every cook, and consider keeping a small bag of moisture-absorbing silica in your grill body when stored. If you discover light flash rust, it wipes off easily with a paper towel and oil — the rust hasn’t penetrated the seasoning layer. If it’s orange and widespread, do a targeted scrub-and-season on the affected sections.

10. The 10 Most Common Cast Iron Seasoning Mistakes (and How to Fix Them)
Most failed seasoning attempts can be traced back to a handful of predictable errors. Here’s what to watch for and what to do if you’ve already fallen into one of these traps.
| # | Mistake | What Happens | The Fix |
|---|---|---|---|
| 1 | Applying too much oil | Sticky, gummy surface; peeling flakes | Scrub off, strip, and re-season with ultra-thin layers |
| 2 | Using the wrong oil (olive, butter) | Rancid smell; poor polymerization | Strip the surface; switch to grapeseed or avocado oil |
| 3 | Not drying the grate before oiling | Rust forms under the seasoning layer | Strip to bare iron, dry in oven, re-season from scratch |
| 4 | Seasoning at too low a temperature | Soft, tacky layer that never cures properly | Run a bake cycle at proper temp (450°F) to finish curing |
| 5 | Only doing one seasoning round | Thin protection; rust within a few cooks | Continue adding layers (3–4 minimum for initial season) |
| 6 | Soaking in water to clean | Strips seasoning; invites rust | Re-season; switch to brush-clean-while-hot method |
| 7 | Using soap to clean between cooks | Gradually strips polymerized layers | Rinse with hot water only; use soap only when absolutely necessary |
| 8 | Storing without oil coating | Flash rust during storage | Always apply thin oil before putting grate away |
| 9 | Starting with lean, acidic foods | Seasoning stripped; food sticks badly | First 5+ cooks should use fatty, neutral-acidity foods |
| 10 | Ignoring uneven patches | Partial rust; uneven cooking surface | Spot-treat with targeted scrub and 2 rounds of seasoning |
11. Troubleshooting Your Cast Iron Grate Seasoning
Even when you do everything right, you may encounter issues. Here’s a diagnostic guide for the most common problems that arise after seasoning.
Problem: Sticky or Gummy Surface After Seasoning
Cause: Too much oil was applied, and only the surface layer polymerized while the oil underneath remained uncured.
Solution: Heat the grate to 450°F in the oven or on the grill and let it bake for another hour. This additional heat may complete the polymerization. If it’s still tacky after that, you’ll need to strip the affected area with a chainmail scrubber and re-season with thinner layers.
Problem: Patchy, Uneven Coloring
Cause: Normal and expected during the first several cooks. Uneven coloring indicates areas that have been seasoned at different depths.
Solution: Nothing to fix — this resolves naturally with continued use. The entire surface will eventually even out to a deep black-brown as cumulative layers build. Many cast iron enthusiasts consider this patchy “seasoning map” a sign of authentic, well-used cookware.
Problem: Brown or Orange Tinge Instead of Black
Cause: Early-stage rust or insufficient seasoning depth.
Solution: If it wipes away with an oiled cloth, it’s surface-level and normal — just re-apply oil. If it’s stubborn, scrub with the chainmail scrubber and add 2–3 seasoning rounds. For more persistent orange tinge, review our discussion on grill discoloration and cleaning techniques.
Problem: Flaking Black Pieces Coming Off
Cause: Old, thick seasoning that was built up too fast without properly thin individual layers, or seasoning that got moisture underneath it.
Solution: Do a full strip-and-re-season. Use a wire brush or chainmail scrubber to remove all flaking material down to bare iron (or clean seasoning), then follow the oven method from scratch with proper thin layers.
Problem: Food Still Sticking Despite Seasoning
Cause: Insufficient seasoning depth, wrong food choice, or not enough oil applied before cooking.
Solution: Check these in order: (1) Are you preheating long enough? (2) Are you applying oil just before placing food? (3) Are you using high-fat foods during early cooks? See our guide on preventing food from sticking for additional technique tips.
Problem: Seasoning Smells Bad When Heated
Cause: Rancid oil (particularly flaxseed, which goes rancid quickly), or using an unsuitable oil with too much saturated fat.
Solution: Strip the grate, wash thoroughly, and re-season with a fresh bottle of grapeseed or avocado oil. Store leftover seasoning oil in the refrigerator to extend its shelf life.

12. Cast Iron vs Other Grate Materials: Does Seasoning Matter for All of Them?
Cast iron isn’t the only grate material you’ll encounter. Understanding how it differs from the alternatives clarifies why its seasoning requirements are unique — and why the investment in proper care is worth it.
Pros & Cons of Cast Iron Grates
✅ Pros
- Exceptional heat retention and distribution
- Builds non-stick surface over time with seasoning
- Produces superior sear marks
- Becomes better with age when cared for
- Extremely durable — can last decades
- Adds subtle iron flavor beloved by many
❌ Cons
- Heavy — difficult to remove and clean
- Requires active maintenance to prevent rust
- Slow to heat up vs thinner materials
- Can crack with extreme thermal shock
- Higher upfront cost than basic grates
Grate Material Comparison
| Material | Needs Seasoning? | Heat Retention | Rust Resistance | Non-Stick Over Time | Lifespan |
|---|---|---|---|---|---|
| Cast Iron | ✓ Essential | ⭐⭐⭐⭐⭐ | Poor without seasoning | Excellent | Decades |
| Stainless Steel | Not required | ⭐⭐⭐ | Excellent | Moderate | 10–15 yr |
| Porcelain-Coated CI | Not initially | ⭐⭐⭐⭐⭐ | Good until chip | Good (new) | 5–10 yr |
| Chrome-Plated | ✗ | ⭐⭐ | Moderate | Poor | 2–5 yr |
| Porcelain-Coated Steel | ✗ | ⭐⭐ | Good until chip | Moderate | 3–7 yr |
For a detailed head-to-head analysis, our article on cast iron vs stainless steel grill grates digs into every performance metric. If you’re considering a new grill entirely, our best barbecue grills roundup includes plenty of options with quality cast iron grates pre-installed.
What About Porcelain-Coated Cast Iron?
Many modern grills come with porcelain-enamel coated cast iron grates. These do not require traditional oil seasoning because the ceramic coating provides the protective layer. However, once that coating chips or cracks (which it will, eventually), the exposed iron underneath is unprotected and will rust quickly. At that point, you have two options: replace the grate, or strip the remaining porcelain and season the bare iron underneath using the methods in this guide.
This decision depends on how much of the porcelain has failed. If it’s localized chipping, replacement may be more practical. If it’s widespread, stripping and seasoning the bare iron gives you a grate that will be superior to the original once the seasoning builds up — and you can refer to our guide on charcoal grill surface durability for broader context on grate selection.

Bonus: Expert Tips That Separate Good Seasoning from Great Seasoning
The following insights come from years of hands-on experience with cast iron at high heat. These aren’t in the standard guides, but they make a measurable difference.
Cook Bone-In Meats for Rapid Seasoning Buildup
Bone marrow releases some of the richest, most seasoning-friendly fats imaginable during cooking. Smoked beef short ribs or bone-in chicken directly on a freshly seasoned grate will add more to your seasoning in one cook than three plain chicken breasts ever would. The dripping, smoking marrow fat bonds to the iron and cures beautifully under high heat.
The “Wipe and Smoke” Shortcut Between Cooks
If you don’t have time for a full seasoning round, but you can tell your grate needs attention, do this: heat the grate to 500°F, apply a thin oil wipe, close the grill, and run it for exactly 20 minutes. This abbreviated round won’t replace full seasoning, but it significantly delays the need for it and keeps the surface protected between sessions.
Temperature Cycling Strengthens the Polymer
Professional foundry workers and traditional blacksmiths know that repeatedly heating and cooling metal creates stronger crystalline structures. The same principle applies to seasoning polymers. Every cook → cool cycle you put your grate through, following the proper oiling routine, incrementally hardens and strengthens the seasoning. This is why a 10-year-old, well-cared-for cast iron grate outperforms a new one — it has been through hundreds of these thermal cycles.
Avoid High-Acid Marinades During Early Cooks
Citrus, vinegar, and wine-based marinades are wonderful for flavor, but acidic compounds attack the carbon bonds in your seasoning polymer. On an established, mature seasoning (built over dozens of cooks), occasional acidic contact is no problem. On a freshly seasoned grate with just 3–4 rounds, it can noticeably strip areas. Hold off on lemon-brined fish and vinegar-based BBQ sauces for at least the first five or six cooking sessions. Our selection of best barbecue sauces includes plenty of low-acid options that work beautifully with fresh cast iron seasoning.
Use a Dedicated Grate Storage Position
If your grill allows it, remove the grate from the grill body for storage and keep it flat in a dry, indoor location. A grate stored inside a cool grill body where moisture can condense overnight is a recipe for progressive rust, even with oil applied. Storing flat on a shelf in your garage, coated in oil, is significantly better than leaving it in the grill through wet weather.
Test Your Seasoning with a Drop of Water
On a warm grate (200°F/93°C or above), drop a small bead of water on the surface. A well-seasoned grate will cause the water to bead up and roll off immediately, like water on a freshly waxed car hood. If the water spreads flat and soaks in, you need more seasoning. This quick test takes five seconds and tells you exactly where you stand.
For related wisdom on getting more from your outdoor cooking equipment, our must-have BBQ accessories guide covers the tools that make maintenance — and cooking — more effective overall.
Safety Considerations When Seasoning Your Grill Grate
Seasoning cast iron involves high heat, hot oils, and often enclosed spaces. A few key safety points are worth emphasizing explicitly.
Ventilation During Oven Seasoning
When baking oiled cast iron at 450°F, the polymerization process produces smoke and fumes. This is normal, but it can set off smoke alarms and create an uncomfortable indoor environment. Open kitchen windows, run your exhaust fan on high, and consider cracking a window in adjacent rooms. The smoking will be most pronounced during the first 15–20 minutes of each bake cycle. For people with respiratory sensitivities, the on-grill method (which vents outdoors) is a better option.
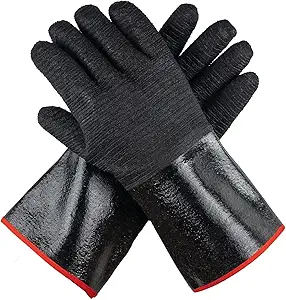
Heat-Resistant Gloves Are Mandatory
When handling a grate at 450°F+, standard oven mitts are insufficient. Use welding gloves or dedicated high-temperature grill gloves that provide coverage up the forearm. Tongs are your best friend for any manipulation of hot grates during the on-grill method. Our guide to barbecue safety features has more on protective equipment worth owning.
Fire Risk from Oil Application
Applying oil to a grate that’s at 500°F+ using a cloth can cause the cloth to ignite if it contains too much oil. Use a small amount of oil on the cloth, maintain a firm grip with tongs, and move quickly. Never use flammable accelerants or sprays (including cooking sprays with propellant) over an open flame.
Frequently Asked Questions About Seasoning Cast Iron Grill Grates
How often should I season my cast iron grill grate?
For active users, a light maintenance seasoning (the quick oil wipe method) should happen before and after every cook. A full multi-round oven seasoning is recommended at the start of each grilling season, after any visible rust appears, after winter storage, and anytime the grate surface shows dullness, patchiness, or food sticking. Heavy users may benefit from a full re-season every 3–4 months.
Can I season a cast iron grate that has already rusted?
Yes — rust is not a death sentence for cast iron. Remove the rust with a combination of wire brushing and a vinegar-water soak (50/50, 30–60 minutes), scrub clean, dry completely in a low oven, then season with the oven method using 3–4 rounds. Even heavily rusted grates can be fully restored to cooking condition with proper treatment. Only pitting (deep craters in the iron caused by prolonged rust penetration) represents truly irreparable damage.
What’s the best oil to season cast iron grill grates?
Grapeseed oil is our top recommendation for most users: it has excellent polyunsaturated fat content for strong cross-linking, a workable smoke point (~420°F), and a completely neutral flavor. For those who grill at very high temperatures regularly (above 500°F), avocado oil’s higher smoke point (~520°F) makes it the superior choice. Flaxseed oil produces excellent results but requires extremely thin application to avoid flaking, making it less forgiving for beginners.
Why is my cast iron grate sticky after seasoning?
A sticky surface almost always means too much oil was applied. Only the oil molecules in direct contact with the iron (or prior seasoning layers) polymerize fully. Excess oil sitting on top partially polymerizes into a gummy, tacky layer. The fix is to run another bake cycle at 450°F for an hour (which may complete the polymerization), or if still tacky, scrub the sticky areas with a chainmail scrubber and re-season with much thinner oil applications.
Can I use cooking spray to season cast iron?
No — and especially not on a hot grate over open flame (serious fire hazard). Aerosol cooking sprays often contain lecithin and other additives that actually gum up and degrade cast iron seasoning over time. They also use propellant gases that are flammable. Use liquid oils applied via cloth with tongs for grate seasoning. Some professionals use pure oil in a spray bottle (not aerosol) as an efficient application method — this is fine.
How many layers of seasoning does a cast iron grate need?
For an initial seasoning from bare iron, complete a minimum of 3 full rounds in the oven. Four rounds is better. After that, the seasoning builds organically with each cook as long as you follow the proper pre- and post-cook oiling habit. A “mature” cast iron grate has accumulated dozens of micro-thin polymer layers over months or years of regular use — this is what gives old cast iron its legendary non-stick performance and dark, almost black surface.
Should I season a new cast iron grate if it says “pre-seasoned”?
Yes. “Pre-seasoned” labels on new cast iron grates indicate a factory-applied seasoning layer — typically one very thin round done at the factory. This is a starting point, not a finished surface. It provides minimal protection and mediocre cooking performance compared to a properly layered seasoning. After washing off the factory coating, complete 3 full oven seasoning rounds before cooking on it for the best results.
Can soap damage the seasoning on cast iron grill grates?
Modern dish soaps (containing surfactants rather than old-fashioned lye) won’t strip a well-established, mature seasoning with occasional use. However, vigorous scrubbing with dish soap after every cook will gradually degrade the polymer layers over months. The safe practice is to clean with hot water and a stiff brush (or chainmail scrubber) for regular cleaning, and to reserve dish soap for the initial preparation of a new grate or for rare deep-cleaning scenarios when needed.
What temperature should I season cast iron grill grates at?
For oven seasoning, 450°F (232°C) is the standard recommendation and works well for grapeseed, canola, and flaxseed oils. For avocado oil, you can go up to 500°F (260°C). The key is to season at or slightly above the oil’s smoke point — this is what drives the polymerization reaction. Too low (below ~380°F for most oils) and you get an incomplete, tacky cure. Too high risks burning the oil off before it bonds.
How do I know when my cast iron grate is fully seasoned?
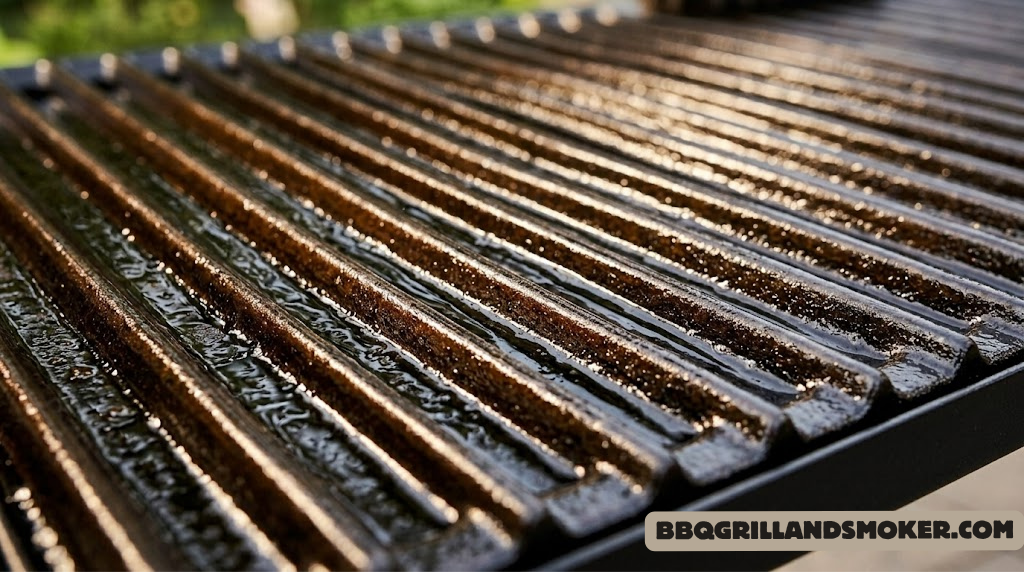
Several signs indicate a well-seasoned grate: the surface is a deep brown to near-black color (even if slightly uneven); food releases cleanly without sticking; a bead of water on a warm grate rolls off immediately rather than spreading flat; there is no visible rust anywhere; and the surface feels smooth and slightly glossy rather than rough or dull. A mature seasoning also has a very faint sheen under light without any oiliness.
Is it safe to grill food on newly seasoned cast iron?
Yes — completely. The polymerized oil that forms the seasoning layer is chemically stable and food-safe at cooking temperatures. It does not leach chemicals into food. The very small amount of iron that may transfer to food from cast iron cooking surfaces is generally considered beneficial rather than harmful, and is one of the reasons cast iron has been used for food preparation for hundreds of years.
Does cast iron seasoning affect the flavor of food?
A properly seasoned cast iron grate does influence flavor, and most people consider the effect positive. The accumulated polymer patina, combined with carbonized drippings from previous cooks, adds a subtle, savory depth that some describe as a “well-used grill” flavor. This is why cast iron veterans often insist their decade-old grate makes food taste better than any new equipment. The oil itself, once fully polymerized, is essentially flavorless — any flavor contribution comes from the accumulated cooking history of the grate.