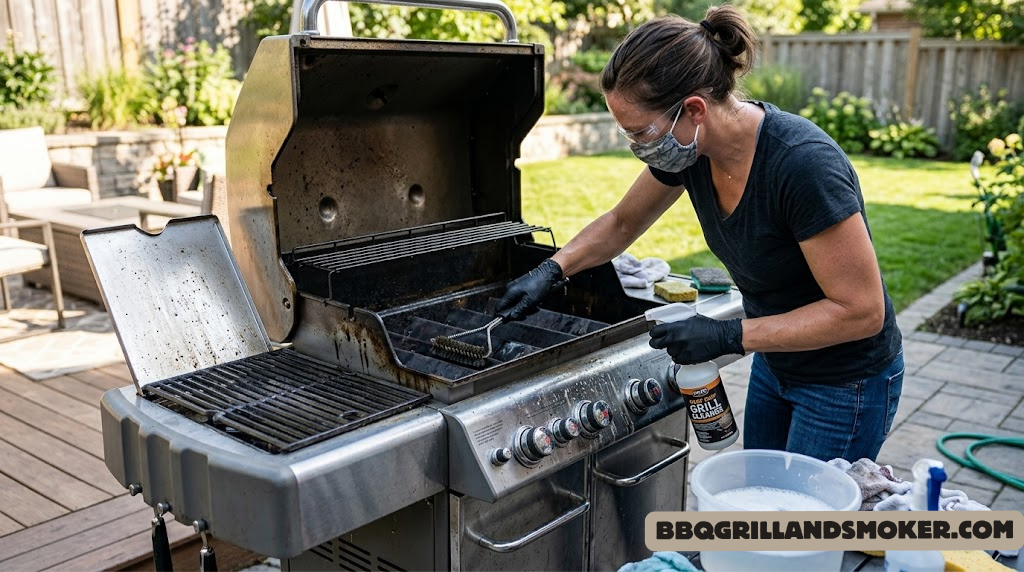
The Complete Clean Gas Grill Guide: Deep Clean, Restore & Maintain Your Grill for Peak Performance
What You’ll Learn in This Guide
- Why cleaning extends grill life
- Exactly how often to clean each part
- Tools & cleaners that actually work
- Step-by-step deep clean process
- How to clean grates by type
- Burner maintenance & unclogging
- Seasoning after deep clean
- Maintenance schedule by season
- Common mistakes to avoid
- Top recommended cleaning products
You spent good money on your gas grill. Maybe it’s a Weber Genesis, a Napoleon Prestige, or one of the best barbecue grills you could find — and there’s nothing worse than watching it underperform because it’s caked in carbonized grease, clogged burners, and rust. A clean grill is a powerful grill. It heats evenly, lights reliably, and produces food that actually tastes like it came off a grill rather than a dirty oven.
This comprehensive clean gas grill guide walks you through every single aspect of gas grill cleaning and maintenance. We’re covering everything from a quick post-cook brush-down to the full seasonal deep clean that most people skip — and shouldn’t. By the time you finish reading, you’ll know exactly how to clean every component, how often to do it, which tools to use, and how to extend your grill’s life by years rather than months.
Why Cleaning Your Gas Grill Actually Matters
Lots of grillers treat cleaning as an afterthought — something to do when the smell gets bad or the food starts sticking. That’s the wrong way to think about it. Grill cleaning is maintenance, the same way you change the oil in your car or clean the filters in your HVAC. Neglect it and you’re shortening the equipment’s lifespan, risking your food quality, and in some cases creating a genuine safety hazard.
The Performance Argument
A buildup of grease and carbon on the grates acts as an insulator. Your burners are pumping out heat, but that heat has to punch through a thick layer of burned residue before it reaches your food. The result: uneven cooking, hot spots, and food that takes longer to cook through. Clean grates, by contrast, transfer heat directly and cleanly, giving you those gorgeous grill marks and evenly cooked results you’re after.
Clogged burner ports are an even bigger problem. When the small holes along your burner tubes get blocked by grease, spider webs, or rust, gas can’t flow evenly. You end up with uneven flames, dead zones where the grill barely heats, and sometimes dangerous flare-ups from gas accumulating before it ignites. If you’ve ever wondered why your grill isn’t heating properly, dirty burners are one of the top culprits.
The Food Safety Argument
Old grease sitting in your drip tray is a bacteria farm. It also turns rancid, and when the grill heats up, those off-flavors vaporize and contact your food. Beyond flavor, a drip tray overflowing with old grease is a fire hazard — grease fires are intense, fast, and hard to control. Keeping that tray clean is one of the single most important things you can do for both safety and food quality.
The Longevity Argument
Rust is the silent killer of gas grills. It starts on the grates, spreads to the firebox, eats through burner tubes, and eventually makes the entire structure unsafe and unsalvageable. A good-quality gas grill should last a decade or more with proper care. The ones that end up at the curb after three years are almost always victims of neglect, not manufacturing defect. Cleaning and oiling the grates, keeping the interior dry, and covering the grill when not in use are the foundational habits that separate a grill that lasts from one that doesn’t.
An overfull drip tray is the #1 cause of dangerous grease fires in gas grills. Empty and clean it before every 3–5 cooking sessions at minimum. Never let it get so full that grease could spill during a flare-up.
Understanding the proper techniques to prevent flare-ups on a gas grill goes hand-in-hand with keeping your grill clean. A clean grill is a safer grill — full stop.
Top-Rated Grill Cleaning Kit on Amazon
Includes stiff-bristle brush, scraper, and degreaser — everything you need for a full deep clean.
View on Amazon →How Often Should You Clean a Gas Grill?
The answer depends on how frequently you grill and what you cook. Someone who grills burgers once a week has a very different maintenance schedule than someone who does long brisket cooks or frequently grills fatty meats. Here’s a practical breakdown that covers every type of griller.
After Every Cook
- Brush grates while hot
- Check drip tray level
- Close lid, run on high 5 min to burn off
- Cover grill when cool
Every 5–6 Uses
- Remove & wash grates
- Wipe heat shields
- Empty drip tray
- Check burner ports
- Wipe exterior
Twice a Year
- Full deep clean, all parts
- Remove & inspect burners
- Check igniters & connections
- Inspect gas lines
- Re-season grates
- Check for rust
Seasonally
- Cover check / replace
- Lubricate hinges
- Inspect propane hose
- Check regulator
- Store properly off-season
The “When in Doubt” Rule
If your food is sticking, the grill smells bad when you fire it up, flames are uneven, or you notice excessive smoke before cooking starts — it’s time to clean. Don’t wait for a schedule if the grill is telling you it needs attention. These are signals that grease buildup and residue have reached a level where performance and safety are compromised.
If you notice white or black flakes falling from the inside of your lid onto food, that’s carbonized grease — not peeling paint. It’s a sign that a deep clean is overdue. Scrape the lid interior immediately.
Tools and Supplies You Need to Clean a Gas Grill
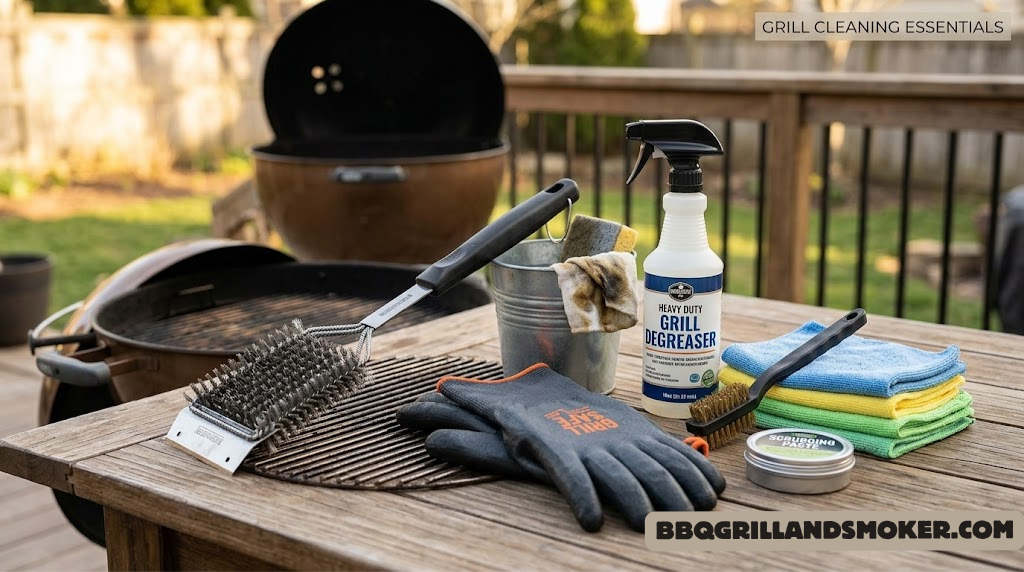
Before you crack open the grill, make sure you have everything on hand. Stopping halfway through a deep clean to run to the hardware store is a frustrating way to spend an afternoon. Here’s the complete toolkit, organized by essential vs. optional.
Bucket with Soapy Water
Warm water + dish soap. Your primary cleaning solution for grates and surfaces.
Grill Brush / Scraper
Stiff-bristle or bristle-free scraper. Use after every cook, before every cook.
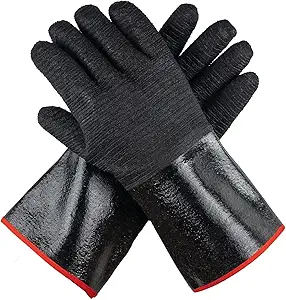
Rubber or Nitrile Gloves
Grease and cleaners are harsh. Protect your hands throughout the process.
Degreaser Spray
A dedicated grill degreaser cuts through thick, baked-on grease significantly faster than soap alone.
Wire Brush (Narrow)
For cleaning inside burner port holes. A pipe cleaner or toothbrush also works for detail work.
Plastic Scraper / Putty Knife
For scraping thick carbon deposits from the firebox bottom without scratching.
Paper Towels / Rags
For wiping surfaces, applying oil, and drying components after cleaning.
High-Heat Cooking Oil
Vegetable, canola, or flaxseed oil for re-seasoning grates after cleaning. Essential step.
Shop Vac (Optional)
Makes quick work of dry ash and debris from the firebox bottom. Speeds up cleaning significantly.
Flashlight
To inspect burner tubes and igniter ports — essential for spotting spider webs and clogs.
Baking Soda
Mixed with water to make a gentle abrasive paste for stubborn grate rust and staining.
Stainless Steel Cleaner
For exterior stainless surfaces — keeps them streak-free and protects against weathering.
If you want to invest in quality barbecue grill cleaners, there are dedicated products on the market that make the job significantly easier. A good enzymatic degreaser, in particular, works on baked-on grease at a molecular level that soap and water simply can’t match. We’ll cover specific product recommendations later in this guide.
You’ll also want to round out your overall grill toolkit. Having the right barbecue tools — including long-handled brushes, proper tongs, and a good thermometer — makes both cooking and maintenance much easier.

Bristle-Free Grill Scraper — Safer & More Effective
Eliminates the wire bristle hazard while out-scraping traditional brushes on every grate type.
View on Amazon →Safety Rules Before You Start Cleaning
A gas grill cleaning session is low-risk if you follow a few non-negotiable safety rules. Skip these and you’re not just risking the grill — you’re risking yourself and your property. Before you touch anything, run through this checklist.
- Turn off all burners and disconnect the propane tank. Shut off the valve, then disconnect the regulator hose. For natural gas grills, close the supply valve at the wall.
- Let the grill cool completely before handling any components. Cleaning with chemicals on a hot grill creates fumes and can cause serious burns.
- Do not use flammable cleaners inside or near the grill. Some solvents are highly flammable. Stick to purpose-made grill degreasers or soapy water.
- Work in a well-ventilated area. Even non-flammable degreasers produce fumes. Outdoor cleaning is always best.
- Never use a pressure washer on the interior. Water forced into gas valves, igniter components, and burner connections creates dangerous conditions.
- Wear gloves. Grease and commercial cleaners irritate skin and can cause chemical burns with extended contact.
- Inspect gas connections when reconnecting. After any deep clean where you remove components, do a soap-water bubble test on all connections before lighting up.
It also pays to review the safety features to look for in a barbecue — understanding how your specific grill is designed helps you clean it correctly without accidentally compromising those safety systems.
After reassembling your grill post-cleaning, always reconnect the propane tank and test ALL connections with soapy water before lighting. Look for bubbles. Any bubbling indicates a gas leak that must be fixed before use.
Step 1: Preheat and Burn Off the Grill
Burn-Off: Your Starting Point for Every Deep Clean
Before you start scrubbing, you need to do a burn-off. Turn all burners to high, close the lid, and let the grill run at maximum heat for 10–15 minutes. This carbonizes the food residue on the grates and interior, turning it from sticky, greasy gunk into dry, brittle ash that’s much easier to brush and scrape away.
This burn-off step is also useful at the start of each cooking session — not just during deep cleans. A 5-minute high-heat burn before cooking sterilizes the grates and makes them easier to brush clean. For deep cleaning, run the full 15 minutes.
After the burn-off, turn off all burners and allow the grill to cool for about 20–30 minutes until it’s warm but handleable — not scorching hot. At this point, the carbonized residue is at its most brittle and ideal for brushing. This is the optimal window for grate cleaning: warm enough that residue doesn’t re-adhere, cool enough to handle safely.
Lay several sheets of newspaper under the grill before you start. It catches falling debris and grease, making cleanup of the surrounding area fast and easy. Worth the 30-second setup.
Step 2: Deep Clean the Grill Grates
Removing, Soaking, and Scrubbing the Grates
The grates take the most punishment of any part of your grill. They’re in direct contact with food, exposed to intense heat, and subject to constant temperature cycling that promotes rust and carbon buildup. Cleaning them properly requires more than a quick brush.
How to Deep Clean Grill Grates
- Remove the grates from the grill once they’ve cooled to a handleable temperature.
- Place them in a large bucket or plastic tub. If they don’t fit, use a heavy-duty garbage bag laid flat, or clean them in sections.
- Fill with warm water and several squirts of dish soap. Let them soak for at least 30 minutes — up to 2 hours for heavily soiled grates.
- Scrub with a stiff grill brush or sponge. Most of the carbon should lift easily after soaking. Use extra pressure on particularly stubborn spots.
- For stubborn buildup: Make a paste of baking soda and water, apply to problem areas, and let sit for 15 minutes before scrubbing.
- Rinse thoroughly with clean water until all soap residue is gone.
- Dry completely with a clean rag or let air dry fully. Never put wet grates back in the grill.
- Season after cleaning — apply a thin coat of high-heat oil before reinstalling (more on this in the seasoning section).
The approach varies slightly depending on what your grates are made of. If you’re not sure which method suits your grates best, check out our detailed comparison of cast iron vs. stainless steel grill grates for material-specific care advice. We also have a comprehensive guide on how to clean barbecue grates with even more in-depth techniques.
No brush handy? Ball up a piece of aluminum foil and use tongs to scrub the hot grate. It works surprisingly well for a quick post-cook cleanup. Not a replacement for deep cleaning, but useful in a pinch.
Cleaning by Grate Type: Cast Iron, Stainless, and Porcelain
Not all grill grates clean the same way. The material dictates which cleaning methods are safe and which ones will damage the surface. Using the wrong approach on porcelain-coated grates, for example, can chip the coating and expose bare metal to rust.
Excellent heat retention and searing. Require the most care — they rust easily if not dried and oiled.
- Brush while warm after each use
- Wash with mild soap + warm water
- Dry immediately and thoroughly
- Apply thin oil coat before storage
- Never soak long-term — causes rust
- Re-season if rust appears
Most durable and rust-resistant. Easier to maintain but can discolor with heavy use.
- Brush hot or cold — both work
- Soak in soapy water for stubborn buildup
- Use stainless steel cleaner for stains
- Avoid coarse steel wool — scratches surface
- Oil lightly to prevent sticking
- Safe for longer soaking periods
Non-stick when new. Coating chips if mishandled, exposing metal underneath to rust.
- Use nylon or soft brass brush only
- Avoid wire brushes — scratch coating
- Soak in warm soapy water gently
- Inspect for chips — replace if damaged
- No harsh abrasive cleaners
- Oil lightly to maintain non-stick quality
If you’re considering upgrading your grates during a deep clean, it’s worth understanding how different materials affect your cooking. Knowing whether to choose cast iron or stainless steel grill grates can significantly impact your grilling experience long-term.
| Grate Type | Rust Resistance | Heat Retention | Cleaning Difficulty | Lifespan | Best Brush Type |
|---|---|---|---|---|---|
| Cast Iron | Low (must be oiled) | Excellent | Moderate — needs oiling | Decades if maintained | Stiff wire brush |
| Stainless Steel | High | Good | Easy | 5–10+ years | Wire or bristle-free |
| Porcelain-Coated Cast Iron | High (while intact) | Excellent | Easy — but delicate | 3–7 years | Nylon / soft brass only |
| Porcelain-Coated Steel | Medium (chips chip) | Moderate | Easy — but delicate | 2–5 years | Nylon / soft brass only |

Upgrade to Heavy-Duty Cast Iron Grill Grates
Better sear marks, better heat retention. Available in multiple sizes to fit most major gas grill brands.
View on Amazon →Step 3: Clean the Heat Shields and Flame Tamers
Why Flame Tamers Are Often the Dirtiest Part of Your Grill
Heat shields — also called flame tamers, heat deflectors, or burner covers — sit directly above the burners and below the grates. Their job is to vaporize dripping fat (creating that smoky flavor) and protect the burners from direct drips. This means they collect a huge amount of carbonized grease and food debris. They’re often the greasiest, most neglected part of the grill.
How to Clean Heat Shields
- Remove the grates (already done in Step 2) and then lift out the heat shields. Most lift straight out — some are secured with a tab or clip. Consult your grill manual if they seem stuck.
- Scrape off thick grease deposits with a plastic scraper or old putty knife. Do this over a trash bin or on newspaper — it gets messy.
- Wash with warm soapy water. A scrub brush or sponge handles the rest. For severely baked-on grease, use a dedicated grill degreaser and let it sit for 5–10 minutes before scrubbing.
- Rinse and dry. Allow to air dry completely or wipe dry with a clean rag.
- Inspect for holes or damage. Heat shields that have burned through need replacement — they’ll no longer protect the burners and can cause uneven heat distribution.
- Reinstall correctly. Make sure shields are properly positioned over their corresponding burners with the tent or V-shape (if applicable) pointing upward.
If your heat shield has burn-through holes, cracks, or has become so thin from corrosion that you can see daylight through it, replace it. A damaged heat shield allows grease to drip directly onto burners — a major flare-up and fire risk. Replacement shields are inexpensive and often available from your grill’s manufacturer.
Step 4: Clean the Burners
The Most Critical Cleaning Step for Performance
Burner cleaning is where most gas grill owners fail their grills. The burner tubes — those long metal pipes with rows of small holes (ports) — are the heart of your grill’s heating system. When those ports get clogged, the flame pattern becomes uneven, your grill develops hot and cold spots, and in some cases, gas builds up until it ignites all at once in a small explosion.
How to Clean Gas Grill Burners
- Let everything cool completely. Burners should never be handled while hot.
- Remove the burners by lifting or sliding them out (refer to your grill manual — the process varies by model). Some slide out after removing a retaining clip or screw.
- Use a flashlight to inspect each burner tube. Look for clogged ports, rust, spider webs (a very common problem in grills that sit unused for weeks), and physical damage like cracks or holes.
- Use a wire brush or narrow pipe brush to scrub along the length of the burner, cleaning all the port holes. Brush perpendicular to the ports — not along them — to push debris out rather than in.
- Use a toothpick, thin wire, or small drill bit to clear any individual ports that remain blocked after brushing. Gently push debris out rather than packing it further in.
- Shake and tap the burner to dislodge any loose debris inside the tube. Do this over a trash can.
- Check the venturi tubes — the wider end of the burner that connects to the gas valve. These are prime real estate for spider webs. A pipe cleaner works perfectly here.
- Wipe down the outside of the burner with a damp cloth. Never submerge burners in water.
- Reinstall carefully, ensuring the venturi is properly aligned over the gas valve orifice.
Spider webs inside venturi tubes are one of the most common causes of gas grill fires and explosions. A spider builds a web in the tube, blocking airflow. This causes gas to back-flow and ignite outside the grill body. If your grill has sat unused for more than 2 weeks, always inspect burner venturis before lighting.
If after cleaning your burners you’re still experiencing uneven heat, check out our guide on why your grill isn’t heating properly — there may be additional fuel or airflow issues at play beyond the burners themselves.

Heavy-Duty BBQ Grill Degreaser
Cuts through years of baked-on grease in minutes. Safe for all grill surfaces including stainless and porcelain.
View on Amazon →Step 5: Clean the Firebox and Drip Tray
Cleaning Inside the Firebox: The Part Most People Skip
The firebox is the metal interior of your grill — the box that holds the burners, heat shields, and grates. Over time, carbonized grease, ash, and debris accumulate on the floor and walls. This buildup affects airflow, creates smoke, and is a fire hazard. Cleaning it is straightforward but requires patience.
Firebox Cleaning Process
- With the burners and heat shields removed, you have full access to the firebox floor.
- Dry-scrape first. Use a plastic scraper or old putty knife to scrape the floor and side walls, pushing debris toward the center or the drain hole.
- If you have a shop vac, vacuum up the loose dry debris before applying any water or cleaner. This is much easier than trying to wipe up wet ash.
- Spray the interior with a grill degreaser or warm soapy water. Let it sit for 5–10 minutes to loosen baked-on grease.
- Scrub with a sponge or stiff brush. Work from the sides down to the floor. Pay special attention to corners.
- Avoid excessive water. You don’t need to hose down the interior. Damp scrubbing is sufficient and prevents water from entering places it shouldn’t.
- Wipe everything down with clean rags until the surfaces are clean and dry.
Drip Tray Cleaning
The drip tray (sometimes called the catch pan or grease tray) is the removable tray at the bottom or side of your grill that collects dripping fat. Some grills route grease to a small aluminum catch cup that hangs on the side — both require regular attention.
- Remove the drip tray carefully — if it’s very full, tip it slowly to avoid spills.
- Empty the grease into a sealed container for proper disposal. Never pour it down the drain.
- Wash the tray with hot soapy water. A degreaser spray speeds this up significantly on trays with heavy buildup.
- Line it with aluminum foil before reinstalling. This makes future emptying trivially easy — just swap the foil and you’re done.
Cut a piece of aluminum foil slightly larger than your drip tray. Press it in, fold the edges up, and replace it every 3–5 cooks. This is one of the simplest grill maintenance hacks that makes ongoing upkeep almost effortless.
Step 6: Clean the Lid Interior and Exterior
The Lid: Inside and Out
The lid interior is often misidentified as peeling paint by panicked grillers who’ve opened their lid after months of neglect. Those black, flaky, greasy deposits are not paint — they are carbonized grease that has built up over many cooks and is now flaking off. It’s not dangerous to your grill’s structure, but it is absolutely something you don’t want falling onto your food.
Cleaning the Inside of the Lid
- Let the lid cool completely. Never scrape or wipe a hot lid.
- Use a plastic scraper to scrape off the worst of the carbon flakes. Scrape into the firebox or onto newspaper below.
- Spray with a grill degreaser and let sit for 5 minutes.
- Wipe with a damp cloth or sponge, working from the center outward. The lid interior doesn’t need to sparkle — just clear the loose, flaking material.
- Dry thoroughly. Moisture trapped on the inside lid can accelerate rust formation.
Cleaning the Exterior
The exterior depends heavily on your grill’s material. Stainless steel exteriors look great when properly cleaned and terrible when streaky or fingerprinted. Painted steel exteriors need gentle care to avoid stripping the coating.
- Stainless steel exterior: Wipe with a damp cloth first, then apply a stainless steel cleaner/polish with a microfiber cloth in the direction of the grain. This removes fingerprints and prevents weathering.
- Painted steel: Wipe with a damp soapy cloth. Avoid abrasive cleaners that scratch and expose bare metal to rust.
- Side shelves, knobs, and handles: Clean with a damp cloth and mild dish soap. Dry thoroughly. Metal knobs can be polished; plastic knobs just need a wipe.
- Cart, legs, and shelf: Wash with soapy water, rinse, and dry. Check for rust spots — treat with a rust-inhibiting primer if needed.
How to Season Grill Grates After Deep Cleaning
Seasoning is not optional — it’s the final critical step that protects your newly cleaned grates and keeps food from sticking. This is the same principle as seasoning a cast iron skillet: you’re building a thin polymerized oil layer on the metal surface that prevents rust and creates a naturally non-stick cooking surface.
If you’re new to grill seasoning, our dedicated guide on how to season a new BBQ grill covers the process in even more detail and applies equally well to re-seasoning after cleaning. Similarly, learning how to season a cast iron grill grate specifically is worth reading if that’s the material you’re working with.
How to Season Grill Grates: Step by Step
- Make sure the grates are completely dry. Any moisture will prevent proper oil adhesion.
- Apply a very thin coat of high-heat oil (canola, vegetable, flaxseed, or grapeseed) using a folded paper towel held with tongs. Cover the entire grate surface, both sides. The coat should be thin enough that you can almost see through it — not pooling or dripping.
- Reinstall the grates and close the lid.
- Heat the grill to 350–400°F and maintain that temperature for 15–20 minutes.
- Turn off the grill and let it cool completely with the lid closed. The oil polymerizes as it cools, forming the seasoning layer.
- Repeat once more for newly cleaned grates, or if the grates had significant rust that was scrubbed off.
More oil is not better. A thick coating will turn sticky, gummy, and rancid rather than polymerizing properly. You want a very thin, almost invisible coat. Wipe on, wipe off — think of it like applying car wax, not cooking oil to a skillet.
Wondering why your food keeps sticking even after oiling the grates? There’s usually a simple fix. Our guide on keeping chicken from sticking to grill surfaces explains the interplay between temperature, oil, and surface prep that makes all the difference.

High-Heat Grill Grate Seasoning Oil
Spray-on canola or flaxseed oil formulated for high-temperature grate seasoning. Even application, zero mess.
View on Amazon →Your Complete Gas Grill Maintenance Schedule
Now that you know how to clean every part of your grill, the key to keeping it in top shape is making this routine rather than reactive. Here’s the full maintenance schedule that will keep your gas grill performing at its best for a decade or more. This ties in directly with the broader barbecue maintenance essentials that every serious griller should have in their routine.
| Task | Frequency | Time Required | Priority |
|---|---|---|---|
| Brush grates (hot, post-cook) | After every cook | 1–2 min | 🔴 Critical |
| Burn-off before cooking | Every cook | 5–10 min | 🔴 Critical |
| Check drip tray level | Every 2–3 cooks | 1 min | 🔴 Critical |
| Deep clean grates | Every 5–6 cooks | 20–30 min | 🟠 Important |
| Wipe heat shields | Every 5–6 cooks | 10 min | 🟠 Important |
| Empty & clean drip tray | Every 5–6 cooks | 10 min | 🟠 Important |
| Scrub firebox floor | Monthly (active season) | 15–20 min | 🟠 Important |
| Wipe exterior | Monthly or as needed | 10 min | 🟡 Recommended |
| Full deep clean (all parts) | Twice per year | 60–90 min | 🔴 Critical |
| Inspect & clean burners | Twice per year | 20–30 min | 🔴 Critical |
| Re-season grates | After each deep clean | 25 min | 🔴 Critical |
| Inspect gas lines & connections | Twice per year | 10 min | 🔴 Critical |
| Check heat shield condition | Twice per year | 5 min | 🟠 Important |
| Inspect igniters | Twice per year | 5 min | 🟠 Important |
| Check propane hose for cracks | Annually | 5 min | 🔴 Critical |
| Replace grill cover if damaged | As needed | 5 min | 🟡 Recommended |
If you also cook on a pellet grill, the maintenance approach differs significantly. Our pellet grill maintenance guide covers the specific cleaning and upkeep needs of pellet systems, which involve more moving parts than a simple gas grill.
Common Gas Grill Cleaning Mistakes to Avoid
Even grillers with the best intentions can cause damage by cleaning incorrectly. Here are the most common mistakes, what goes wrong, and how to avoid them.
✅ Do This
- Brush hot grates after every cook
- Let grill cool before deep cleaning
- Use oil-appropriate brushes per grate type
- Season grates after cleaning
- Empty drip tray regularly
- Cover grill when not in use
- Inspect burners twice per year
- Use a grill cover to prevent rust
- Test gas connections after reassembly
❌ Don’t Do This
- Use a wire brush on porcelain grates
- Power wash the interior
- Submerge burners in water
- Clean while grill is still hot
- Use flammable solvents as cleaners
- Over-oil grates when seasoning
- Ignore spider webs in burner tubes
- Let drip tray overflow
- Skip the gas connection check
The Wire Brush Bristle Problem
Traditional wire grill brushes are effective but carry a significant risk: bristles can break off and adhere to the grill grate, where they then get picked up by food and ingested. This has caused serious injuries. Many grill experts now recommend switching to a bristle-free grill scraper or a coil-style brush that can’t shed individual wire bristles. If you use a traditional wire brush, inspect the grates carefully after brushing and before cooking.
Cleaning a Grill That Has Mold
If your grill has been sitting covered in damp conditions, you may open it to find mold. Don’t panic — it’s more common than you think, especially in humid climates. Our detailed guide on assessing grill mold causes and cleaning techniques walks through the specific protocol. The short version: burn it off at maximum heat for 15 minutes, let cool, then do a full deep clean with soap and water.
Neglecting the Gas Connections
Every time you deep clean your grill, you’re handling the gas components — removing burners, moving the firebox, potentially disconnecting fittings. Before your next cook, do a simple gas leak test: reconnect everything, turn on the propane slowly, and apply a solution of soapy water to all connections with a brush. Any bubbling indicates a gas leak that must be fixed before lighting. This takes two minutes and could prevent a serious accident.
Best Cleaning Products for Gas Grills in 2026
The right products make grill cleaning significantly faster and more effective. Here’s a breakdown of the product categories you need and what to look for in each. For a comprehensive roundup of the best barbecue grill cleaners available, we maintain a regularly updated guide with specific product recommendations.
| Product Category | Best For | What to Look For | Avoid |
|---|---|---|---|
| Grill Degreaser Spray | Firebox, heat shields, grate soaking | Enzymatic formulas, food-safe after rinse | Oven cleaners with lye (on stainless) |
| Grill Brush (Stiff Wire) | Cast iron & stainless grates (hot) | Rigid handle, replaceable head | Soft brushes that skip buildup |
| Bristle-Free Grill Scraper | All grate types — no bristle risk | Sturdy construction, good handle | Flimsy plastic scrapers |
| Stainless Steel Cleaner/Polish | Exterior stainless surfaces | Streak-free, UV protective coating | Abrasive powders that scratch |
| Baking Soda | Porcelain grate stains, gentle abrasion | Pure sodium bicarbonate | Coarse salt (too abrasive) |
| High-Heat Cooking Oil | Grate seasoning | High smoke point (400°F+): canola, flaxseed | Olive oil (smokes too low) |
| Pipe/Venturi Brush | Burner tube interiors | Flexible wire, small enough for tube bore | Brushes too wide to enter tube |
| Drip Tray Liners | Simplifying drip tray maintenance | Heavy-duty foil or pre-formed liners for your model | Thin foil that tears during removal |
A Note on Oven Cleaners
You’ll see advice online recommending oven cleaner (lye-based products like Easy-Off) for heavily soiled grill grates. These are extremely effective at cutting through carbon — but they’re also highly caustic and can damage stainless steel and porcelain coatings. If you use them, use them only on raw cast iron grates, rinse extraordinarily thoroughly, and re-season immediately. For most grillers, a quality grill degreaser plus soaking time achieves the same results without the risk.
Investing in Good Grill Accessories
Good tools are what separate the grillers who enjoy the process from the ones who dread it. Beyond cleaning supplies, having the right must-have BBQ accessories in your kit makes every aspect of grilling — from setup to cleanup — more efficient and enjoyable.

Complete Gas Grill Cleaning & Maintenance Kit
Everything in one box: brush, scraper, degreaser, seasoning oil, and drip tray liners. The smart starter kit.
View on Amazon →Winterizing and Storing Your Gas Grill Correctly
If you live in a region with cold winters or a rainy off-season, how you store your gas grill matters as much as how you clean it. A properly stored grill starts up in spring ready to go. An improperly stored grill greets you with rust, mold, and damaged components.
End-of-Season Storage Checklist
- Do a complete deep clean — don’t put it away dirty. Old grease and food residue attract pests, causes rust, and makes a much bigger mess to deal with in spring.
- Season the grates heavily — apply an extra coat of oil to protect against moisture during storage.
- Disconnect and store the propane tank separately. Never store a propane tank indoors. Store it outside in an upright position away from direct sunlight and heat sources. Most gas suppliers or local regulations require outdoor storage only.
- Cover the grill burner openings with foil or steel wool to prevent spiders from building webs in the tubes over winter.
- Apply a thin coat of cooking oil to exterior metal surfaces to inhibit rust.
- Use a quality, breathable grill cover. Non-breathable covers trap condensation and actually promote rust. A good cover lets moisture out while keeping rain off.
- Store in a covered area if possible — under a deck, in a shed, or against the house. Complete exposure to winter weather year after year shortens grill life significantly.
When you bring your grill out of storage in spring: remove covers from burner tubes, check all gas connections, inspect the propane hose for cracking (replace if it feels stiff or shows cracks), do a full burn-off before cooking, and do a quick brush of the grates. Your first spring cook should be a test run — burgers or hot dogs rather than the centerpiece of a big cookout.
Gas Grill Cleaning vs. Charcoal, Pellet, and Smoker Cleaning
Not all grills and smokers clean the same way. If you cook on multiple types of equipment, understanding these differences saves time and prevents mistakes.
| Grill/Smoker Type | Key Cleaning Difference | Ash Management | Deep Clean Frequency |
|---|---|---|---|
| Gas Grill | Focus on grease/carbon; no ash | N/A — burner debris only | Twice per year |
| Charcoal Grill | Ash removal after every use is essential | Remove ash before next cook | Monthly (active season) |
| Pellet Grill | Firepot ash + grease management; more complex | Vacuum firepot every 2–5 cooks | Every 50 hours of cook time |
| Offset Smoker | Firebox ash + grease; large surface area | After every long cook | Twice per year (full) |
| Electric Smoker | Wood chip tray, drip pan; gentler cleaning | Wood chip tray after each use | Every 3–5 cooks |
If you’re curious about how different cooking approaches compare on quality and convenience, our in-depth analysis of grilling vs. smoking breaks down the heat, time, and flavor mechanics of each method. And if you’re weighing your next equipment purchase, the comparison between pellet grill vs. gas grill is an excellent starting point.
When to Repair vs. Replace Your Gas Grill
Cleaning can do a lot, but there comes a point when a grill is beyond saving with elbow grease alone. Knowing when to repair vs. when to replace is important for both safety and budget.
Signs You Can Repair and Continue Using
- Rust on grates only (replaceable parts)
- Clogged burners (cleanable)
- Failed igniter (replaceable — cheap)
- Damaged heat shields (inexpensive replacement)
- Drip tray or catch pan rust (replaceable)
- Loose or cracked side shelves (repairable)
Signs It’s Time to Replace the Grill
- Rust has eaten through the firebox walls — holes in the cooking chamber are a structural safety failure
- Burner tubes have rusted through and gas is burning at the wrong place
- Gas regulator or valve failure that makes safe operation impossible
- Lid warped or broken so badly it doesn’t seal
- Replacement parts for your specific model are no longer available
- Repair costs exceed 60–70% of a comparable new grill’s price
If it’s time for a new grill, our comprehensive guide to the best barbecue grills covers every major type and budget range. If you’re specifically comparing gas grill brands head to head, our Weber vs. Napoleon grill comparison and Monument Grills review are solid starting points for research.
Before buying any gas grill, check whether the manufacturer sells replacement parts — grates, burners, heat shields, igniters. Grills from major brands like Weber, Napoleon, and Char-Broil have widely available parts. Budget brands often have poor parts support, meaning a single broken burner can end the grill’s life prematurely.
How Cleanliness Affects Grill Flavor
This is the part that converts casual grillers into dedicated cleaners. A clean grill doesn’t just cook better — it tastes better. Here’s what’s happening at the flavor level.
Rancid Grease and Off-Flavors
Old grease that’s been sitting in your drip tray or coating your heat shields since your last cookout has gone rancid. When you fire up the grill, that rancid grease vaporizes and the smoke contacts your food. You might not identify the source, but you’ll taste it as a harsh, slightly off, “old grill” flavor that shouldn’t be there. Clean grills produce clean smoke, which means the only smoke flavoring your food is coming from the Maillard reaction and caramelization of the food itself.
Carbon Buildup and Bitter Notes
Thick carbon deposits on grates don’t just cause sticking — they create bitter, acrid flavors that transfer to food. This is especially noticeable with fish and chicken, which have delicate flavor profiles that easily pick up off-notes from the grate surface. When you strip back to clean metal and season properly, food flavors come through clearly.
Understanding how gas and charcoal grills compare in flavor gives useful context here — gas grills can absolutely produce excellent, flavorful food, but they’re more dependent on grill cleanliness than charcoal because they don’t have smoke flavor to mask off-tastes from old residue.
The Clean Grill Difference
Grilling a steak on a properly cleaned, properly seasoned grill produces noticeably better results: cleaner sear marks, better caramelization, no sticking, and pure, unadulterated flavor. If you want to grill the perfect steak, it starts with a clean grill — not with the steak.
Frequently Asked Questions About Cleaning Gas Grills
-
Brush the grates after every cook, empty the drip tray every 3–5 cooks, do a mid-level clean (grates, heat shields, tray) every 5–6 uses, and perform a full deep clean twice per year — once at the start of grilling season and once at the end. High-frequency grillers should deep clean more often.
-
Yes — warm water and dish soap is safe and effective for all grate types except raw cast iron (which you should rinse immediately and dry to prevent rust). Avoid harsh abrasive cleaners on porcelain-coated grates, which can scratch and damage the coating. For heavy buildup, a dedicated grill degreaser is more effective than dish soap alone.
-
For post-cook grate brushing, yes — cleaning while grates are still warm makes the residue easier to remove. For deep cleaning with soap, water, and chemicals, always allow the grill to cool fully and disconnect the propane tank first. Never apply degreasers or soap to a hot grill.
-
A mixture of dish soap and warm water works for most cleaning. For stubborn carbon and grease buildup, dedicated grill degreasers (enzyme-based formulas work especially well) are highly effective. A paste of baking soda and water is a great non-toxic option for moderate buildup and works on all grate types without risk of scratching.
-
Remove the burner tubes when the grill is cool, then use a narrow wire brush to scrub along the length of the tube, cleaning the port holes. Use a toothpick or thin wire to clear individual blocked ports. Check inside the venturi tubes (wide end) for spider webs using a flashlight and pipe cleaner. Tap and shake the tube over a trash can to dislodge loose debris before reinstalling.
-
Never put cast iron grates in the dishwasher — the high heat and water strip the seasoning and cause immediate rust. Stainless steel grates can technically go in the dishwasher but hand washing is safer and preserves their surface longer. Porcelain-coated grates should always be hand washed to protect the coating from chipping in the dishwasher environment.
-
After every cleaning, apply a thin coat of high-heat cooking oil to the grates. Keep the grill covered with a breathable cover when not in use, and store in a dry, sheltered area. Never leave grates wet after washing — dry immediately. If rust appears, scrub it off with a wire brush, re-season the grates with oil and heat, and apply oil before storage to prevent recurrence.
-
Mold on a grill that’s been stored in damp conditions is common and solvable. Turn all burners to high with the lid closed for 15–20 minutes — this kills the mold. Let it cool, then do a thorough deep clean: scrub all surfaces with hot soapy water, rinse well, and dry completely. Re-season the grates before cooking. See our full guide on assessing grill mold for step-by-step instructions specific to severe cases.
-
The black flakes on the inside lid are carbonized grease, not peeling paint. Use a plastic scraper to remove the loose flakes, then spray with a grill degreaser and let it sit for 5 minutes. Wipe with a damp cloth in circular motions. The interior doesn’t need to be spotless — focus on removing loose, flaking material that could fall onto food. Dry thoroughly after cleaning.
-
Absolutely yes. After cleaning and fully drying the grates, rub them lightly with high-heat oil (canola, vegetable, or flaxseed oil) using a paper towel. Reinstall the grates and heat the grill to 350–400°F for 15–20 minutes. Let it cool. This polymerizes the oil into a protective seasoning layer that prevents rust, prevents food from sticking, and adds a slight depth of flavor to everything you cook.
-
Essential tools: a stiff wire grill brush or bristle-free grill scraper, a bucket with warm soapy water, rubber or nitrile gloves, sponges or rags, a plastic scraper or putty knife, aluminum foil, high-heat cooking oil, and a flashlight for inspecting burners. Optional but very helpful: a shop vac for dry debris, a dedicated grill degreaser spray, stainless steel cleaner for the exterior, and a narrow pipe brush for burner tubes.
-
Use a narrow wire brush to scrub along the outside of the burner tube, directing debris downward. A toothpick can clear individual blocked port holes. The venturi end is harder to clean without removal — use a pipe cleaner or long, narrow brush. For a thorough clean, removal is always better, but the above approach extends the time between full removals if you clean it regularly.
Conclusion: The Grill That Gets Cleaned Is the Grill That Lasts
We’ve covered everything from a post-cook grate brush to a full seasonal deep clean, and the through-line is simple: cleaning your gas grill consistently is the single most impactful thing you can do to protect your investment, improve your food, and grill safely for years to come.
The grillers who get the most out of their equipment aren’t necessarily the ones who bought the most expensive model — they’re the ones who take care of what they have. A well-maintained mid-range grill outperforms a neglected premium grill every time. Clean grates, unclogged burners, and an empty drip tray are the fundamentals that separate great backyard cooking from mediocre results.
Start with the basics: brush the grates after every cook, empty the drip tray regularly, and schedule two full deep cleans per year. Add in a good grill cover, quality cleaning products from our best grill cleaner guide, and the maintenance schedule from this article, and your grill will reward you with years of reliable, flavorful performance.
Now that your grill is clean and ready, it’s time to cook something worthy of the effort. Check out our BBQ baby back ribs recipe, learn to grill the perfect steak, or try our grilled chicken thighs BBQ recipe — your newly cleaned grill is ready to deliver its best.
Ready to Fire Up a Clean Grill?
Explore our full library of grill reviews, recipes, and maintenance guides to get the absolute most out of your backyard cooking setup.

Premium Grill Cover + Cleaning Combo
A heavy-duty breathable grill cover paired with professional-grade cleaning supplies. The complete protection kit.
View on Amazon →