Charcoal Grill Temperature Control: The Definitive Pitmaster’s Manual
From 225°F slow-smoke to 700°F sear — learn exactly how to command your coals, master your vents, and hold any temperature with confidence.
There’s a reason competition pitmasters obsess over temperature with near-religious devotion. The difference between a brisket that makes grown adults weep happy tears and one that resembles a leather boot is almost never about the cut of meat, the seasoning, or even the wood — it’s about temperature control. On a charcoal grill, that control doesn’t come from a digital dial or an algorithm. It comes from you: your hands on the vents, your eyes on the coals, your understanding of the fire.
Charcoal grill temperature control is both an art and a precision science. Unlike gas grills where you simply turn a knob, a charcoal fire demands that you understand airflow, combustion, fuel load, coal arrangement, and how your specific grill retains or loses heat. Get those variables right and you can hold 225°F for a 12-hour brisket cook as reliably as a pellet smoker — or blast your grate to 650°F for a crust on a ribeye that would make a steakhouse chef nervous.
This guide covers every layer of that knowledge, from the fundamental physics of combustion to advanced pitmaster methods used in competition BBQ. Whether you’re grilling burgers on a Weber kettle or smoking ribs low-and-slow on a ceramic kamado, the principles in this guide will transform how you interact with your fire — and what comes off your grill.
Why Temperature Control Is the Foundation of Great Barbecue
Every protein has a temperature window where transformation happens. Collagen in tough cuts like brisket and pork shoulder starts breaking down into gelatin around 160°F and accelerates at 195–205°F. That breakdown is what makes smoked meat “pull” cleanly, creating the tender, unctuous texture that defines great low-and-slow barbecue. Push past 210°F too fast without enough time in the conversion zone and you get dry, stringy meat — the collagen turned to gelatin and then dried out before it could baste the muscle fibers.
At the other extreme, a proper Maillard reaction — the chemical browning process that creates crust, bark, and those complex savory flavors — requires surface temperatures above 300°F and ideally closer to 400–500°F. Below that threshold, you get gray, steamed-looking meat instead of a deep mahogany crust. This is why understanding and controlling temperature isn’t a nice-to-have skill for charcoal grilling — it’s the skill that determines everything else.
Understanding these ranges also helps you make smarter choices when comparing cooking methods. If you’ve ever explored the differences between direct and indirect grilling methods, you already know that the same grill can operate across wildly different temperature ranges depending on how you arrange your fuel. That versatility is charcoal’s greatest advantage over any other cooking fuel.
Always account for “temperature stall” when smoking tough cuts. At around 160–170°F internal temperature, evaporative cooling from the meat’s surface can hold the temperature flat for 2–4 hours. This isn’t a problem — it’s where bark formation happens. Hold your grill steady at 225–250°F and trust the process.
The Physics of Charcoal Heat: What’s Really Happening in Your Grill
Before you can control fire, you need to understand it. Charcoal combustion requires three elements — fuel (carbon in the charcoal), oxygen (from airflow), and heat (the initial ignition). Remove or reduce any one of these and the fire slows or dies. This is the literal basis of every temperature control technique available to you.
When charcoal is lit and ashed over, it radiates heat in three ways:
- Radiant heat: Infrared energy transmitted directly from the glowing coal surface. This is what creates searing — meat placed directly above hot coals receives intense, focused radiation that browns the surface rapidly.
- Convective heat: Hot air currents circulate inside the sealed grill, surrounding the food with heat. This is the primary mechanism in indirect cooking and low-and-slow smoking, and it’s why a properly lidded grill can cook large roasts evenly without direct contact with the coals.
- Conductive heat: Direct contact transfer from the grill grates, which absorb and re-radiate coal heat. Heavy cast iron grates conduct more heat and retain it longer than stainless steel grates.
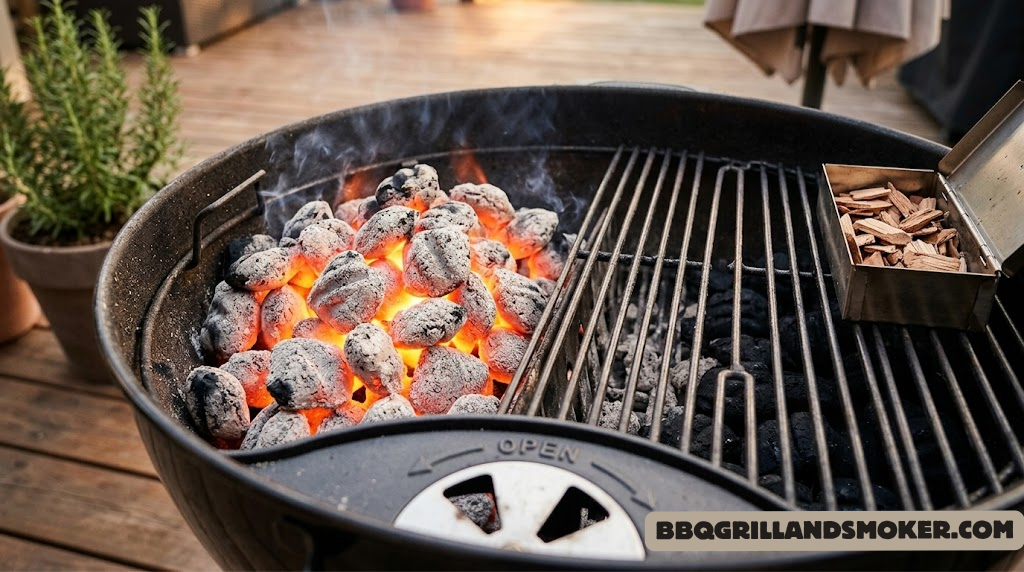
The oxygen pathway through your grill determines how intensely the coals burn. Air enters through the bottom vent (intake damper), passes over the coals, and exits through the top vent (exhaust damper). The greater the airflow, the more intense the combustion, the hotter the fire. Restricting either vent reduces airflow and cools the fire. This is the complete mechanism behind vent-based temperature control — everything else is a refinement of this principle.
Airflow path inside a charcoal kettle grill — oxygen enters the bottom vent, combustion drives hot air upward through convection, and exhaust exits the top vent.
The lid plays a crucial role here. Cooking without a lid on a charcoal grill is like driving with your windows open in a storm — you have no control of the environment. With the lid on, you create a sealed convection oven where temperature can be precisely managed. Even a well-sealed kettle grill like the Weber 22-inch can hold temperatures within 10–15°F of your target for hours when managed correctly.
Never grill without a grate-level thermometer if precision matters. The built-in dome thermometer on most charcoal grills reads 50–100°F cooler than actual grate temperature. Always clip a probe thermometer at cooking grate level for accurate readings.
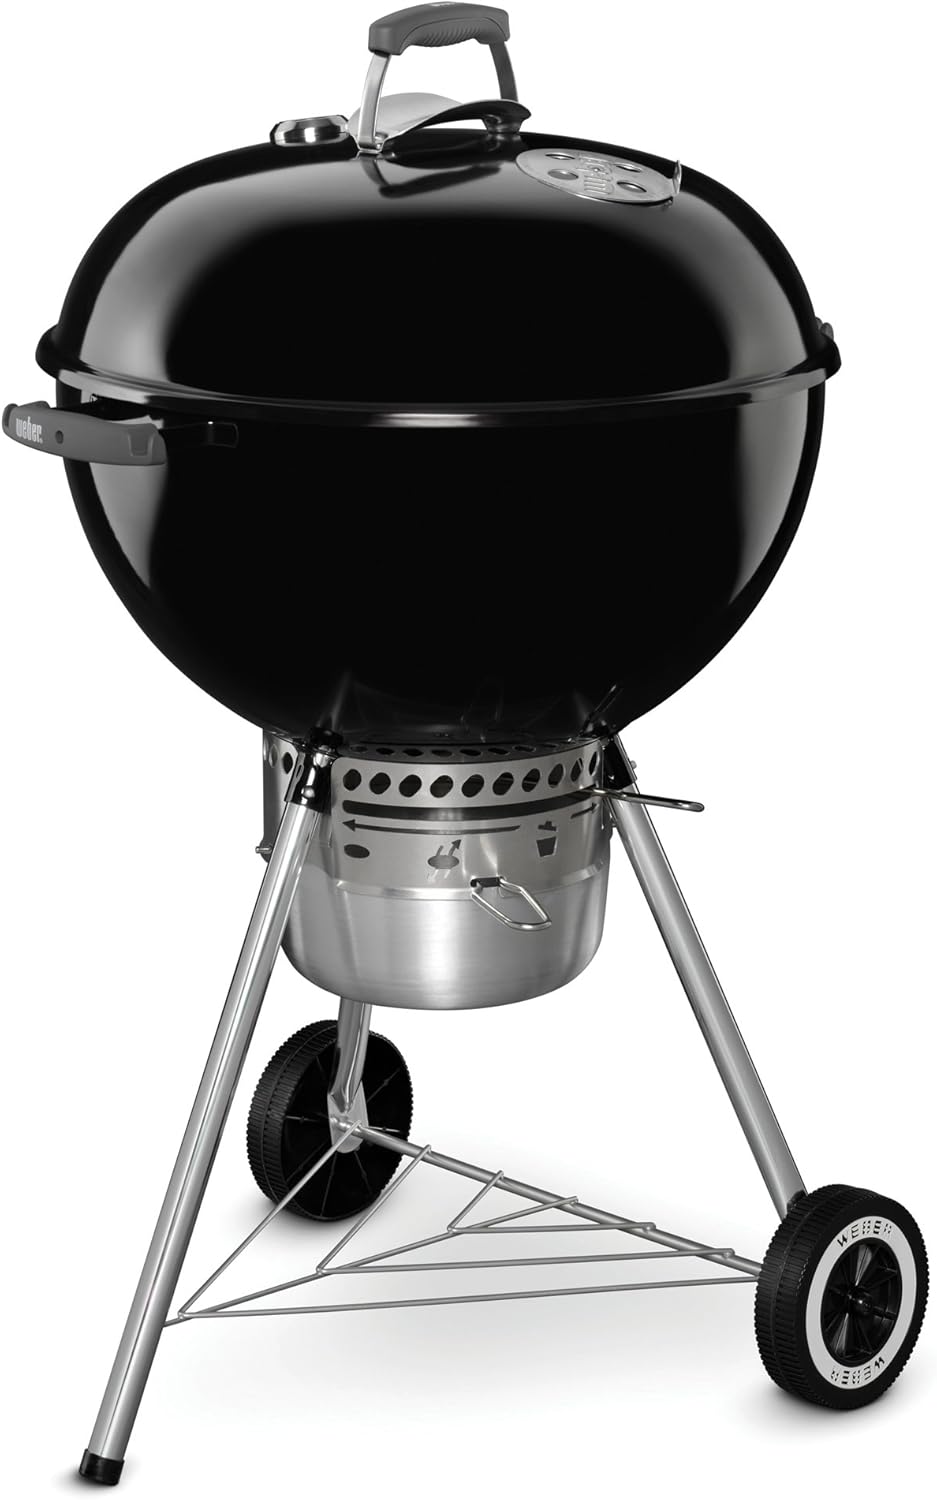
The gold standard in charcoal grill design. Porcelain-enameled bowl, precise One-Touch damper, and ash-catcher system make it the best kettle for temperature control at any level.
View on Amazon →Vent Mastery: Your Charcoal Grill’s Temperature Control Panel
Every charcoal grill has at least two vents, and understanding how each functions independently — and together — is the single most important skill you can develop. Think of your vents as a two-stage throttle: the bottom vent controls the fuel supply (oxygen to the coals), and the top vent controls the exhaust draw, which in turn regulates how powerfully the bottom vent draws fresh air.
The Bottom Vent (Intake Damper)
This is your primary temperature control. Located beneath the coal grate, the bottom vent allows oxygen to flow into the fire from below. Opening it wide maximizes combustion; partially closing it chokes the burn. As a rule of thumb:
- Fully open bottom vent: Maximum temperature — ideal for searing and high-heat grilling (400–700°F range)
- Half-open bottom vent: Medium heat — ideal for direct cooking of chicken pieces, chops, and vegetables (300–400°F)
- 25% open bottom vent: Low heat — ideal for smoking and indirect roasting (225–275°F)
- Fully closed bottom vent: Fire extinguishing mode — use at the end of the cook to preserve unburned charcoal for reuse
Four key vent settings for different cooking styles — note that both vents work together and temperature takes several minutes to respond to adjustments.
The Top Vent (Exhaust Damper)
The top vent works in partnership with the bottom vent. Think of it as the draft regulator: opening the top vent creates more draw, pulling air through the system more aggressively (which raises heat), while partially closing it slows the draft (which lowers heat and also holds smoke longer for flavor development).
Most experienced pitmasters work primarily with the bottom vent for temperature adjustment and keep the top vent mostly open (never fully closed during cooking, as this can cause smoke to back-flow and create bitter, acrid flavors on the meat). Here’s the standard operating approach:
- Always cook with the top vent at least 25–30% open to allow exhaust flow
- Make coarse temperature adjustments with the bottom vent
- Use the top vent for fine-tuning ±20°F corrections
- Never fully close the top vent during an active cook — creosote buildup creates off-flavors
On windy days, rotate your grill so the bottom vent faces away from the wind. Wind blowing directly into the bottom vent acts like a bellows — it can raise your temperature by 50–100°F unexpectedly. Facing the vent downwind gives you back control over your airflow.
Vent Adjustment Speed: The 5-Minute Rule
One of the most common beginner mistakes is over-correcting. You check the temperature, see it’s 50°F too hot, close the vent halfway — but then the temperature keeps climbing for another 3–5 minutes before it starts dropping. The fire takes time to respond to vent changes. This leads to panic-closing, which then overshoots the target in the other direction, creating a temperature roller coaster.
The discipline of good vent management: make small adjustments (one-quarter at a time), then wait 5–10 full minutes before making another change. Patience is the technique.
Coal Quantity and the Chimney Starter: Fuel Load Management
The amount of charcoal you use sets the ceiling for how hot your grill can get. You can’t coax 650°F from six briquettes, no matter how wide you open your vents. Conversely, using a full chimney of coals for a low-and-slow smoke session means you’ll spend the whole cook fighting to keep the temperature down.
The Chimney Starter: Your Best Temperature Tool
A chimney starter is not just a convenient way to light charcoal without lighter fluid. It’s a measuring device. A standard chimney holds 80–100 briquettes (roughly 5–6 lbs), and that quantity represents a full load. Knowing this, you can calibrate your coal load by filling the chimney to different levels:
| Chimney Fill | Coal Volume | Target Temp Range | Best For |
|---|---|---|---|
| Full chimney (lit) | 80–100 briquettes | 450–550°F | Direct grilling, searing, high-heat cooks |
| ¾ chimney (lit) | 60–75 briquettes | 375–450°F | Thicker cuts, indirect chicken, pork chops |
| ½ chimney (lit) | 40–50 briquettes | 325–375°F | Indirect roasting, whole chicken, vegetables |
| ¼ chimney + Minion | 20–30 lit + unlit bed | 225–275°F | Low-and-slow smoking, ribs, brisket |
| Full chimney on half grill | 80–100 briquettes (zoned) | 600–700°F zone | Reverse sear, steak crust, zone cooking |
Notice that the searing capability comes not just from more coal, but from concentrating the coal in a smaller area. Stacking a full chimney worth of lit coals on half of the grill creates a searing zone capable of 650–700°F while the other half of the grill sits at 250–300°F — giving you the best of both worlds for reverse-sear cooking.
Always fully light your charcoal in the chimney before adding it to the grill. Partially-lit charcoal releases higher levels of incomplete combustion products, produces thicker white smoke (vs the thin blue smoke you want), and makes temperature control harder because the fire is still trying to establish itself. Wait until all coals are ashed over with a gray coating before using them.
Adding Coals Mid-Cook
For long cooks, you’ll need to add fresh fuel. The key: always add fresh coals to the chimney and light them first, then add the fully-lit coals to the grill. Never dump raw briquettes directly onto a live fire — they will smolder and produce bitter, acrid smoke that will ruin your food. Keep a separate chimney going on a side burner or propane torch so you’re always working with lit coals.
This principle is why exploring the differences between lump charcoal and briquettes matters so much — lump charcoal is generally faster to relight and adds minimal smoke when added mid-cook, while briquettes take longer and produce more raw smoke when first lit.
Coal Arrangement Methods: How You Place Your Coals Determines Everything
Fuel quantity sets your temperature ceiling, but fuel arrangement determines how heat is distributed, how long it lasts, and whether you can create different cooking zones. These are the five core arrangements every charcoal griller should know:
The Single Zone / Full Spread
Distribute lit coals evenly across the entire coal grate. This creates uniform high heat across the entire cooking surface — ideal for foods that all need the same treatment (a grate full of hot dogs, corn, burgers). The weakness: no escape zone for flare-ups or foods that are cooking too fast.
Single-zone full spread — uniform high heat with no indirect area
The Two-Zone Setup
Stack all your coals on one half of the grill, leaving the other half empty. You now have a direct heat zone (over the coals) and an indirect heat zone (over the empty side). This is the most versatile arrangement for general grilling — sear on the hot side, finish on the cool side, or move meat to the indirect zone to avoid flare-ups. Almost every reputable barbecue grill guide will recommend mastering this setup first.
Two-zone setup — the foundation arrangement for versatile charcoal grilling
The Snake Method (Fuse Method)
Arrange briquettes in a long crescent or “C” shape around the inner perimeter of the grill, two or three briquettes wide and two layers tall. Light a small cluster at one end. The fire slowly burns along the snake over 4–8 hours, producing a steady, low temperature without requiring charcoal additions. This is the primary method for long smoking sessions on a kettle grill. Add wood chunks along the snake at intervals for sustained smoke flavor throughout the cook.
Snake method — fire travels slowly along the briquette “fuse” for hours of consistent low temperature
The Minion Method
Fill your coal grate or basket with unlit briquettes, then nestle 8–15 fully-lit coals in the center or on one end. As the lit coals slowly ignite the surrounding unlit ones, they produce a steady low temperature that can be maintained for 4–6 hours on a kettle and even longer on a bullet smoker. This method was developed for bullet smokers like the Weber Smokey Mountain but works extremely well on kettles too.
Minion method — a small cluster of lit coals slowly ignites the surrounding unlit bed for long, low-temperature cooking
The 3-Zone Setup
Create three distinct heat levels: pile coals deeply on one side (very hot), spread them thinner in the middle (medium hot), and leave one side empty (indirect). This gives you maximum versatility for cooking multiple proteins with different temperature needs simultaneously. It’s the method of choice when cooking for large groups with varied menu items.
Two-Zone and Multi-Zone Cooking: The Secret to Versatility
The ability to create multiple temperature zones on a single charcoal grill is perhaps the greatest advantage charcoal has over gas grilling in terms of cooking technique. On a gas grill, zones are defined by individual burner outputs and their spatial relationships. On a charcoal grill, you have complete freedom to arrange your heat however the cook demands.
Understanding zone cooking also bridges directly into understanding when to use direct vs. indirect grilling methods. The zone arrangement you create physically defines which method is available where on your grill at any given moment.
Zone Temperatures You Can Expect
| Zone | Position | Temperature | Best Uses |
|---|---|---|---|
| Direct High | Directly over coal pile | 500–700°F | Searing steaks, crust formation, char marks |
| Direct Medium | Over medium coal spread | 350–500°F | Burgers, chicken pieces, fish fillets |
| Indirect Medium | Edge of direct zone | 275–350°F | Finishing thick cuts, resting after sear |
| Indirect Low | No coals beneath | 200–275°F | Slow roasting, smoking, finishing brisket |
“Two-zone cooking isn’t a method — it’s an insurance policy. The indirect zone lets you park food at any moment without burning it, turning reactive grilling into controlled cooking.”
The Reverse Sear: Mastering Zone Transitions
The reverse sear — cooking a thick steak at low indirect heat first, then finishing with a direct-heat sear — is the ultimate expression of two-zone mastery. Here’s why it produces superior results: by bringing the steak to 115–120°F in the indirect zone at 250°F, you develop a perfectly uniform edge-to-edge cook with no gray overcooked ring. Then a 90-second blast at 600°F+ per side creates the Maillard crust without pushing the internal temperature past your target.
This technique is also ideal when using quality charcoal at high temperatures. When comparing approaches, those who want to understand how to make a truly juicy result should read about the temperature and fat ratio tips that make burgers perfect.
The “hand test” for zone temperature: hold your palm 5 inches above the grate. If you can only hold it there 1–2 seconds before pulling away, you’re in the 500–600°F sear zone. 3–4 seconds = 400–500°F grilling zone. 5–7 seconds = 300–400°F medium zone. 8+ seconds = indirect, under 300°F. It’s not precise, but it’s fast and practical.

Monitor grate temp AND meat internal temp simultaneously from up to 500 feet away. The dual-probe setup is essential for multi-zone charcoal cooking — one probe at grate level, one in the meat.
View on Amazon →Low-and-Slow: Holding 225–275°F on a Charcoal Grill
Low-and-slow barbecue is the test of true temperature mastery. Holding a charcoal grill at 225–250°F for 8–14 hours requires a fundamentally different approach than high-heat grilling. The entire cook is about maintaining a steady, smoldering fire — not a roaring blaze. Those interested in the full philosophy behind this style should explore the guide to smoker selection for low-and-slow ribs and brisket.
Prepare Your Coal Bed
Use the snake method or Minion method with quality briquettes. For snake: two briquettes wide, two tall, in a C-shape around the perimeter. For Minion: fill the coal grate with unlit briquettes, leaving a pocket in the center or at one end for lit coals. The goal is maximum unlit fuel that will burn progressively, not all at once.
Light a Small Starter Load
Use a half-full chimney (or less) to light 10–15 briquettes. For the snake method, light a small fire at one end of the snake using a small pile of lit briquettes, a fire starter cube, or a propane torch — never lighter fluid. For Minion, nestle your 10–15 lit coals into the center pocket of the unlit bed.
Set Your Vents for 225°F
Bottom vent: 25% open. Top vent: 40–50% open. Place the lid on immediately. Do NOT peek for the first 20 minutes. Let the temperature climb to your target range naturally. It may overshoot slightly (240–250°F) before settling. This is normal — the system needs time to equilibrate.
Low-and-slow vent configuration — small incremental adjustments every 10 minutes, never chase temperature aggressively
Add Wood for Smoke
Place 2–4 wood chunks (not chips — chunks last longer) on or around the lit coals. For the snake method, position a wood chunk every 4–6 briquettes along the snake so smoke is produced throughout the burn. Use fruit woods (apple, cherry) for pork and poultry; hickory or oak for beef. Avoid softwoods entirely. For more on this, see the detailed breakdown of wood chips vs. chunks for smoking.
Monitor and Maintain
Check temperature every 30–45 minutes (not every 5 minutes — patience is the technique). Make vent adjustments in quarter-turn increments only. If temperature drops 15°F below target, open the bottom vent slightly. If it rises 15°F above target, close the bottom vent slightly. Resist the urge to lift the lid — each lid lift drops grill temperature by 25–50°F and costs 10–15 minutes of recovery time.
When smoking brisket or pork shoulder, the internal temperature will plateau (“stall”) at 155–170°F for several hours due to evaporative cooling. Your grill temperature is fine — this is normal. Do not panic and raise the grill temperature. Maintain 225–250°F and let the stall pass naturally, or wrap the meat tightly in butcher paper (Texas crutch) to push through it faster.
Fuel Duration: What to Expect
At 225–250°F with the snake method on a 22-inch kettle, expect:
- Kingsford briquettes (full snake): 6–8 hours of stable heat
- Premium competition briquettes: 7–10 hours
- Lump charcoal (Minion): 4–6 hours (burns faster and hotter)
For brisket cooks that run 12–14 hours, you’ll need to reload mid-cook. Pre-light a fresh batch in the chimney and add them carefully to the coal arrangement without disturbing the existing fire. This is one reason many pitmasters prefer pellet grills or dedicated BBQ smokers for very long cooks — but the kettle is absolutely capable with the right technique.
High Heat Grilling: Achieving and Sustaining 400–700°F on Charcoal
High-heat charcoal grilling is where charcoal truly outperforms gas — in both peak temperature capability and the quality of the Maillard browning that results. A properly loaded kettle or kamado can reach 700°F+, something most gas grills simply cannot achieve. This is why grilled meat over charcoal has a different character than gas-grilled food — you can explore more of that distinction in this analysis of flavor outcomes between gas and charcoal grills.
Getting to High Heat: The Setup
High heat setup — full chimney concentrated on one side creates a 600–700°F sear zone with a cooler indirect zone opposite
For high-heat grilling:
- Use a full chimney of quality lump charcoal or briquettes, fully ashed over
- Pile all coals on one side or spread them across two-thirds of the grill
- Open both vents fully
- Replace the lid and preheat for 10–15 minutes
- Open the lid and place food — the grate should be screaming hot
Temperature Maintenance During High-Heat Grilling
Unlike low-and-slow cooking where you’re fighting to hold temperature down, high-heat grilling is usually brief enough that you don’t need to add fuel. The bigger challenge is managing flare-ups — explosive bursts of flame from fat dripping onto the coals. The solution: always keep that indirect zone available as an escape route. Move food to the indirect side immediately when a flare-up occurs, let it subside, then return the food to the direct zone. Never try to fight a flare-up with a spray bottle on a charcoal grill — water steams the food and can scatter coals. For more detail on this, check out the guide to preventing flare-ups.
✅ Charcoal High Heat Advantages
- Peak temperatures 50–150°F higher than most gas grills
- Lump charcoal can reach 800°F+ in small zones
- True Maillard crust development from radiant heat
- Natural smoke from dripping fat onto coals
- No gas lines or propane tank concerns
❌ High Heat Charcoal Challenges
- Temperature drops as coals burn down (45–60 min window)
- Flare-up management requires active attention
- Re-lighting mid-cook takes 15–20 minutes
- Can be hard to dial back from maximum heat quickly
- Ash scatter can dirty food during windier cooks

Dense South American hardwood lump that burns 20–30% hotter than standard lump charcoal with minimal ash production. The go-to for competition-level searing performance on charcoal.
View on Amazon →Thermometers and Temperature Reading: See What Your Grill Is Actually Doing
A charcoal grill without a quality thermometer is like driving at night without headlights. You can do it, but you’re relying entirely on feel, guesswork, and experience built up over many imperfect cooks. A properly placed thermometer removes the guesswork entirely and allows you to reproduce successful cooks consistently.
The Dome Thermometer Problem
Nearly every charcoal grill comes with a built-in dome thermometer — a bi-metal coil gauge mounted in the lid. These are notoriously inaccurate for a simple reason: they measure air temperature at dome level, not cooking temperature at grate level. On a standard 22-inch kettle, the dome sits 8–10 inches above the grate. Hot air rises and stratifies — the dome temperature can read 50–100°F higher than the actual cooking temperature at grate level during low-and-slow cooks, or significantly lower during high-heat cooks where the radiant heat from the coals is most intense at grate level.
Rule: Use the dome thermometer as a rough orientation only. Always rely on a calibrated probe thermometer at grate level for cooking decisions.
Thermometer Types and Placement
| Type | Best For | Placement | Accuracy |
|---|---|---|---|
| Instant-read digital | Checking meat doneness | Insert into thickest part of meat | ±1–2°F |
| Wireless dual-probe | Long cooks with grate + meat monitoring | Probe 1: grate level; Probe 2: meat center | ±2–3°F |
| Clip-on grate thermometer | Monitoring ambient grate temp | Clip at grate level in indirect zone | ±5–10°F |
| Infrared gun | Measuring grate surface temp for searing | Point at grate surface (not food) | ±5–15°F |
| Built-in dome gauge | Rough orientation only | Fixed position in lid | ±50–100°F |
Critical Internal Temperatures for Meat Doneness
| Protein / Cut | Target Internal Temp | Notes |
|---|---|---|
| Beef brisket (flat + point) | 195–205°F | Probe-tender — thermometer should slide in like warm butter |
| Pork shoulder / Boston butt | 195–205°F | Must reach collagen breakdown zone for proper pulling |
| Beef ribs (short ribs, back ribs) | 200–205°F | Probe-tender between bones; longer hold time = more tender |
| Pork ribs (baby back, spare) | 195–203°F | Bend test: ribs crack but don’t break when bent 90° |
| Steak (medium-rare) | 130–135°F | Pull at 125–128°F — carryover adds 5–7°F during rest |
| Burger | 160°F (USDA) | Most prefer 155°F pull for juicier result with 5°F carryover |
| Whole chicken | 165°F (thigh) | Check at thickest part of thigh, avoiding bone |
| Pork chops / tenderloin | 145°F | Safe per USDA 2020 update; slight pink center is fine |
| Fish (salmon, etc.) | 125–130°F | Medium, flaking cleanly — many prefer 120°F for salmon |
Lump Charcoal vs. Briquettes: How Fuel Type Affects Temperature Control
The charcoal you choose isn’t just a fuel decision — it’s a temperature control decision. Lump charcoal and briquettes have fundamentally different burn characteristics that affect how easy or hard it is to hit and hold your target temperature. This is explored in depth in the comprehensive comparison of lump charcoal vs. briquettes, but here’s how the differences play out specifically for temperature control:
| Factor | Lump Charcoal | Briquettes | Winner For Temp Control |
|---|---|---|---|
| Ignition Speed | Fast (8–12 min in chimney) | Slower (15–20 min) | Lump |
| Peak Temperature | Higher (up to 700–800°F+) | Lower (500–600°F typical) | Lump (for searing) |
| Temp Consistency | Variable (mixed piece sizes) | Very consistent | Briquettes |
| Burn Duration | Shorter at high heat | Longer at any heat | Briquettes |
| Ash Production | Very low | Higher (binders burn) | Lump |
| Snake Method | Poor (irregular pieces) | Excellent | Briquettes |
| Smoke Flavor | Cleaner wood flavor | Slight additive flavor | Lump |
| Low-Slow Control | Harder to dial in | Easier to maintain | Briquettes |
The Blend Strategy
Many experienced pitmasters use a blend: briquettes as the base fuel (for consistency and longevity) with a handful of lump charcoal on top (for peak temperature capability and cleaner flavor). A 70/30 mix of briquettes to lump gives you the predictable burn curve of briquettes with lump’s higher peak heat and cleaner smoke profile.
Cheap briquettes with high filler content (sawdust, limestone binders) produce more ash, burn inconsistently, and leave off-flavors in your food. For precision temperature control, invest in quality briquettes like Kingsford Professional, B&B, or Royal Oak. The difference in burn consistency and temperature predictability is dramatic.

The original chimney starter and still the best. Wide bottom air channels ignite coals 30–50% faster than competitors. Acts as a consistent measuring device for coal quantity — the foundation of fuel-load based temperature control.
View on Amazon →Troubleshooting Temperature Problems: Diagnose and Fix Any Issue
Even experienced pitmasters encounter temperature control problems. The difference is they know how to diagnose the root cause quickly. Here are the most common charcoal temperature issues and their solutions:
Problem: Temperature Won’t Rise Above 300°F
This is the most common complaint from new charcoal grillers. The cause is almost always one of three things: insufficient coal quantity, coals that aren’t fully lit (still black with no ash coating), or vents that are too restricted. Work through this diagnostic checklist:
- Check vent position: Both vents should be fully open when trying to establish high heat
- Check coal quantity: Are you using a full chimney? Half a chimney maxes around 325–375°F
- Check coal state: Are coals fully ashed over with a gray coating? Black coals aren’t ready yet
- Check for ash blockage: Heavy ash accumulation in the bottom of the grill blocks airflow to the coals — clean before each cook
- Check for moisture: Damp or old charcoal burns cool and inconsistently
If your grill consistently underperforms, there may be a design or seal issue. Check out the guide on why your grill isn’t heating properly for a more comprehensive diagnostic.
Problem: Temperature Running Too Hot for Low-and-Slow
You’re trying to hold 225°F but the grill sits at 300°F+. Common causes:
- Too many lit coals added at the start — use fewer lit coals for the Minion/snake start
- Vents too open — restrict the bottom vent to 20–25% for low-and-slow
- Lid seal is poor, allowing air infiltration from gaps — this is a grill quality issue
- Wind blowing into the bottom vent — rotate the grill or use a windbreak
Problem: Temperature Drops and Recovers Inconsistently
Temperature spikes and valleys of more than ±25°F suggest an unstable fire, which often means:
- Lid is being opened too frequently — each lift causes a temperature spike as fresh oxygen hits the coals
- Coals were added raw (unlit) — always pre-light additions in the chimney
- Snake method has a gap in the briquette chain — the fire may die before reaching the next section
- Wet wood chunks causing temperature fluctuations — use dry, seasoned wood only
Problem: Ash Blocking Airflow
If temperature steadily declines over a long cook even with vents open, ash buildup is likely the culprit. Ash falls and packs below the coal grate, blocking the vent. On a kettle, use a long poker or the One-Touch ash sweep (on Weber models) to push ash to the sides periodically without disturbing the fire. Always clean ash from the previous cook before starting a new one — this single maintenance step is the most overlooked cause of temperature problems. Read more about complete barbecue maintenance essentials.
| Symptom | Most Likely Cause | Fix |
|---|---|---|
| Won’t get above 300°F | Insufficient coals, not fully lit, or closed vents | Add more lit coals; open both vents fully |
| Sitting at 300°F instead of 225°F | Too many lit starter coals | Restrict bottom vent to 15–20%; let it settle |
| Temperature swings ±50°F | Opening lid too often or unlit coals added | Stop opening; only add pre-lit coals |
| Slow steady decline over hours | Ash blocking bottom vent; fuel burn-down | Sweep ash; add pre-lit coals proactively |
| Can’t get to 600°F+ for searing | Using briquettes only, spread too thin | Pile lump charcoal concentrated on one side |
| One side much hotter than other | Uneven coal distribution | Redistribute coals evenly or embrace as two-zone |
Advanced Pitmaster Techniques for Precise Charcoal Temperature Control
Once you’ve mastered the fundamentals of vents, coal quantity, and arrangement, there’s a second tier of techniques that separate weekend grillers from competition-level pitmasters. These methods address the nuances — the fine control and adaptive strategies that make the difference during complicated cooks.
The Fuel Bed Architecture: Stacking for Even Heat
Rather than simply dumping coals into the grill, experienced pitmasters think about coal architecture. Arranging briquettes in an organized layer structure — rather than a random pile — creates more predictable, even combustion. For medium-heat grilling, try placing a single layer of briquettes across the coal grate first, then adding a second, slightly denser layer on top. This “pyramid” layer structure ignites from the top down and radiates more evenly than a random dump.
The Water Pan Trick: Temperature Moderator
Placing a water-filled drip pan between the coals and the food is a technique borrowed from offset smokers and bullet smokers, and it works brilliantly in kettle grills too. The water in the pan serves as a thermal buffer — it absorbs and re-radiates heat, significantly moderating temperature spikes and creating a more humid cooking environment (which slows moisture loss from the meat). A full water pan can bring a wild 300°F grill down to a stable 250°F with no vent changes. This is especially useful for long smokes where maintaining steady temperature with minimal adjustment is the goal.
Water pan setup — the pan acts as a thermal buffer between hot coals and the meat, moderating temperature spikes and adding cooking humidity
The Kamado Advantage: Ceramic Mass Temperature Control
If you’re serious about charcoal temperature control, a kamado grill represents the pinnacle of the form. The thick ceramic walls absorb and re-radiate heat with extraordinary stability — a properly dialed-in Kamado Joe or Big Green Egg will hold 225°F for 16+ hours on a single load of lump charcoal with minimal attention. The ceramic mass acts as a thermal flywheel, damping temperature swings to near zero. The comparison between Kamado Joe and Big Green Egg reveals fascinating differences in how each manufacturer achieves this thermal stability.
The trade-off: kamados are slow to heat and slow to cool. Plan for a 30–45 minute startup period, and never try to rapidly drop temperature by opening vents wide — the thermal mass will hold heat regardless. The technique for kamado temperature management is to set vents correctly from the start and let the ceramic do the work.
Charcoal Grill Temperature in Weather Extremes
Ambient conditions dramatically affect charcoal temperature control. Here’s how to compensate:
- Cold weather (below 40°F): Expect to use 25–30% more charcoal. The cold air is denser and draws oxygen faster, but the cold grill shell also loses heat rapidly. Preheat longer before cooking. Keep a spare chimney going for refueling. Avoid opening the lid at all during cold-weather low-and-slow cooks.
- Wind: As mentioned earlier, wind blowing into the bottom vent acts like a bellows and can raise temperatures unpredictably by 50–100°F. Use a windbreak (garden wall, patio furniture) or orient the grill so the bottom vent faces away from the wind.
- Rain: Rain falling on coals extinguishes them quickly. Use a grill with a good lid seal and keep the lid down. For extended rain, set up a pop-up canopy at least 6 feet above the grill (never enclosed, always ventilated) to keep coals from getting doused.
- Altitude: Higher altitudes (above 3,500 feet) have thinner air with less oxygen per unit volume. Expect temperature control to be harder, with more charcoal needed for the same temperatures. Open vents slightly wider than you would at sea level.
Using a Fan Controller: Automated Charcoal Temperature Management
For those who want to bridge the precision gap between charcoal and pellet grilling, automatic temperature controllers (ATC) — small fans that attach to the bottom vent and are regulated by a digital temperature probe — can hold charcoal grill temperatures within ±5°F of your target for the entire cook. Products like the FireBoard, BBQ Guru, and Flame Boss connect via Bluetooth or Wi-Fi and allow remote monitoring and adjustment. This is the ultimate expression of charcoal temperature control: the feel and flavor of charcoal with the precision of an appliance.
Dialing in Your Specific Grill: Build a Temperature Map
Every grill is different. Slight variations in vent size, lid seal quality, grill diameter, and metal thickness all affect how a specific unit responds to vent adjustments. The most effective way to develop mastery over your particular grill is to build a temperature map: run the grill with a measured coal load and specific vent settings, record the stable temperature reached, and build a reference chart for your own unit. After four or five practice sessions, you’ll know exactly what combination of coal load, arrangement, and vent position produces any target temperature on your specific grill.
This kind of systematic approach to understanding your equipment is discussed further in resources on comparing charcoal grill features — because the features of your grill (vent design, body material, lid seal) directly determine the range and ease of temperature control.
Charcoal Grill Temperature vs. Pellet Grill: The Honest Comparison
It would be dishonest not to acknowledge that pellet grills are dramatically easier to control. Set a temperature on the dial, hit the button, and walk away — this level of convenience is simply not available with charcoal. The comparison between pellet grills and charcoal grills gets into this trade-off in depth, but the core summary is: charcoal offers superior peak heat, authentic smoke flavor from burning charcoal, and a more engaged, skilled cooking experience. Pellet offers precision, convenience, and consistent results with less skill investment.
Neither is objectively “better” — they’re optimized for different values. But understanding charcoal temperature control deeply means you can get pellet-grill-level precision results from your charcoal setup, with the added reward of genuine fire management craft.
For competition-level temperature consistency on a kettle grill, wrap the outside of the grill lid with a welding blanket or grill insulation wrap during cold-weather or long-duration cooks. The insulation dramatically reduces heat loss through the lid and walls, turning a budget kettle into a precision smoker with minimal temperature variance.
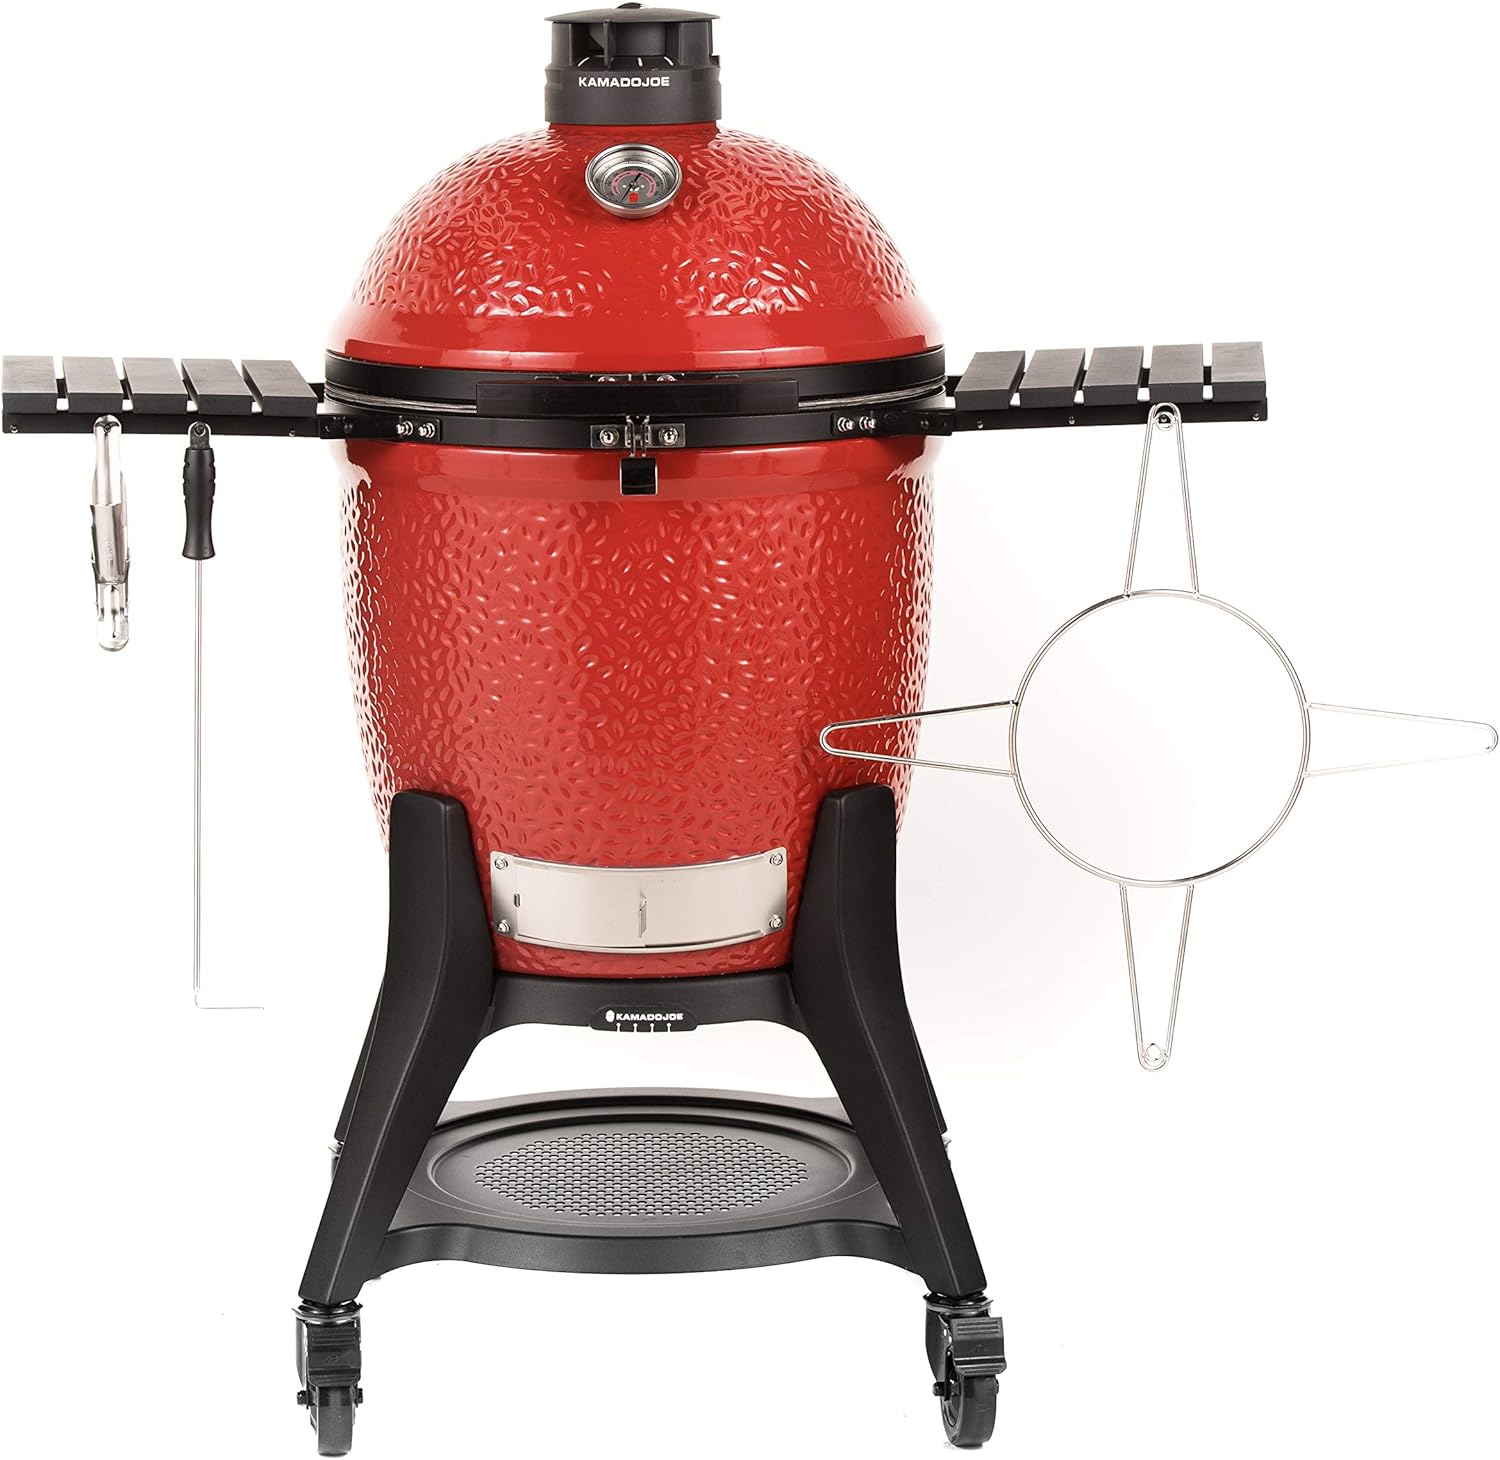
The ceramic wall thermal mass and triple-tier divide & conquer system make this the most temperature-stable charcoal grill on the market. Hold 225°F for 16 hours or sear at 750°F — all with the same load of lump charcoal.
View on Amazon →Frequently Asked Questions: Charcoal Grill Temperature Control
Control charcoal grill temperature by managing three variables: the amount of charcoal lit, the bottom (intake) vent opening, and the top (exhaust) vent opening. More coal + more open vents = higher temperatures. Less coal + more restricted vents = lower temperatures. The bottom vent is your primary heat controller; the top vent manages smoke draw and fine-tunes temperature. Always make small, incremental vent adjustments and wait 5–10 minutes for temperature to stabilize before making another change.
For steaks, aim for a two-zone setup: a searing zone of 600–700°F (315–370°C) over direct high heat for the initial sear, then move the steak to the cooler indirect zone at 350–400°F to finish. Alternatively, use the reverse-sear by starting at 225–250°F indirect and finishing with a 90-second sear per side at maximum heat. Pull the steak at 125–128°F internal temperature for medium-rare — carryover cooking adds another 5–7°F during the rest period.
To hold 225°F on a charcoal grill, use the Minion Method or snake method — arrange unlit coals in a ring or horseshoe and light only a small cluster of 8–12 briquettes at one end. Restrict the bottom vent to about 20–25% open and the top vent to 40–50% open. Check temperature every 15–20 minutes and adjust vents in small increments. Use a quality digital thermometer clipped at grate level, not the built-in dome gauge, which typically reads 50–75°F higher than actual grate temperature during low-and-slow cooks.
Opening the vents makes the grill hotter. More open vents allow more oxygen to reach the coals, which intensifies combustion and raises temperature. Closing the vents restricts oxygen, which slows the burn and lowers temperature. Completely closing both vents will eventually extinguish the fire, but it can take 30–60 minutes for embers to fully die. During cooking, always keep the top vent at least 25% open to prevent smoke from back-flowing and depositing bitter creosote on your food.
A standard chimney starter full of charcoal (about 80–100 briquettes) burns at high temperatures (400–500°F) for approximately 45–75 minutes with both vents fully or mostly open. Lump charcoal burns hotter but faster — roughly 30–60 minutes at peak heat. For longer high-heat cooks, add a fresh chimney of pre-lit coals at the 45-minute mark. At low-and-slow temperatures (225–250°F), the same amount of charcoal using the snake or Minion method can last 5–8 hours.
Charcoal grills lose temperature for several reasons: insufficient charcoal used initially, ash buildup blocking airflow to the coals, vents that are too restricted, damp or poor-quality charcoal, a lid that doesn’t seal properly allowing heat to escape, or coals that burned down without being replenished. Clean the ash catch before each cook, ensure charcoal is fully lit and ashed-over before placing the lid on, and check that both vents move freely and seal completely when closed.
The Minion Method involves filling the coal chamber with unlit charcoal, then adding a small number of fully-lit coals (8–15) on top or at one end. As the lit coals slowly ignite the surrounding unlit ones, they produce a steady, consistent low heat ideal for long smoking sessions at 225–275°F. The method was popularized by competition BBQ cook Jim Minion and works exceptionally well in kettle grills, Weber Smokey Mountain cookers, and bullet smokers.
The snake method (also called the “C” method or fuse method) arranges charcoal briquettes in a long crescent or snake shape around the perimeter of the grill, two briquettes wide and two briquettes tall. You light one end of the snake and the fire slowly travels along it over 4–8 hours, providing steady low temperature (225–275°F) without needing to add charcoal mid-cook. Add wood chunks along the snake at intervals for sustained smoke flavor throughout the session.
A digital thermometer is strongly recommended. The built-in dome thermometers on most grills are notoriously inaccurate — they measure air temperature 6–8 inches above the grates, not actual cooking surface temperature. A quality instant-read thermometer or a dual-probe wireless thermometer (one probe at grate level, one in the meat) gives you the precision needed for consistent results, especially for smoking or indirect cooking where temperature precision is critical.
General guidelines for a 22-inch kettle: For low heat (225–275°F), use the Minion or snake method with a full chimney of unlit coals plus 8–12 lit coals to start. For medium heat (325–375°F / indirect roasting), use ½ chimney of lit coals, divided to both sides. For high heat (400–500°F / direct grilling), use a full chimney of fully lit coals. For searing (600°F+), pile a full chimney of lit coals concentrated on one half of the grill — this concentrates the heat for maximum surface temperature in the sear zone.
Yes, significantly. Lump charcoal ignites faster, burns hotter (up to 100°F hotter at peak), and leaves less ash than briquettes. However, it also burns faster and produces less consistent temperatures due to irregular piece sizes. Briquettes burn more slowly and evenly, hold temperature more predictably for longer sessions, and are generally preferred for low-and-slow smoking. For searing, lump charcoal’s high peak heat is an advantage. Many pitmasters blend both — 70% briquettes for consistency, 30% lump for peak heat capability.
Absolutely, and it’s highly recommended for low-and-slow cooks. Place a disposable aluminum pan filled with water (or apple juice for flavor) on the empty side of the grill, level with or below the cooking grate. The water absorbs heat spikes, moderates temperature by 20–40°F, and creates a humid cooking environment that slows moisture loss from the meat. Replace the water if it evaporates during long cooks — a dry water pan will begin to act as a heat reflector rather than a buffer.
Conclusion: Temperature Control Is the Craft
There are no shortcuts to mastering charcoal grill temperature control — but there are no mysteries, either. Every technique covered in this guide comes down to the same three variables: how much fuel you’re burning, how much air you allow to feed it, and how strategically you arrange your coal bed. Master those three levers and you master the fire.
Start with the fundamentals: a full chimney, properly ashed coals, and both vents fully open for high heat. Then work toward the snake method or Minion method for low-and-slow sessions. Add a quality grate-level thermometer to remove guesswork. Build your temperature map over several cooks so you know exactly how your specific grill responds. Within a month of practice, you’ll be holding 225°F for 8-hour brisket cooks and searing steaks at 650°F with equal confidence.
The fire is yours to command. Get out there and cook.
Related Articles You’ll Find Useful
- Direct vs. Indirect Grilling Methods — When to Use Each
- Lump Charcoal vs. Briquettes — The Complete Comparison
- Pellet Grill vs. Charcoal Grill — Which Is Right For You?
- Grilling vs. Smoking — Heat, Time, and Flavor Mechanics
- How to Grill the Perfect Steak
- The 3-2-1 Method for Perfect Smoked Ribs
- Wood Chips vs. Chunks — Which Is Better for Smoking?
- Understanding Smoke Ring Formation and Meat Color Changes
- How to Keep Smoked Meat Moist — Temperature and Moisture Control
- How to Season a New BBQ Grill