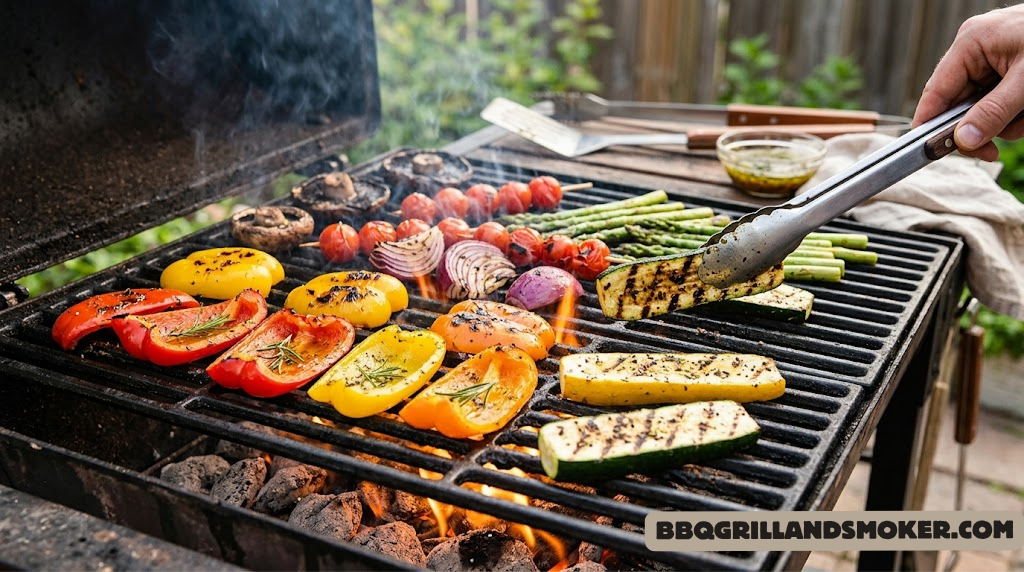
Grill Veggies Like a Pro: The Complete Technique, Timing & Flavor Master Class

Let’s be brutally honest: most people ruin their grilled vegetables. They throw cold, unseasoned slices onto a screaming-hot grate, watch them stick and char unevenly, and wonder why grilling vegetables never tastes as good as it does at their favorite restaurant. The difference isn’t magic — it’s technique. Real technique, applied with intention. This guide is your definitive master class on how to grill vegetables like an actual professional — covering heat science, prep protocols, timing charts, marinade chemistry, tool selection, and the subtle moves that separate a memorable grilled veggie platter from a forgettable one. Whether you’re firing up a gas grill, wrestling with charcoal, or running a pellet rig, every principle in this guide applies.
Why Grilling Fundamentally Transforms Vegetables
Before mastering technique, it’s worth understanding why grilling does what it does to vegetables at a molecular level. This isn’t just culinary science for its own sake — understanding the “why” directly informs every “how” that follows.
The Maillard Reaction and Caramelization
When a vegetable surface hits temperatures above 300°F (149°C), two simultaneous chemical reactions kick off: the Maillard reaction and caramelization. The Maillard reaction involves amino acids and reducing sugars reacting to create hundreds of new flavor compounds — the same chemistry responsible for the brown crust on a seared steak or freshly baked bread. In vegetables, this manifests as that dark, slightly bitter char around the edges of a grilled zucchini or the mahogany exterior of a fire-kissed onion.
Caramelization happens separately: when the natural sugars in vegetables break down at around 320°F (160°C), they form caramel compounds that deliver sweetness and nutty complexity. This is why a grilled corn cob tastes exponentially more complex than a boiled one — the sugar caramelization happening at the kernels’ surface is a flavor event that no other cooking method replicates with the same intensity.
Moisture Loss and Flavor Concentration
Grilling is also a dehydration event. As surface moisture evaporates under high heat, the remaining water-soluble flavor compounds become more concentrated. A fresh tomato grilled over charcoal loses surface moisture rapidly, causing its sugars, acids, and umami compounds (glutamates) to intensify. The same principle applies to mushrooms, eggplant, and even watery bell peppers — the grill strips away excess water and amplifies what’s left.
Smoke Penetration and Phenolic Compounds
Unlike meat, vegetables have a more porous cellular structure that allows smoke compounds — particularly guaiacol and syringol, which are phenolic derivatives from burning wood — to penetrate more deeply per unit of cooking time. This means vegetables take on smoke character faster than proteins, which is why a 6-minute spell over oak coals can transform a halved eggplant into something complex and deeply aromatic. If you’re cooking on a wood-fired or charcoal setup, the smoke actively participates in flavor building rather than just acting as a background note.
Understanding that your grill is simultaneously operating as a dehydrator, a caramelization chamber, a smokehouse, and a high-temperature searing surface will change how you approach every decision — from how thick to cut your vegetables to how long to let them marinate. Understanding grilling vs smoking heat, time, and flavor mechanics is foundational knowledge every serious grill cook should develop.
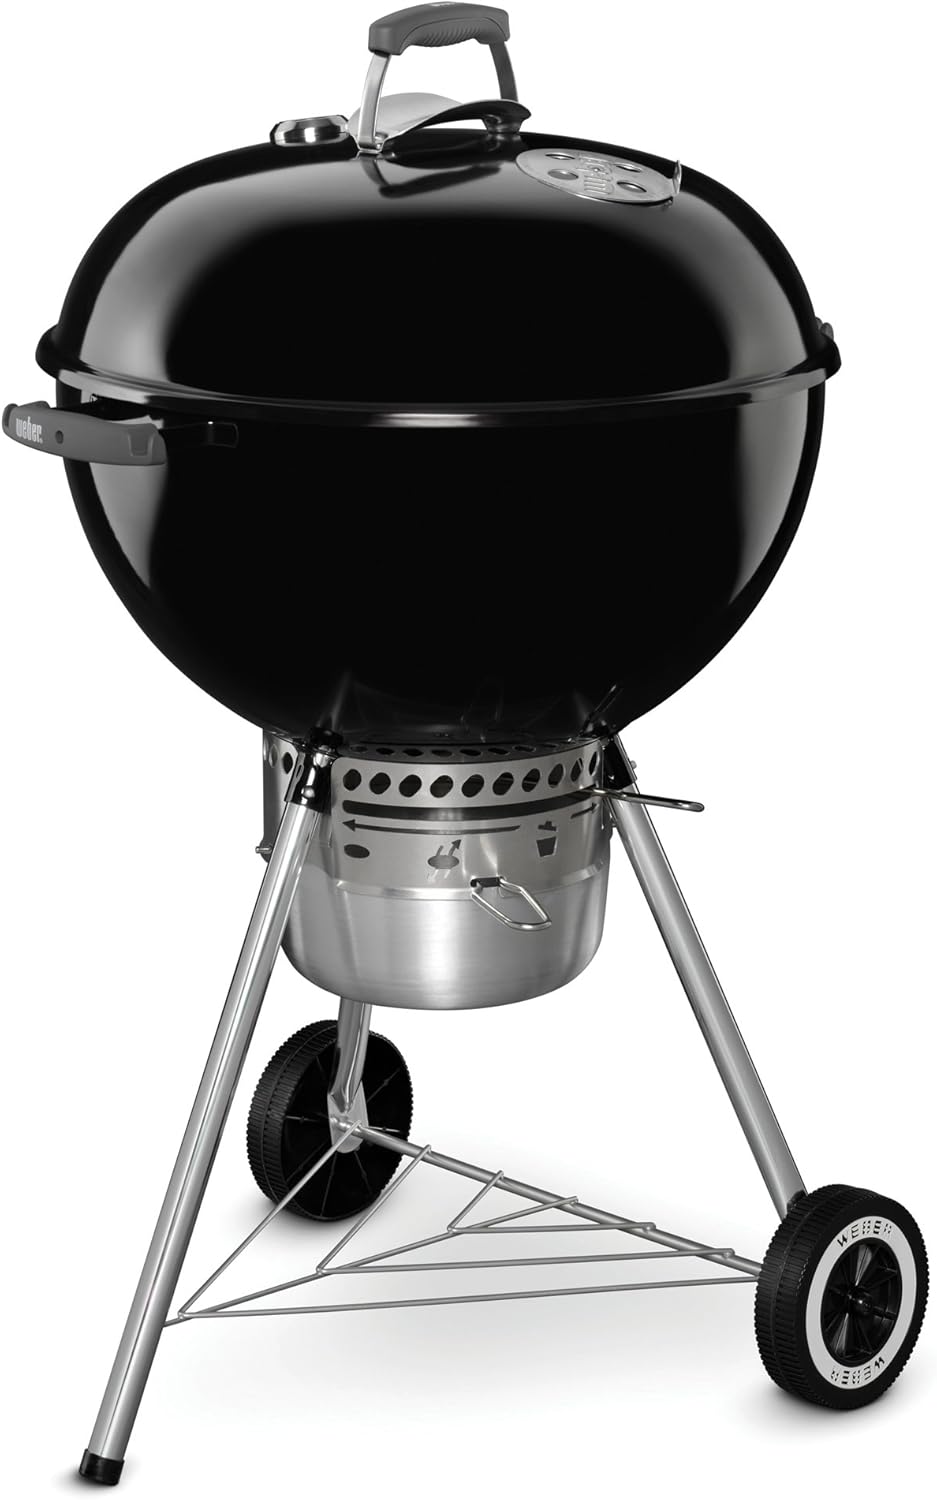
The classic grill that pros trust for perfect char and heat control on every vegetable they cook.
Check Price on Amazon →Mastering Heat Zones: The Foundation of Pro Veggie Grilling
Every professional grill cook — whether they work at a Michelin-starred restaurant or compete on the national BBQ circuit — operates with deliberate heat zones. This is the single most important concept separating average backyard grilling from professional-level execution. Most home cooks treat their grill as a single, uniform cooking surface. Pros understand it as a landscape of micro-environments, each with a specific purpose.
The Three-Zone Setup
Setting up a three-zone configuration on any grill style is the core professional move. Here’s how it works across different fuel types:
🔥 Charcoal Three-Zone Setup
After your coals are ashed over, arrange them in a deliberate gradient: a double-banked layer of coals on one side (Zone 1 — direct high heat), a single layer in the middle (Zone 2 — medium), and no coals at all on the far side (Zone 3 — indirect). This setup lets you sear vegetables in Zone 1, finish cooking in Zone 2, and hold warm or smoke-finish in Zone 3 without burning. For absolute control over your charcoal heat, review this guide on charcoal grill temperature control.
🟦 Gas Grill Three-Zone Setup
On a three-burner gas grill, set the left burner to high, the center to medium, and the right burner off — this creates the same three-zone gradient. On a two-burner grill, set one to high and one to low. On a four-burner grill, you have even more granularity: high, medium-high, medium, and off. Always preheat for 10–15 minutes with all burners on high before adjusting to your zoned configuration.
🟤 Pellet Grill Zone Management
Pellet grills are naturally set to a single temperature by design, but you can still leverage zones by understanding where heat pools (typically toward the back and fire pot) versus where it’s more diffused (front corners). Some pellet vs charcoal grill comparisons show that pellet grills are better for indirect vegetable cooking while charcoal excels at high-heat direct char. Use a dedicated sear station if your pellet grill has one for Zone 1 work.
Always test your zones with the “hand test” before cooking: hold your palm 3 inches above the grate. Zone 1 should be uncomfortable after 1–2 seconds. Zone 2 should be manageable for 3–4 seconds. Zone 3 should be comfortable for 5+ seconds.
Why Vegetables Need Zones More Than Meat
Here’s something most guides won’t tell you: vegetables are actually more sensitive to heat zone mismanagement than proteins. A thick steak has fat, collagen, and dense muscle fiber that buffer against uneven heat. A slice of zucchini has none of those buffers — it’s mostly water wrapped in thin cell walls. Too much direct heat and it burns on the outside while remaining raw in the center. Too little heat and it just steams in its own moisture without ever caramelizing. The heat zone system solves both problems simultaneously.
Prep Like a Pro: Cuts, Oiling, and Pre-Grill Protocol
Restaurant-quality grilled vegetables begin long before they hit the grates. The prep protocol — how you cut, dry, oil, and stage your vegetables — determines whether you end up with beautifully charred pieces that come off the grill cleanly or a soggy, stuck, unevenly cooked mess.
The Crucial Drying Step Most Home Cooks Skip
After cutting your vegetables, pat them thoroughly dry with paper towels. This step is non-negotiable for professional results. Why? Because water is the enemy of browning. When a wet vegetable surface hits a hot grate, the moisture needs to evaporate before caramelization can begin — and by the time that happens, you’ve already used up precious browning time and dropped the grill temperature at the contact point. A dry surface browns faster, sticks less, and chars more evenly.
For vegetables like zucchini, eggplant, and mushrooms that hold a lot of internal moisture, take it one step further: after cutting, lay them on a wire rack over a baking sheet, salt lightly, and let them rest for 20–30 minutes. The salt draws out excess moisture through osmosis (a process called purging), which you then blot away. The result is a vegetable that’s already slightly pre-dehydrated, which means it browns and chars on the grill with exceptional speed and intensity.
Oiling: The Right Way
The oiling technique matters more than the oil choice, though both are important. Never apply oil directly to the grill grates before cooking vegetables — this causes the oil to burn off before your food even arrives. Instead, apply oil directly to the cut surfaces of each vegetable piece. Use a brush or your hands to work a thin, even coating across every flat surface. The goal is a film, not a pool.
For high-heat grilling (400°F+), use oils with a high smoke point: avocado oil (520°F), refined coconut oil (450°F), or refined safflower oil (510°F). Olive oil (especially extra-virgin) has a smoke point of around 375°F, which means it starts degrading and becoming bitter at high-heat applications — reserve it for finishing after the grill, not for the grill surface itself. If you’re cooking at medium heat (325–375°F), a good extra-virgin olive oil is fine and adds flavor.
Season with salt and pepper immediately before grilling, not far in advance. Salt draws out moisture over time; if you salt 30+ minutes ahead without the osmosis-purge technique described above, you’ll have vegetables weeping moisture at grill time, making browning harder.
The Pre-Grill Staging System
Professional grill cooks pre-organize their vegetables by cook time before anything touches the grates. Group your prepped vegetables into three staging categories:
- Category A (Long cook, 10–15 min): Potatoes, artichokes, thick fennel slices, corn cobs
- Category B (Medium cook, 5–8 min): Bell peppers, onion rounds, eggplant slices, portobello caps
- Category C (Quick cook, 2–4 min): Asparagus, scallions, cherry tomatoes, thin zucchini slices
By staging your vegetables this way, you add them to the grill in sequence — Category A first, then B, then C — so everything finishes at roughly the same time. This is the single best organizational habit for producing a great mixed vegetable platter rather than a mix of overcooked and undercooked items.
The Best Vegetables for Grilling — A Comprehensive Roster
Not all vegetables are equally suited to grilling. Some are naturals — they have the density, water content, and sugar profile that practically beg for fire. Others require technique adjustments, and a few are genuinely better left to other cooking methods. Here’s the definitive breakdown:
The Elite Eight: Best Grilling Vegetables Explained
Corn on the Cob: The undisputed champion of grilled vegetables. Its natural sugar content is perfect for caramelization, the husk acts as a natural steam wrapper, and the cob handles direct high heat without falling apart. Leave the husk on (soak for 30 minutes first) for a steamed effect with charred edges, or shuck completely for maximum direct caramelization and char on every kernel. The latter method — also called “naked grilling” — produces a much more aggressively flavored cob. Check out our guide on BBQ grilled corn on the cob for full technique.
Bell Peppers: Another superstar. They blister and char beautifully, and that blistered skin can be peeled away to reveal the sweet, smoky flesh underneath. Cut into planks (vertical strips, seeds removed) rather than rings — planks lie flat on the grate for even contact. Red, orange, and yellow peppers have more sugar and char more dramatically than green peppers.
Eggplant: Requires the osmosis technique (salting and purging) described in the prep section. Cut into rounds or lengthwise halves (not dice — too small and they fall through). Its spongy interior becomes silky and rich after proper grilling, but it demands patience: let it sit without moving for the full 5–6 minutes per side before checking for release.
Portobello Mushrooms: These are the closest vegetable equivalent to a steak on the grill. Their density, umami content, and size make them exceptional grill candidates. Remove the gills if you want a drier result; leave them in if you want more moisture. Brush with garlic-herb oil and cook gill-side down first to concentrate those juices.
Asparagus: Best when thick spears are used — thin asparagus overcooks in seconds and falls through the grate. Snap off the woody ends, toss with high-smoke-point oil, season, and lay perpendicular to the grate bars. Roll once per side. They’re done when they yield to slight pressure but still have a snap — about 4–6 minutes total over high heat.
Zucchini and Summer Squash: Versatile and quick-cooking. Diagonal slices create more surface area than rounds. The key is getting them off the grill before they turn mushy — they go from perfectly charred to overcooked within 60–90 seconds on either side.
Onions: Perhaps the most flavor-transforming vegetable on the grill. Raw onion’s pungent sulfur compounds break down into sweet, complex sugars through grilling. Cut into ¾-inch rounds and use a skewer or toothpick through each round to keep the rings together. Or grill halved onions cut-side down for a deeply caramelized flat face.
Cherry Tomatoes: Skewer them or use a grill basket. They burst with concentrated sweetness and slight acidic brightness after just a few minutes on direct high heat. Remove them the second they start to blister — they’re done.
For vegetables that are difficult to grill (thin or small items like cherry tomatoes, green beans, or halloumi cubes), use a perforated grill basket or a grill mat. These allow heat and smoke to reach the food while preventing items from falling through.
Vegetables That Need Pre-Cooking First
Some vegetables are too dense to cook through on the grill in reasonable time without burning the outside. For these, a quick pre-cook before grilling is the professional approach:
- Potatoes: Microwave for 4–5 minutes or parboil until just barely fork-tender, then slice and grill for char and crispness.
- Cauliflower: Slice into thick steaks (1–1.5 inches), microwave 2–3 minutes, then grill over medium-high heat. The pre-cook ensures the interior is creamy while the exterior chars.
- Artichokes: Boil or steam until tender before cutting in half and grilling cut-side down for beautiful char.
- Beets: Roast or boil first, then slice and grill for color and caramelization. Raw beets are too hard and dense for direct grilling.
- Carrots: Blanch for 3–4 minutes before grilling if using whole carrots. Thin carrot planks can go direct.

Ideal for small veggies — cherry tomatoes, green beans, asparagus tips — that would otherwise fall through grate gaps.
Check Price on Amazon →Direct vs. Indirect Heat: Choosing the Right Method
Understanding when to use direct heat versus indirect heat is the tactical core of grilling vegetables professionally. These aren’t just theoretical concepts — they’re the practical decision you’ll make for every single vegetable that goes on your grill. For a broader understanding of how these methods work across all grilled foods, read our deep dive on comparing direct and indirect grill methods.
The most powerful approach combines both methods in sequence — something restaurant grillers do automatically. This is called the sear-and-slide method: start the vegetable on direct high heat to develop caramelization and char marks, then slide it to the indirect zone to finish cooking through without risk of burning. Think of it exactly like reverse-searing a steak, but for vegetables.
When to Use Direct Heat Only
Pure direct heat is appropriate for vegetables with a high water content and thin structure that cook through quickly — asparagus, scallions, cherry tomatoes, thin zucchini slices, and halved small peppers. These items cook fully in 2–6 minutes over high direct heat without needing the gentler finish of the indirect zone. The risk with these vegetables is not undercooking; it’s overcooking — keep vigilant and remove them the moment they yield but still have structure.
When to Use Indirect Heat Only
Pure indirect heat is ideal for whole vegetables or very thick pieces where you want even cooking without any surface char: whole heads of garlic (40–50 minutes until soft and caramel), whole onions, parcook-first potatoes wrapped in foil, or whole beets. These are essentially oven-roasted in the ambient heat of a closed grill — the smoke and char come from the environment, not direct flame contact.
The Combo Method: Sear-and-Slide
For thick vegetable steaks — portobello caps, thick eggplant rounds, cauliflower steaks, fennel halves — the sear-and-slide method delivers superior results. Place the vegetable on direct high heat for 2–3 minutes per side to establish char marks and surface browning, then move to the indirect zone and close the lid for 8–12 minutes to finish cooking through. The result: beautifully charred exterior, tender and well-cooked interior. No raw center. No burned outside.
Marinades & Seasoning: Building Deep Flavor Before the Grill
Grilled vegetables are endlessly adaptable when you master the language of marinades and seasoning. This is where the flavor profile of your dish gets established — the grill amplifies and caramelizes whatever you apply, so quality and intentionality in the marinade pay dividends. For the best results, also consider pairing with the best barbecue rubs and premium BBQ sauces for finishing touches.
The Anatomy of a Great Vegetable Marinade
A professional-quality vegetable marinade contains four components in balance:
- Fat (40–50%): Carries fat-soluble flavor compounds into the vegetable and protects surface from burning. Use avocado oil, olive oil (for medium heat), or nut oils for Asian-inspired preparations.
- Acid (15–25%): Brightens flavor and slightly breaks down cell walls for better marinade penetration. Use lemon juice, lime juice, red wine vinegar, balsamic, or rice vinegar depending on cuisine direction.
- Aromatics (20–30%): The primary flavor drivers. Garlic, shallots, fresh herbs, ginger, citrus zest, miso paste, harissa, tahini, or any other flavoring agent.
- Salt and sweetener (5–10%): Salt for extraction and flavor enhancement; a small amount of honey, maple syrup, or brown sugar for additional caramelization. Sugars caramelize aggressively on the grill, so use sparingly.
🌿 Classic Italian Herb Marinade
- 4 tablespoons extra-virgin olive oil
- 2 tablespoons lemon juice + zest of 1 lemon
- 3 cloves garlic, minced to a paste
- 1 tablespoon fresh rosemary, finely chopped
- 1 tablespoon fresh thyme leaves
- ½ teaspoon dried oregano
- 1 teaspoon sea salt, ½ teaspoon black pepper
- Pinch of red chili flakes
Marinate time: 20–60 minutes. Best for: zucchini, eggplant, bell peppers, asparagus.
🧄 Miso-Sesame Asian Marinade
- 3 tablespoons white miso paste
- 2 tablespoons sesame oil
- 2 tablespoons rice vinegar
- 1 tablespoon honey or maple syrup
- 1 tablespoon soy sauce or tamari
- 1 teaspoon fresh ginger, grated
- 1 clove garlic, minced
- 1 teaspoon toasted sesame seeds
Marinate time: 15–30 minutes only (miso can over-penetrate). Best for: eggplant, portobello, corn, bok choy.
🌶️ Smoky Chipotle-Lime Marinade
- 3 tablespoons avocado oil
- 2 tablespoons fresh lime juice + zest
- 2 chipotle chiles in adobo + 1 tablespoon adobo sauce, minced
- 2 cloves garlic, grated
- 1 teaspoon cumin
- ½ teaspoon smoked paprika
- 1 teaspoon honey
- 1 teaspoon kosher salt
Marinate time: 30–60 minutes. Best for: corn, peppers, onions, sweet potato, broccoli.
Dry Rubs for Vegetables
Dry rubs work exceptionally well on vegetables with more surface area and density — eggplant steaks, portobello caps, corn, and thick squash planks. The rub creates a spiced crust that caramelizes dramatically on the grill. A great all-purpose vegetable dry rub includes equal parts smoked paprika, garlic powder, onion powder, cumin, and coriander, with salt and a touch of brown sugar. Apply immediately before grilling (unlike marinades, dry rubs don’t need time to work). You’ll find an outstanding homemade BBQ rub recipe that adapts beautifully for vegetables here.
Post-Grill Finishing: The Move That Elevates Everything
This is the secret that restaurant chefs use that home cooks virtually never do: finishing grilled vegetables with a completely separate seasoning layer after they come off the grill. While the vegetables are still warm (but not on the grill), toss or drizzle them with:
- A high-quality finishing extra-virgin olive oil (different from your cooking oil)
- Fresh citrus juice or high-quality vinegar for brightness
- Fresh herbs added at this stage: basil, mint, cilantro, parsley, chives
- Flaky sea salt for texture contrast
- Optional: crumbled cheese (feta, ricotta salata), toasted nuts, or pomegranate molasses
This post-grill layer adds vibrancy, freshness, and textural contrast that the grill alone can’t provide — and it prevents the disappointment of beautifully charred vegetables that taste flat on the plate.

Apply marinades and oil precisely and evenly to every surface of your vegetables before they hit the grates.
Check Price on Amazon →Grill Type Comparison: Gas, Charcoal & Pellet for Vegetable Grilling
Your grill type meaningfully influences how your vegetables cook and taste. Each fuel source has distinct strengths and limitations for vegetable work. Understanding these helps you optimize your setup and set realistic expectations.
| Grill Type | Heat Control | Smoke Flavor | Preheat Time | Best Veggie Use | Overall Score |
|---|---|---|---|---|---|
| Gas Grill | Excellent | Minimal | 10–15 min | Quick-cook veggies, weeknight grilling | ★★★★½ |
| Charcoal Kettle | Good | Excellent | 20–30 min | Char-forward, smoky flavor profiles | ★★★★★ |
| Pellet Grill | Excellent | Good | 15–20 min | Indirect cooking, consistent results | ★★★★ |
| Kamado Grill | Excellent | Excellent | 20–30 min | Both direct and indirect, superior retention | ★★★★★ |
| Flat-top Griddle | Good | None | 8–10 min | Even searing, no grate fall-through | ★★★½ |
Gas Grills: Precision and Convenience
Gas grills are the most practical choice for regular vegetable grilling. The dial-adjustable heat control makes zone management straightforward, preheat is fast, and cleanup is minimal. The one limitation is smoke flavor — gas combustion produces virtually no wood-smoke character. Compensate by adding a smoke box with soaked wood chips to one burner, which adds meaningful smoke complexity to your vegetables without converting your rig. For a deep dive on gas grill options, our best BBQ grills guide covers the top performers in detail.
Charcoal Grills: The Flavor Champion
Nothing beats charcoal for flavor complexity in grilled vegetables. The combination of radiant heat, convective heat, and wood-smoke phenolics creates a depth of flavor that gas simply can’t replicate. The trade-off is control — charcoal requires more skill to manage heat zones, and temperature responds slowly to adjustment. For comparing specific charcoal setups, check out our charcoal grill feature comparison. The debate between lump charcoal and briquettes is also worth understanding — lump burns hotter and cleaner for vegetable grilling, while briquettes give more consistency.
Pellet Grills: Set-It-and-Go Consistency
Pellet grills excel at indirect, low-and-slow applications where precise temperature maintenance matters. For vegetables, this makes them ideal for slow-smoking whole vegetables (like a whole head of garlic or large eggplant) or cooking dense vegetables like potato planks at controlled temperatures. They struggle with high-heat direct searing unless equipped with a dedicated sear zone. Read our comparison of pellet grill vs gas grill to understand where each shines.
Kamado Grills: The All-Around King
Kamado grills — the ceramic, egg-shaped cookers — are arguably the best all-around choice for vegetable grilling. Their thick ceramic walls retain heat with exceptional consistency, they can run at ultra-high temperatures (700°F+) for aggressive searing, and at low temperatures (225°F) for smoke-infused indirect cooking. Check out the Kamado Joe vs Big Green Egg comparison if you’re considering this style of grill.
✅ Gas Grill Pros for Veggies
- Instant heat control
- Easy zone management
- Consistent results
- Fast preheat
- Easy cleanup
⚠️ Gas Grill Cons for Veggies
- No natural smoke flavor
- Less caramelization character
- Grates often cause sticking
- Cost vs charcoal
Technique by Vegetable: The Individual Playbook
Every vegetable has its own grilling personality. Understanding the nuances of each one — how it moves on the grate, how it signals doneness, where it tends to go wrong — is the mark of a truly experienced grill cook. Here’s the individual playbook for the most-grilled vegetables.
Asparagus: The Speed Demon
Setup: Direct high heat, 450–500°F. Cut: No cutting needed — snap woody ends. Technique: Lay spears perpendicular to grate bars (so they can’t fall through). Toss with avocado oil, salt, and pepper. Roll them 90 degrees halfway through cooking. Listen for a light sizzle — that’s caramelization, not burning. Doneness: 4–6 minutes. Look for light browning along the spears and tips that have gone slightly crisp. They should have a slight bend but snap cleanly if broken. Finish: Lemon zest, flaky salt, and optional shaved Parmesan.
Corn on the Cob: Husk-On vs Husk-Off
Husk-On Method: Soak in water 20–30 minutes. Grill on direct medium heat (375°F), turning every 3–4 minutes, total 15–20 minutes. The husk steams the kernels to tenderness while the exterior chars. Result: tender, juicy, lightly smoky. Husk-Off Method: Shuck completely. Oil lightly. Grill direct high heat (450°F+), rotating every 2–3 minutes, total 10–12 minutes. Result: aggressively caramelized, deeply charred kernels with intense sweetness. Both methods are excellent — the husk-off produces a more dramatic, restaurant-quality char. See our full corn on the cob recipe for complete instructions.
Eggplant: Patience is the Key
Prep: Cut into ¾-inch rounds or lengthwise halves. Salt generously, let stand 20–30 minutes, pat thoroughly dry. Setup: Start on direct high heat (425°F). Oil very well — eggplant absorbs oil aggressively. Technique: Place and do not touch for 5–6 minutes. Premature moving causes tearing. After 5–6 minutes, try to lift with a thin metal spatula. If it releases cleanly, flip. If it sticks, wait 90 more seconds — it will release when properly seared. Doneness: The interior should be completely soft and silky, the exterior deeply charred. If using thick halves, finish on indirect heat for 8–10 minutes after the initial sear.
Bell Peppers: Char for the Best Flavor
For char-and-peel: Leave peppers whole. Place directly on grate over direct high heat. Rotate every 2–3 minutes until completely blackened on all sides, about 15 minutes. Place immediately in a bowl, cover with plastic wrap, and steam for 10 minutes. Peel the blackened skin away to reveal sweet, smoky, silky flesh. For planks: Cut peppers into vertical strips, oil, and grill direct medium-high 4–5 minutes per side until lightly charred but still with some bite. The whole-and-char method produces far superior flavor and is worth the extra effort.
Master Timing & Temperature Reference Guide
Timing is everything in grilling, and vegetables are even less forgiving than meat — the window between perfectly done and overcooked is measured in minutes, sometimes seconds. This comprehensive reference chart gives you the precise parameters for every major grilling vegetable.
| Vegetable | Prep Method | Grill Temp | Heat Type | Cook Time | Doneness Cue |
|---|---|---|---|---|---|
| Asparagus | Whole, ends removed | 450–500°F | Direct High | 4–6 min total | Light browning, slight flex |
| Bell Peppers (planks) | Vertical strips, ¼ seeded | 400–425°F | Direct Med-High | 8–10 min total | Char edges, skin blistering |
| Corn on Cob (naked) | Husked, oiled | 450°F | Direct High | 10–12 min, rotating | 30–40% kernels spotty |
| Zucchini | ½” diagonal slices | 400°F | Direct Med-High | 4–6 min total | Clear grill marks, slight softness |
| Eggplant | ¾” rounds, dried | 425°F | Direct, then Indirect | 10–14 min total | Complete interior softness |
| Portobello | Cap whole, gills up first | 400°F | Direct Med-High | 8–12 min total | Moisture beading on surface |
| Onion (rounds) | ¾” rounds, skewered | 400°F | Direct Med-High | 8–10 min total | Golden color, rings yielding |
| Cherry Tomatoes | Skewered or basket | 425°F | Direct High | 4–6 min total | First signs of blistering/bursting |
| Broccoli Florets | Large florets, steamed 2 min first | 400°F | Direct Med-High | 6–8 min total | Charred tips, tender stem |
| Cauliflower Steaks | 1–1.5″ slabs, microwaved 3 min | 400°F | Direct → Indirect | 14–18 min total | Fork-tender, golden crust |
| Fennel | Halved or ¾” planks | 375°F | Direct → Indirect | 12–16 min total | Deep golden, anise scent fades |
| Scallions | Whole, roots trimmed | 450°F | Direct High | 3–5 min total | Exterior charred, interior soft |
| Romaine Halves | Halved lengthwise, oiled | 425°F | Direct High | 2–3 min per side | Cut face deeply charred |
| Sweet Potato Slices | ½” rounds, parcook 4 min | 400°F | Direct Med-High | 8–10 min total | Fork enters with slight resistance |
Grill temperatures vary by fuel type, weather, and equipment. These are guidelines based on a properly preheated grill. Always adjust based on your actual equipment — if your grill runs hot, reduce times by 10–15%. Use a grill surface thermometer for accurate readings.
The Flip Rule: Once vs Multiple Times
A persistent debate in grilling circles: flip once for maximum grill marks and crust development, or flip multiple times for more even cooking? For vegetables, the answer depends on the specific vegetable:
- Flip once: Eggplant, portobello, cauliflower steaks, fennel — thick items that benefit from a full sear on each face.
- Flip multiple times: Corn (rotate every 2–3 min for even char all around), scallions and asparagus (roll for even browning), cherry tomatoes on skewers.
- The general rule: Resist the urge to move vegetables immediately after placing. They will naturally release from the grates when properly seared — if they stick, they’re not ready to flip. Forcing them causes tearing and leaves material stuck to the grates.

Monitor grill surface and air temperature precisely for consistent vegetable grilling results every session.
Check Price on Amazon →Essential Tools & Accessories for Pro-Level Vegetable Grilling
The right tools make a material difference in vegetable grilling. Meat can accommodate some imprecision — it’s forgiving. Vegetables, being thinner and more delicate, need implements specifically suited to their characteristics. For a comprehensive overview, our guide to the best barbecue tools covers everything in depth.
| Tool | Why You Need It | Key Feature | Priority |
|---|---|---|---|
| Thin Metal Spatula | Slides under delicate veggies without tearing | Thin, angled blade | Essential |
| Long Tongs (16″) | Turn and move veggies with precision at safe distance | Scalloped tips for grip | Essential |
| Perforated Grill Basket | Cook small/thin veggies that would fall through grates | Stainless, dishwasher safe | Essential |
| Grill Mat | Uniform heat surface, no-stick, easy cleanup | PTFE, 600°F rated | Recommended |
| Silicone Basting Brush | Even oil and marinade application | Heat resistant to 400°F | Essential |
| Grill Grate Thermometer | Know your actual cooking surface temp, not ambient | Infrared or probe type | Recommended |
| Cast Iron Plancha | Even, extreme heat for mushrooms, delicate items | Pre-seasoned, fits standard grates | Advanced |
| Skewers (flat metal) | Cherry tomatoes, mushroom pieces, onion chunks | Flat prevents spinning | Recommended |
| Grill Brush / Scraper | Clean grates before cooking prevents sticking | Coil or scraper type, no bristles | Essential |
Cast Iron vs Stainless Steel Grill Grates
The grill grates themselves are a critical variable for vegetable grilling. Cast iron grates retain and radiate heat more intensely, creating superior sear marks — but they require maintenance (seasoning) and are heavier to handle. Stainless steel grates are easier to maintain and resist corrosion, but don’t retain heat as well. For vegetables specifically, cast iron’s superior heat retention helps create better caramelization contact. The full breakdown is covered in our cast iron vs stainless steel grill grates comparison. For cleaning those grates and keeping them performing at their best, our best BBQ grill cleaners guide and grate cleaning guide cover the full protocol.
The Grill Basket: A Dedicated Section
A perforated grill basket deserves special attention because it’s probably the most underused, highest-impact tool in vegetable grilling. It allows you to cook a mix of small, delicate, or chopped vegetables directly over the fire without any of them falling through the grates, while still getting direct heat and some smoke character. Toss your vegetables with marinade, load the basket, place it over medium-high direct heat, and shake or stir every 2–3 minutes. The result is a mixed vegetable medley with beautiful char and even cooking — something nearly impossible to achieve with individual items on the grates. The key features to look for: heavy stainless steel or cast iron construction, large perforations (not mesh), high walls to prevent spilling during stirring, and a long heat-resistant handle.
Common Mistakes to Avoid — The Pro Diagnosis
Understanding what goes wrong is often more instructive than knowing what goes right. These are the most common vegetable grilling mistakes, explained with the underlying cause and the professional correction.
The Sticking Problem: A Deep Dive
Sticking is the most common and frustrating vegetable grilling problem. Here’s the complete prevention protocol: First, preheat the grill fully (not just warm — fully hot) before any food goes on. A properly hot grate creates an initial sear that prevents proteins and sugars from bonding to the metal. Second, oil the vegetable surfaces (not the grates). Third, clean your grates before each cook session — residue from previous cooks is the biggest single cause of sticking. Our guide on preventing food from sticking to the grill covers the surface prep in detail. Fourth, and most critically: let the vegetable release naturally. Sticking is almost always a sign that the Maillard reaction isn’t complete yet — the crust hasn’t formed. Give it another 60–90 seconds before trying to lift again.
The Over-Charring Problem
There’s a meaningful difference between char and burn. Char is controlled caramelization — dark brown to black at the edges with golden to deep brown in the center, adding complexity and slight bitterness that balances sweetness. Burn is when the entire surface is carbonized and uniformly black, contributing only acrid, bitter flavors with no sweetness at all. The distinction matters for both flavor and health — heavily carbonized food contains polycyclic aromatic hydrocarbons (PAHs) that are best minimized. For context on this topic, our article on health impacts of charcoal grilling provides a measured, evidence-based overview. The prevention: manage your heat zones, don’t leave vegetables over direct high heat longer than necessary, and move them to the indirect zone if they’re browning faster than they’re cooking through.
Pro Recipes & Masterful Vegetable Combinations
With technique mastered, it’s time to put it all together in the form of specific recipes and vegetable combinations that demonstrate the full range of what pro-level vegetable grilling can achieve.
Grilled Vegetable Platter: The Entertainer’s Standard
This is the classic mixed platter that belongs at every serious outdoor gathering. Prepare in 30 minutes using the staging system:
- Base: 2 ears of corn (naked), 1 large eggplant sliced ¾” rounds (salted and purged)
- Medium: 2 bell peppers (1 red, 1 yellow, cut into planks), 2 large Portobello caps, 2 medium onions in ¾” rounds
- Quick: 1 bunch asparagus, 1 large zucchini in diagonal slices, 1 cup cherry tomatoes on skewers
Marinade: Whisk ¼ cup olive oil, 3 tbsp lemon juice, 4 garlic cloves minced, 1 tbsp fresh thyme, salt and pepper. Divide across vegetable groups. Set up three-zone grill at 400–450°F. Cook corn and eggplant first (10–12 minutes). Add medium group at minute 5. Add quick group at minute 10. Finish: Drizzle with excellent extra-virgin olive oil, scatter fresh basil and flat-leaf parsley, sprinkle with flaky Maldon salt, serve with a bowl of good hummus and warm flatbread.
Mediterranean Grilled Vegetable Board with Whipped Feta
This crowd-pleasing presentation technique involves grilling a range of Mediterranean vegetables — eggplant, zucchini, peppers, onions, and halved cherry tomatoes — with the chipotle-lime marinade (sub fresh herbs for cilantro-parsley mix). While the vegetables rest, whip together 8 oz block feta, ¼ cup cream cheese, 2 tbsp lemon juice, and 2 tbsp olive oil until completely smooth. Spread on a wooden board as a base. Arrange the warm grilled vegetables artfully over the whipped feta. Drizzle with pomegranate molasses, scatter toasted pine nuts, and add a final dusting of za’atar. This dish makes vegetables genuinely the star of any meal.
Smoked Whole Vegetables: The Long Game
Some vegetables transform most dramatically through a long, slow smoke rather than quick direct grilling. Try these:
- Whole smoked eggplant: Place directly on grates over indirect heat at 250°F for 60–75 minutes until completely collapsed and soft. The skin becomes irrelevant — scoop out the silky, smoke-saturated interior for the best baba ganoush you’ve ever made.
- Whole garlic heads: Slice off the top ¼ inch, drizzle with olive oil, wrap in foil, place on indirect at 300°F for 40–50 minutes until completely caramelized. The resulting soft garlic paste is extraordinary spread on grilled bread.
- Smoke-roasted onions: Quarter onions through the root (so they stay together), oil generously, place cut-side down on indirect at 275°F for 35–45 minutes. The layers caramelize from the inside out and become intensely sweet.
For more inspiration on what the grill can do beyond simple char, explore our comparison of flavor outcomes across different grill types. You can also round out any vegetable-focused BBQ menu with a world-class grilled salmon, BBQ shrimp skewers, or even grilled lamb chops alongside your vegetables.
Chefs at high-end restaurants often use the grill as the first step, not the only step: grill vegetables to 80% done, then finish in a cast iron pan with butter, garlic, and fresh herbs for the last 2 minutes. The butter basting caramelizes the surfaces further and adds a richness that pure grilling doesn’t. Try it with portobello caps and thick zucchini planks.

Press portobello caps, eggplant steaks, and cauliflower slabs flat for maximum grate contact and even caramelization.
Check Price on Amazon →Frequently Asked Questions: Grilling Vegetables Like a Pro
Master the Fire. Own the Flavor.
Grilling vegetables like a true professional isn’t about a single secret technique — it’s about the accumulation of details, each one compounding on the others. It’s the three-zone heat setup that gives you control. The osmosis purge that prepares eggplant for perfect char. The high-smoke-point oil applied directly to vegetable surfaces. The patience to let the Maillard reaction finish before you attempt to flip. The post-grill finishing layer of bright acid, fresh herbs, and flaky salt that turns good into extraordinary.
Every single one of these elements is learnable. Every grill session is an opportunity to apply one more layer of technique until the whole thing becomes intuitive — until you stop thinking about the temperature and just feel it, stop checking the timer and just listen to the sizzle. That’s what pro-level grilling looks and sounds like. Now you have the complete roadmap to get there.
Explore the Best BBQ Grills →
The perfect all-in-one solution for grilling mixed vegetables at any heat level without fall-through or sticking.
Check Price on Amazon →