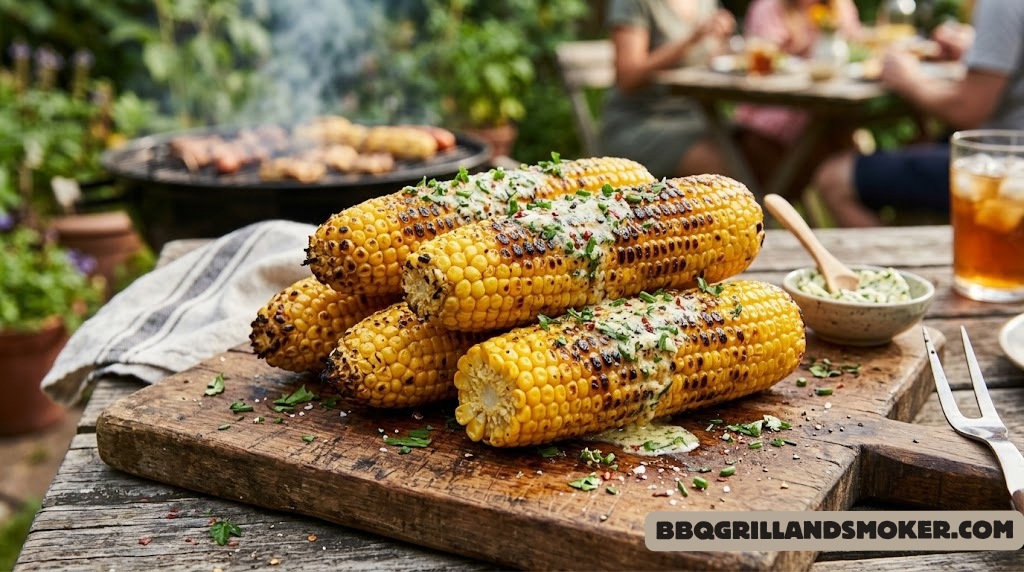
BBQ Grilled Corn on the Cob: Perfect Char, Smoky Sweetness, Every Single Time
There is no side dish more universally celebrated at a summer BBQ than a properly grilled ear of corn. It costs almost nothing. It takes fifteen minutes. And when it comes off the grill charred, sweet, and slathered in the right compound butter, it can outshine the steak, the ribs, and everything else on that table. The problem is that most people grill corn badly — pale and steamed in foil, or burnt and dry because the timing was off. This guide fixes all of that.
Whether you’re firing up a charcoal grill, a gas grill, or even a pellet smoker, this complete BBQ grilled corn on the cob guide gives you three proven methods, a master recipe with step-by-step instructions and SVG visuals, eight compound butter variations, a timing chart for every doneness level, and the exact techniques that take corn from “fine” to “how did you make this taste so good.”
Corn is one of the great underappreciated canvases of BBQ cooking. The natural sugars in fresh sweet corn caramelize brilliantly under direct heat, the husk creates a natural steam chamber when left on, and wood smoke turns the whole thing into something almost otherworldly. Let’s make it right.
Why Grilling Is the Best Way to Cook Corn on the Cob
You can boil corn. You can microwave corn. You can roast it in the oven. But none of these methods come close to what grilling does to a fresh ear of sweet corn. And the reason is rooted in the same chemistry that makes everything taste better when it comes off a grill.
The Maillard Reaction and Caramelization
Corn kernels are about 10% sugar by weight when fresh and at peak sweetness. When those sugars hit a hot grill grate at 400°F or higher, two things happen simultaneously. The Maillard reaction creates hundreds of new flavor compounds through a reaction between amino acids and reducing sugars — this is the same reaction that gives bread its crust, steak its sear, and coffee its roast character. At the same time, caramelization converts complex sugars into simpler compounds with deep, butterscotch-like sweetness and beautiful golden-to-amber color.
The result is a kernel that’s simultaneously sweeter, more complex, more savory, and more aromatic than anything boiling water can produce. The char marks aren’t just aesthetic — they carry deep, bitter-sweet flavor compounds that balance the corn’s natural sweetness perfectly.
Why Boiling Corn Falls Short
Boiling corn can produce a perfectly acceptable result — sweet, tender, familiar. But water is an enemy of flavor concentration. It leaches water-soluble sugars and nutrients out of the corn into the cooking water, and it provides zero opportunity for the Maillard reaction or caramelization to occur. The temperature of boiling water is capped at 212°F — nowhere near the temperatures needed for browning chemistry. You’re essentially trading flavor for speed.
“A grilled ear of corn properly caramelized has more flavor complexity than one boiled for twice as long. Heat and fire do what water cannot.” — Competition BBQ pitmaster wisdom
| Method | Max Temp | Caramelization? | Char Flavor? | Time | Result Quality |
|---|---|---|---|---|---|
| Grilling (direct) | 400–600°F | Yes | Yes | 10–15 min | ★★★★★ |
| Grilling (in husk) | 350–400°F | Partial | Subtle | 15–20 min | ★★★★☆ |
| Grilling (foil) | 350–400°F | Minimal | No | 15–20 min | ★★★☆☆ |
| Boiling | 212°F | No | No | 5–8 min | ★★★☆☆ |
| Oven roasting | 400–450°F | Yes | No | 25–30 min | ★★★★☆ |
| Microwave | ~250°F internal | No | No | 3–5 min | ★★☆☆☆ |

Weber Original Kettle Premium 22″ Charcoal Grill
The most iconic grill in America — and the best possible tool for charcoal-grilled corn. High-heat capability, reliable vent control, and the original charcoal grill experience. See our full Weber 22″ charcoal grill review.
View on Amazon →Choosing the Best Corn for Grilling: What to Look For at the Market
The single biggest factor in the quality of your grilled corn — more than technique, more than seasoning — is the freshness and quality of the corn itself. Grilling amplifies what’s already there. Start with mediocre corn and you’ll get mediocre results no matter how good your grill skills are. Start with exceptional sweet corn at peak freshness and you can do almost nothing wrong.
Peak Sweet Corn Season
Sweet corn peaks between July and September in most of North America. This is when corn is picked at maximum sugar content — when you pull it fresh from the stalk and cook it within hours, you’re eating corn at its absolute best. As corn sits after harvest, its natural enzymes begin converting those sugars into starch. After 24 hours off the stalk at room temperature, you’ve already lost a significant portion of that brightness. This is why farmer’s market corn picked that morning tastes so much better than supermarket corn that’s been in cold storage for days.
How to Select Fresh Corn
- Check the silk: Fresh silk is pale gold, slightly damp, and silky. Dry, brown, crispy silk indicates older corn.
- Feel the kernels through the husk: Run your hand gently along the ear. You should feel plump, tightly packed kernels with no gaps. Gaps indicate missing or underdeveloped kernels.
- Check the stem end: Look for a freshly cut stem that’s still moist. A dried-out, shriveled stem means the corn was cut long ago.
- Peel back slightly if permitted: A few pale yellow, plump kernels tightly arranged — not shrunken, not white or overly starchy. Press a thumbnail into a kernel: it should release milky juice, not be dry or watery.
- Look for even husk coverage: Green, tightly wrapped husks all the way to the tip indicate the ear filled out fully.
Corn Varieties for Grilling
| Variety | Sweetness | Texture | Grill Performance |
|---|---|---|---|
| Supersweet (SH2) | Very High | Crisp | Excellent — holds sweetness under heat |
| Sugar Enhanced (SE) | High | Tender | Excellent — classic BBQ corn flavor |
| Standard Sweet | Medium | Tender-firm | Great — caramelizes beautifully |
| Bicolor (peaches & cream) | High | Tender | Excellent — stunning presentation |
| Field/Dent Corn | Low | Starchy, tough | Poor — not suitable for fresh eating |
3 Proven Grilling Methods: In-Husk, Naked, and Foil-Wrapped
There is no single “correct” way to grill corn. There are three distinct methods, each with different results, different advantages, and different situations where they shine. Understanding all three lets you choose the right approach for any scenario — from a weeknight cookout to a competition-level BBQ spread.
Method 1: Naked (Direct Grill) — Maximum Char, Maximum Flavor
Shuck the corn completely, removing all husks and silk. Brush or rub with oil or butter. Place directly over high heat on the grill grate. Turn every 2–3 minutes until kernels are charred in spots and golden all around — typically 10–12 minutes total. This method produces the most dramatic char, the deepest caramelization, and the most complex flavor. It’s the method used by professional grill cooks and most competitive BBQ cooks.
✅ Naked Method Pros
- Deepest, most complex char flavor
- Maximum caramelization of sugars
- Beautiful presentation with char marks
- Fastest method — 10–12 minutes
- Best smoke ring uptake on pellet/charcoal
❌ Naked Method Cons
- Requires more attention — needs frequent turning
- Can overcook quickly at very high heat
- Less forgiving of inattention
- Silk removal can be tedious
Method 2: In-Husk (Steam-Roasting) — Sweet, Tender, Foolproof
Leave the husks on the corn, either completely intact or with the tips peeled back to remove the silk and then folded back up. The husks act as a natural steam packet — trapping moisture and gently steaming the kernels while the outer husks char and smolder. This method is more forgiving and produces exceptionally juicy, tender kernels. The smoke flavor penetrates subtly through the husk. Many cooks soak the ears in water for 15–30 minutes before grilling to add extra steam.
✅ In-Husk Method Pros
- Very forgiving — hard to overcook
- Extremely juicy, tender kernels
- Dramatic presentation (peel at the table)
- Natural steam keeps corn moist
❌ In-Husk Method Cons
- Less char, less caramelization
- Silk can be tricky to remove before grilling
- Takes 15–20 minutes vs 10–12 naked
- Less smoke flavor penetration
Method 3: Foil-Wrapped — Consistent, Butter-Basted, Easy
Shuck the corn, season it with butter, salt, pepper, and any other seasonings, then wrap tightly in heavy-duty aluminum foil. Place over medium-high heat for 15–20 minutes, turning occasionally. The foil creates a sealed steam environment that cooks the corn through and melds all the butter and seasoning into every kernel. This method produces the most consistently cooked corn and is the easiest to manage, especially when cooking for large groups.
✅ Foil Method Pros
- Easiest method for large batches
- Butter infuses deeply into every kernel
- Very consistent results
- Can be assembled ahead of time
❌ Foil Method Cons
- No char — steamed result only
- Least visual appeal
- Less smoke flavor
- Can become soggy if overcooked
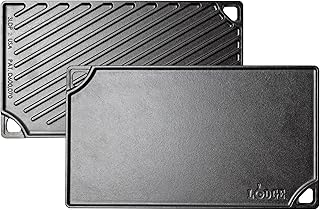
Lodge Cast Iron Grill Pan
For stovetop or camping grill corn when you can’t access an outdoor grill. Cast iron holds and distributes heat perfectly for achieving the char marks and caramelization of an outdoor cook.
View on Amazon →The Classic BBQ Grilled Corn on the Cob Recipe (Step-by-Step)
This is the master recipe — naked direct-grilled corn with a garlic herb butter finish. It’s our most tested, most recommended method. Follow these steps and you will produce the best grilled corn you’ve ever eaten.
Ingredients
Step 1: Prep Your Corn and Make the Garlic Butter
Remove all husks and silk from each ear of corn. Don’t worry about getting every strand of silk — any remaining strands will burn off quickly on the hot grill. In a small bowl, combine the softened butter, minced garlic, half the chopped parsley, salt, and pepper. Mix well and set aside — this goes on after grilling for maximum impact. Before grilling, rub or brush each ear lightly with olive oil. Oil helps conduct heat evenly, prevents sticking to the grill grate, and helps the char develop more uniformly.
Step 2: Preheat Your Grill to High Heat
Preheat your grill to high — 400°F to 450°F measured at the grate level. For a gas grill, set all burners to high and close the lid for 10–15 minutes. For a charcoal grill, use a full chimney of lit coals spread in an even layer and let them ash over completely before you start cooking. A properly preheated grill accomplishes two things: it ensures the grate is hot enough to create immediate char marks (cold grates cause sticking), and it burns off any residue from previous cooks. Clean the grate with a wire brush immediately before placing the corn.
Step 3: Place Corn on the Grill and Develop the Char
Place the oiled corn ears directly on the hot grill grate at a diagonal angle to the grate bars — this maximizes the contact area for char marks and prevents the ears from rolling into the gaps. Leave 2–3 inches of space between ears so heat circulates properly. Let the corn cook undisturbed for 2–3 minutes before turning — rushing this step is the most common reason people don’t get good char marks. You should hear a satisfying sizzle when the corn hits the grate. If you don’t hear it, your grill isn’t hot enough.
Step 4: Turn Every 3 Minutes for Even Char
After 2–3 minutes, use long-handled tongs to rotate the corn a quarter turn (90 degrees). Repeat this process every 2–3 minutes, rotating through all four “sides” of the ear. Total cook time for a medium ear of corn at 400–450°F is 10–12 minutes. You’re looking for golden to deep amber kernels with dark char marks on each surface. A small amount of char is desirable and adds complex bitter-sweet flavor notes that balance the corn’s sweetness. Black burnt kernels that are shriveled and hard are overcooked.
Step 5: Apply Garlic Butter Immediately Off the Grill
The moment the corn comes off the grill is the most critical moment for flavor delivery. The kernels are at their hottest — the heat will immediately melt the compound butter and draw it into every crevice between the kernels. Use a brush, a spoon, or simply press the softened butter directly onto the ear and roll. Work quickly. Add the remaining chopped parsley, a light squeeze of fresh lemon, and a final pinch of flaky sea salt. Serve immediately — grilled corn waits for no one.
OXO Good Grips 16″ Locking Tongs
Long-handled, spring-loaded tongs with a secure locking mechanism. Ideal for rotating corn every 3 minutes without losing grip. The extra length keeps your hands safely away from high-heat grates.
View on Amazon →8 Compound Butter Variations to Transform Your Grilled Corn
The compound butter you choose is as important as the grilling method. Each of these eight variations works beautifully on fresh grilled corn — from classic to international, mild to bold. Make them in advance and store in the refrigerator for up to a week, or freeze in log form for up to three months.
For all compound butters: start with 4 tablespoons of softened unsalted butter as the base. Add the ingredients listed, mix thoroughly, and apply generously to hot corn fresh off the grill. Find your go-to seasoning in our guide to the best barbecue rubs — many of the same flavor profiles translate beautifully into butter form.

Traeger Signature Blend Wood Pellets
When you’re grilling corn on a pellet grill, the wood smoke adds an entirely new dimension. Traeger’s Signature Blend of maple, hickory, and cherry is perfect for corn — subtle smoke that complements without overwhelming the sweetness.
View on Amazon →Timing & Temperature Guide: Doneness Levels for Grilled Corn
Perfectly grilled corn covers a spectrum of doneness — from barely touched with golden color and full crunch, to deeply charred with jammy, caramelized kernels and concentrated sweetness. Your preference will depend on who you’re cooking for and what you’re pairing the corn with. Here’s a complete guide to every doneness level and exactly how to hit it.
| Doneness Level | Grill Temp | Time (Naked) | Time (In-Husk) | Kernel Look | Texture |
|---|---|---|---|---|---|
| Lightly Grilled | 400°F | 6–8 min | 12–14 min | Pale gold, minimal char | Very crisp, juicy |
| Golden Char ⭐ | 400–425°F | 10–12 min | 15–18 min | Deep gold, char marks | Tender-crisp, sweet |
| Deep Char | 425–450°F | 13–15 min | 18–22 min | Dark amber, heavy char | Tender, smoky-sweet |
| Charred Smoky | 450°F+ | 16–18 min | 22–25 min | Near-black char patches | Jammy, concentrated |
Temperature Setup on Different Grills
Grilling Corn on Different Grill Types: Charcoal, Gas, Pellet & Kamado
Every major grill type produces excellent grilled corn, but each one has its nuances. Here’s how to get the best results from whichever grill you’re working with.
Charcoal Grill Corn
Charcoal delivers the most intense, authentic char and a subtle smoky undertone that gas cannot replicate. For corn, use a full chimney of coals spread in a direct configuration — you want even, high heat across the whole grate. The Weber 22″ kettle is the gold standard for this. The key advantage of charcoal is radiant heat: the glowing coals emit infrared radiation that penetrates the corn more deeply than convective heat alone, producing faster, more even caramelization. For a detailed comparison of charcoal’s flavor benefits, see our guide to flavor outcomes on gas vs. charcoal grills. And if you want to compare lump vs. briquettes for your fuel choice, our lump charcoal vs. briquettes breakdown is essential reading.
Gas Grill Corn
Gas grills are the most convenient option and produce excellent results with proper technique. Set all burners to high and preheat for 10–15 minutes. The main challenge with gas grills is flare-ups from corn oil or butter dripping on the burner covers. Our guide to preventing flare-ups on a gas grill has the complete protocol. If you want to compare specific gas grill brands for corn grilling performance, see our Weber Spirit vs. Genesis comparison.
Pellet Grill Corn
Pellet grills at high temperature (400°F+) can produce excellent grilled corn with the bonus of a subtle wood smoke flavor that adds another dimension to the sweetness. Set your pellet grill to its highest temperature setting (or use “High” mode), allow it to fully preheat, then grill naked corn as you would on a gas grill. The indirect convection heat of most pellet grills means you may need an extra 2–3 minutes versus direct-heat grills. If your pellet grill has a flame broiler or direct-flame feature, use it for corn — it dramatically improves char development. See our pellet grill vs. gas grill comparison for context on heat differences between these grill types.
Kamado Grill Corn
Kamado grills — especially ceramic ones like the Big Green Egg or Kamado Joe — are exceptional for corn. Their ceramic walls hold heat extremely efficiently, and once at temperature they maintain almost perfectly even radiant heat from all sides. Set up for direct cooking at 450°F. The ceramic-retained heat produces a uniquely deep caramelization that’s hard to achieve on other grill types. See our kamado grill vs. gas grill comparison for the full breakdown of heat and flavor differences.

Weber Spirit II E-310 Gas Grill
Three burners, 529 square inches of cooking space, and Weber’s legendary reliability. A top-tier gas grill for backyard corn season and everything else. Read our full Weber Spirit II E-310 review.
View on Amazon →Mexican Street Corn (Elote): The Ultimate Grilled Corn Recipe Upgrade
If classic garlic butter corn is the everyday version, elote — Mexican street corn — is the showstopper. It’s the preparation that makes non-corn-lovers reach for a second ear, that gets requested by name at every cookout where it appears, and that proves definitively that corn can be the most exciting thing on a BBQ table. Elote is simply grilled corn on the cob finished with a crema-based sauce, cotija cheese, lime, and chili — but the combination is greater than the sum of its parts.
Elote Ingredients (for 4 ears)
Elote Method
- Grill the corn naked using the master recipe above until you reach Deep Char doneness — 13–15 minutes at 425°F. Elote benefits from more char than classic corn because the crema and cheese will temper the bitterness.
- Mix the crema and mayonnaise together in a shallow bowl. Season with garlic and a pinch of salt.
- While the corn is still hot off the grill, brush or roll it generously in the crema mixture — you want good coverage on all sides.
- Immediately roll or sprinkle the crema-coated corn in the crumbled cotija cheese. Press lightly to adhere.
- Dust with chili powder and smoked paprika. Finish with a squeeze of lime and scattered cilantro. Serve immediately.
What to Serve with BBQ Grilled Corn: Perfect Pairings
Grilled corn is one of the most versatile BBQ sides precisely because it pairs naturally with virtually everything that comes off a grill or smoker. Here’s how to build a complete BBQ menu around grilled corn as the star side dish.
Classic BBQ Pairings
- Baby back ribs or spare ribs — The sweetness of perfectly grilled corn is the natural counterpart to smoky, savory ribs. Follow our BBQ baby back ribs recipe and the 3-2-1 rib method for a complete feast.
- Smoked pulled pork — Serve elote alongside pulled pork sandwiches and you have one of the greatest BBQ meals possible. See our smoked pulled pork recipe.
- BBQ grilled burgers — The ultimate weeknight duo. Our grilled burger recipe with charred corn on the side is a summer classic.
- Grilled chicken thighs — Both take about the same time on a hot grill and the flavors are perfectly complementary. See our guide to grilling chicken perfectly.
Upscale Pairings
- Grilled salmon — Charred corn with herb butter alongside cedar-planked salmon is a restaurant-quality pairing. See our grilled salmon recipe.
- Grilled lamb chops — The sweetness of corn balances beautifully against the richness of grilled lamb. Our grilled lamb chops recipe is the companion dish.
- Grilled steak — Elote with a perfectly seared ribeye is a Tex-Mex steakhouse pairing that never misses. See our guide to grilling the perfect steak.
Vegetarian and Lighter Options
- Grilled vegetables — Corn alongside grilled zucchini, peppers, and mushrooms makes a stunning vegetarian spread. Our guide to grilling vegetables like a pro covers all the techniques.
- BBQ grilled shrimp skewers — A fast, crowd-pleasing combo where everything goes on the grill at the same time. Our BBQ grilled shrimp skewers recipe is the perfect companion.

Cuisinart Deluxe 20-Piece Grill & Prep Set
Everything you need for a complete BBQ session — tongs, spatula, fork, basting brush, corn holders, skewers, and a carrying case. Perfect for corn night and beyond. See our BBQ tool set comparison.
View on Amazon →Make-Ahead Tips, Leftovers & Storage
While grilled corn is genuinely best eaten within minutes of leaving the grill — when the caramelized kernels are hot and the butter is melting into every crevice — there are several smart ways to get ahead on prep and handle any leftovers.
What You Can Prep Ahead
- Compound butters — All eight compound butter variations can be made up to one week in advance and stored tightly wrapped in the refrigerator, or frozen for up to three months in log form. Pull from the freezer 30 minutes before grilling.
- Elote sauce — The crema-mayo mixture can be made 2–3 days ahead and stored covered in the refrigerator.
- Pre-husked corn — Corn can be husked and wrapped individually in damp paper towels up to 4 hours before grilling, then wrapped loosely in plastic and refrigerated. Re-oil before grilling.
- In-husk soak — If using the in-husk method and soaking in water, you can soak ears up to 2 hours ahead and keep them in the water until ready to grill.
Storing and Reheating Leftover Grilled Corn
Leftover grilled corn should be wrapped tightly or stored in an airtight container in the refrigerator and used within 3–4 days. To reheat: brush with a little butter and place in a 375°F oven for 8–10 minutes, or microwave wrapped in a damp paper towel for 1–2 minutes. The char won’t re-develop (you can’t un-caramelize and re-caramelize sugars in a microwave), but the flavor will still be far superior to leftover boiled corn.
What to Do with Leftover Grilled Corn Kernels
Cut leftover kernels off the cob and use them in: grilled corn salsa, corn chowder, corn and black bean tacos, corn risotto, esquites (elote in a cup with leftover crema), or tossed into our smoked mac and cheese for a charred corn variation that will absolutely blow people’s minds. Leftover grilled corn kernels can also be frozen for up to three months — spread them on a baking sheet to freeze individually before transferring to a freezer bag.
Can You Freeze Grilled Corn on the Cob?
Yes — but with caveats. Whole grilled corn on the cob can be frozen, but the texture of the kernels changes significantly after freezing and thawing. The crunch is gone and the kernels become noticeably softer. For most applications, it’s better to cut the kernels off the frozen cob and use them cooked into dishes rather than reheating the whole ear. If you know you’ll have extra corn, consider cutting and freezing the kernels immediately after grilling rather than after a refrigerated stay.
Pro Tips, Troubleshooting & Advanced Techniques
These are the techniques and insights that separate a good grilled corn cook from a great one. Most of them are simple shifts in approach that compound over a season of cooking.
The Milk Soak Trick for Extra Sweetness
For an unusual but effective trick used by some restaurant cooks: soak husked corn ears in a mixture of 1 cup milk, 1 cup water, and 2 tablespoons sugar for 30 minutes before grilling. The milk proteins help retain moisture during the high-heat cook, and the sugar enhances caramelization. This works particularly well with corn that’s slightly past its sweetness peak.
Smoking Corn at Low Temperature First
For an advanced technique that adds serious complexity: start your corn at 225°F on a pellet grill or charcoal smoker for 30 minutes before increasing heat to finish with a direct char. The initial low-temperature smoke phase infuses the kernels with deep wood smoke flavor before the high heat caramelizes the exterior. This is particularly spectacular with cherry or apple wood. It’s essentially doing for corn what the indirect-to-direct method does for steaks and ribs.
Corn Holder Stakes for Serving
Corn holder stakes — the small two-pronged skewers that insert into the cut ends of the cob — are inexpensive and make a meaningful difference in the eating experience. They keep hands clean, give you something to rotate the ear with while eating, and allow you to butter more efficiently without burning your fingers. They’re one of those accessories that seem unnecessary until you use them once.
The Char-Rest Method
For maximum flavor concentration: after charring the corn to your desired doneness, wrap it immediately in foil with a pat of butter inside and let it rest off the heat for 3–5 minutes before serving. This brief resting period does two things — it allows the butter to melt into the hot kernels, and it lets any remaining moisture redistribute through the ear, resulting in more evenly juicy corn from tip to tip.
Common Mistakes to Avoid
- Not preheating enough. Cold grate = sticking and steaming instead of searing. Always preheat fully and clean the grate immediately before adding corn.
- Using margarine instead of real butter. The water content in margarine creates steam that inhibits caramelization. Use real unsalted butter always.
- Applying butter before grilling (on naked corn). Butter burns at around 300°F — applying it before high-heat direct grilling causes burning rather than browning. Oil the corn before grilling, butter after.
- Grilling corn straight from the refrigerator. Cold corn placed on a hot grill creates a large temperature differential that can result in undercooked centers with overcharred exteriors. Let corn come to room temperature for 20–30 minutes before grilling.
- Overcrowding the grill. Corn needs space around it for heat to circulate. Leave at least 2–3 inches between ears and don’t pack them in so tightly that you can’t comfortably turn them.
- Using the wrong grill cleaner. Residue on grill grates from improper cleaning can affect food flavor. Our guide to the best barbecue grill cleaners covers the right products for different grate materials.

Fox Run Stainless Steel Corn Holders (8 pairs)
Sharp two-prong corn cob holders in dishwasher-safe stainless steel. Firm grip, easy to insert, and a must-have for serving corn at any outdoor event. One of the most underrated BBQ accessories.
View on Amazon →Frequently Asked Questions: BBQ Grilled Corn on the Cob
Q: Should I soak corn in water before grilling?
Soaking is only necessary if you’re grilling corn in the husk. The soak adds water to the husk so it doesn’t burn through before the corn finishes cooking. For naked direct-grilling, soaking is completely unnecessary and can actually slow down the caramelization process by adding excess moisture to the kernels. Soak in-husk corn for 15–30 minutes; skip the soak entirely for naked corn.
Q: How do I grill corn without it burning?
The key is turning frequently — every 2–3 minutes rather than leaving it on one side. Also, moderate your grill temperature: 400–425°F is ideal for naked corn. At very high temperatures (500°F+), corn can go from perfect to burnt very quickly. If your grill runs hot, use medium-high rather than full high. Some char is good; shriveled, black, dry kernels are overcooked.
Q: How do I know when grilled corn is done?
Visually, look for golden-to-deep-amber kernels with distinct char marks on each side. Press a kernel with your fingernail — it should yield easily and release a small amount of milky liquid. The kernels should not look shrunken or dried out. For in-husk corn, the husk should be completely charred and the silk at the tip should be burnt through. The whole ear should feel tender when squeezed with tongs (use protection — it’s hot).
Q: Can I grill frozen corn on the cob?
Technically yes, but the results are notably inferior to fresh corn. Frozen corn has been blanched before freezing, which means the sugars have already begun converting to starch and some cell structure has been compromised. If you must use frozen ears: thaw completely in the refrigerator overnight, pat very dry, and grill at slightly lower temperature (375°F) for a longer time (15–18 minutes) to ensure the center heats through before the exterior overcooks. For a deeper look at cooking frozen items, see our guide on grilling frozen meat safely — similar principles apply.
Q: What grill temperature is best for corn on the cob?
For naked corn, 400–425°F at grate level is the sweet spot — hot enough to caramelize quickly and develop char marks, but controlled enough to cook the kernels through before the exterior burns. For in-husk corn, the same temperature range works, but the husk insulates the kernels so the overall cooking time is longer. For foil-wrapped corn, medium-high (375°F) works best since you’re relying on steam rather than direct heat.
Q: Is it better to grill corn with or without the husk?
Both methods produce excellent results but with different flavor profiles. Naked (no husk) grilling produces more char, more caramelization, more complex flavors, and a slightly firmer texture — it’s the method favored by professional grill cooks. In-husk grilling produces juicier, more tender kernels with a milder, more “steamed corn” flavor with subtle smoke. The best approach is to serve both at a cookout and let your guests discover their preference.
Q: Can I prep grilled corn in advance for a party?
Yes — with the foil method. Prepare the corn completely (buttered and seasoned) wrapped in heavy foil, then grill the foil packets up to 30 minutes before serving. They’ll stay hot inside the foil for a surprisingly long time. Alternatively, grill naked corn to about 80% done (8–10 minutes), remove, and finish to full doneness just before serving (3–4 minutes more). This is the restaurant approach to high-volume corn service.
Q: What can I put on grilled corn besides butter?
The possibilities are vast — from the classic Elote (Mexican street corn with crema, cotija, lime, and chili) to parmesan and basil, truffle oil and chives, honey chipotle, miso brown butter, and BBQ rub butter. Grilled corn is also excellent with just a squeeze of lime and a pinch of tajín, or simply flaky sea salt and good olive oil for a more restrained presentation that lets the corn’s natural sweetness speak.
Q: Can I add wood smoke flavor to grilled corn?
Yes — and it’s fantastic. On a charcoal grill, add a chunk of apple or cherry wood to your coals for a subtle fruity smoke that complements the corn’s sweetness. On a gas grill, use a smoke box loaded with cherry wood chips. On a pellet grill, just cook at temperature — the pellets already provide the smoke. Even subtle wood smoke adds a remarkable additional layer to already-caramelized grilled corn.
Q: How do I remove silk from corn before grilling?
The easiest method: peel back all the husks to expose the cob, grab the silk at the top, and pull downward in a firm motion — most of the silk comes off in one clean pass. For stubborn strands, a dry vegetable brush or a dampened paper towel works well. Alternatively, for the in-husk method, pull the husks back about 3/4 of the way, remove the silk, then fold the husks back up and tie with a strip of soaked husk or kitchen twine. Any silk you miss will burn off harmlessly on the grill.
Q: Is grilled corn healthy?
Plain grilled corn is a naturally nutritious food — it’s a good source of fiber, B vitamins (especially B6 and folate), magnesium, and antioxidants including lutein and zeaxanthin, which are important for eye health. A medium ear of corn has approximately 90 calories before butter. The main caloric considerations come from added butter and other toppings. For context, a tablespoon of compound butter adds about 100 calories. Elote-style with crema and cotija is significantly more calorie-dense — delicious, but a fuller meal.
Q: What’s the best grill for making grilled corn?
For charcoal corn specifically, a quality charcoal grill produces the most authentic result. For convenience, any gas grill with multiple burners and good heat output works excellently. Kamado grills produce exceptional caramelization due to their superior heat retention. Pellet grills add wood smoke complexity. For budget buyers, even an entry-level charcoal kettle grill will produce genuinely excellent corn — it’s one of those recipes where the grill type matters less than the technique.
The Best Grilled Corn of Your Life Is One Cookout Away
If there’s one thing this guide makes clear, it’s that great BBQ grilled corn on the cob requires almost nothing in terms of complexity — just quality corn, a properly preheated grill, the right technique, and the right finishing butter. The difference between forgettable grilled corn and the ear that makes every person at your cookout immediately ask for the recipe is almost entirely technique and freshness.
Start with the farmer’s market or the local farm stand at the peak of summer. Husk it, oil it, put it on a screaming-hot grill, turn it every three minutes, and pull it when those kernels are golden amber with beautiful char marks. Hit it immediately with the garlic herb compound butter while the heat is at its maximum — that moment when butter meets hot corn is where all the magic happens. Rest for three minutes in foil if you want to take it to the next level. Serve within minutes.
Once you’ve nailed the classic version, explore the compound butter variations, graduate to elote, smoke it low before you sear it high, and experiment with the doneness levels until you know exactly where your perfect corn lives. It’s a simple recipe with enormous ceiling — a dish that rewards attention and care with flavor that no boiled ear of corn will ever match.
Looking for more BBQ recipes to build the perfect menu around your grilled corn? Our smoked pulled pork, BBQ baby back ribs, and perfect grilled burger recipes are the natural companions. And when you’re ready to level up your whole BBQ setup, our guide to the best BBQ overall covers the complete landscape of grills and smokers to help you find your perfect outdoor kitchen.
🌽 Ready to Make the Best Grilled Corn of Your Life?
Grab your corn, fire up the grill, and make your summer cookout legendary. Browse all our BBQ recipes, grill reviews, and gear guides below.
Full Recipe & More at BBQGrillandSmoker.com →
GrillPro Non-Stick Corn Grilling Basket
Holds 4 ears of corn securely while allowing full 360° heat contact. Perfect for high-heat grilling without the risk of ears rolling into gaps in the grate. Non-stick coating for easy cleanup and no sticking.
View on Amazon →