The Ultimate Homemade BBQ Rub Recipe:
From Base Ratios to Competition-Grade Blends
A great BBQ rub is not a recipe — it is a philosophy. The balance between sweet, salty, spicy, and savory determines whether a brisket is merely edible or genuinely unforgettable. Every pitmaster has a rub. The best pitmasters understand why theirs works.
Walk into any grocery store and you will find a shelf lined with pre-made spice blends promising incredible bark and restaurant-grade flavor. Most of them deliver mediocre results, underdosed heat, over-sugared profiles that burn before bark forms, and sodium levels calibrated for shelf life rather than actual cooking. The truth that serious backyard pitmasters have known for decades is refreshingly simple: making your own BBQ dry rub takes fifteen minutes, costs a fraction of the price, and produces results that no commercial blend can match — because yours is tuned to your cooker, your preferred wood smoke, and the specific cut of meat you are cooking.
This comprehensive guide is the definitive resource for building, understanding, scaling, and applying homemade BBQ rub recipes. Whether you are new to the smoker or chasing a competition ribbon, the principles here will transform how you think about seasoning. We are going deep on the chemistry of spice, the physics of bark formation, the logic of salt timing, and the art of balancing a custom blend for every cut from brisket to baby backs.
If you are still exploring your setup and looking for the best barbecue smokers to pair with your rubs, or just beginning your journey and need a solid smoker guide for beginners, we have full resources to get you equipped. But right now, let us talk about the spice that makes smoke worthwhile.
1. Why Homemade Beats Store-Bought Every Time
The commercial dry rub market is enormous and largely underwhelming. Most mass-market products share a handful of structural problems that no amount of marketing can disguise. Understanding those problems is the fastest way to understand what a good rub looks and tastes like.
The Core Problems With Commercial Rubs
First, anti-caking agents. Commercial rubs must flow freely through shaker holes for months — sometimes years — on a retail shelf. To achieve this, manufacturers add silica dioxide, calcium silicate, and similar agents that have no flavor contribution whatsoever. These agents actively dilute your spice concentration and can interfere with bark formation on the smoker grate.
Second, salt loading. Salt is cheap, heavy, and makes spice blends taste bolder at low doses. Many commercial blends are 40% to 50% salt by weight, which means you either over-season your meat or you under-season it trying to manage sodium. Either way, the balance is compromised before you even season.
Third, stabilized heat profiles. Capsaicin compounds are volatile and can fade over storage. To compensate, many producers use white pepper (which is more stable than cayenne) in quantities that create a flat, one-dimensional heat that does not layer or develop during a cook the way fresh cayenne and black pepper do.
What Homemade Gives You
When you make your own rub, you control four things that commercial products cannot give you: freshness, ratio precision, salt independence, and cut-specific customization. Freshly ground black pepper has terpene compounds — particularly β-caryophyllene and limonene — that volatilize beautifully in the first hour of smoke exposure. Pre-ground commercial pepper is nearly always oxidized, with those aromatic compounds already gone. The difference in bark character is audible: your crust will crack rather than just darken.
Salt independence deserves particular emphasis. When you keep your rub salt-free or low-sodium and add kosher salt separately, you can dry-brine your meat overnight without worrying about the complex spice blend interacting unpredictably with osmosis over many hours. This is one of the most important professional techniques for producing consistently moist, flavorful smoked meat, and it requires a homemade rub to execute properly.
- Full control over salt-to-spice ratio
- Maximum freshness — no anti-caking agents
- Customizable for each cut of meat
- Fraction of the cost (5–8× cheaper per ounce)
- No preservatives or artificial flow agents
- Can tune heat level precisely
- Builds genuine pitmaster knowledge
- Anti-caking agents dilute spice concentration
- High sodium obscures other flavors
- Stabilized, flat heat profiles
- Pre-oxidized, stale ground spices
- One-size-fits-all ratio for all cuts
- Expensive per ounce for actual spice content
- No adaptation possible
The economics are stark, too. A well-stocked spice pantry built for BBQ rub production costs around $25–$35 and produces roughly 40–50 batches of rub. The equivalent in premium commercial blends would run $120–$200. The money you save in one grilling season pays for a quality set of barbecue tools many times over.
2. The Flavor Science of a Dry Rub
Understanding what happens to your spices during a long smoke changes the way you build every blend. A dry rub is not simply a flavoring — it is an active participant in the Maillard reaction, bark formation, moisture management, and smoke adhesion. Each component has a specific chemical role.
The Six Flavor Pillars
Every well-balanced BBQ rub operates across six flavor dimensions. The relative emphasis shifts based on the cut and the cook style, but all six should be present in every serious blend.
What Actually Happens During the Cook
When your seasoned meat enters the smoker, the surface temperature begins climbing toward 165–180°F within the first 30–45 minutes. At this range, several transformations occur simultaneously. Sugar begins to caramelize at around 160°F, creating new flavor compounds including furans, lactones, and various aldehydes that contribute the toasty, complex notes in good bark. Proteins in the outermost meat layer undergo Maillard browning, which requires both heat and the presence of sugars — this is why sugar in the rub dramatically accelerates bark formation.
Meanwhile, the fat-soluble compounds in paprika, pepper, and other oleoresin-bearing spices are being driven into the meat’s outer fat layer by heat. These oil-soluble flavor compounds — the ones responsible for the deep, resonant smokiness and spice depth you taste well below the bark — require fat contact to penetrate. This is why lean cuts like pork loin or chicken breast benefit from a light oil pre-coat before rubbing, while fatty cuts like brisket or pork shoulder need no assistance.
The smoke itself interacts directly with the rub surface. Phenolic compounds in wood smoke — guaiacol, syringol, and eugenol — bind to the outer layers of proteins and partially-caramelized sugars, creating the smoke ring and contributing the signature BBQ aroma. A rub with coarse texture (like cracked black pepper) creates micro-pockets that trap more smoke compounds against the meat surface. This is one reason why the classic Central Texas brisket rub — which is nothing more than coarse salt and coarse black pepper — produces such intense smoke character. The coarseness amplifies smoke adhesion.
The Role of Particle Size
Particle size is one of the most overlooked variables in rub formulation. Fine powders (such as garlic powder and onion powder) penetrate the surface more effectively and create a tighter, smoother bark. Coarse elements (cracked black pepper, dried herb flakes, raw sugar crystals) create textural contrast in the finished crust and trap smoke compounds more efficiently. The ideal rub blends both: a fine base that adheres uniformly, with coarse accent elements that add texture and visual appeal.
For reference on how wood smoke character interacts with rub flavor, understanding hickory vs. mesquite smoke flavor profiles will help you design rubs that complement rather than compete with your chosen wood. A heavy mesquite smoke pairs better with bold, simple rubs; a gentle apple or cherry smoke can handle more complex herbaceous blends without being overwhelmed.
3. The Master Base BBQ Rub Recipe
Every pitmaster’s journey begins with a master base recipe — a balanced, all-purpose blend that works reliably on any cut before you start customizing. The recipe below represents the ideal starting ratio: versatile enough for pork, beef, and chicken, with a bark-friendly sugar base and a clean, layered heat profile.
🌶️ Master BBQ Dry Rub — All-Purpose Base Blend
🧂 Base Ingredients
- Kosher salt (Diamond Crystal)2 tbsp
- Dark brown sugar, packed2 tbsp
- Smoked paprika2 tbsp
- Garlic powder1 tbsp
- Onion powder1 tbsp
- Coarsely cracked black pepper1½ tbsp
- Cayenne pepper1 tsp
- Dry mustard powder1 tsp
- Ground cumin1 tsp
- Dried oregano, ground½ tsp
- Celery seed, ground½ tsp
🥄 Method
- Measure all dry ingredients into a medium mixing bowl, breaking up any brown sugar clumps with fingertips.
- Whisk vigorously for 90 seconds until the color is uniform — no streaks of paprika or brown sugar.
- Taste a pinch on your fingertip. Adjust: more sugar for a sweeter bark, more cayenne for heat, more salt if your meat is fresh and you are cooking same-day.
- Transfer to an airtight glass jar. Label with date and contents.
- Apply generously: 1 tablespoon per pound of meat as a baseline, adjusted up for thicker cuts.
Understanding the Master Ratio
The recipe above uses a 2:2:2:1:1 core ratio — paprika:sugar:salt:garlic:pepper — which is the backbone of most American BBQ rub traditions. Here is a breakdown of why each component earns its place at those specific proportions:
| Ingredient | Amount | Primary Role | What Happens When You Use Too Much |
|---|---|---|---|
| Smoked Paprika | 2 tbsp | Color, oil-soluble sweetness, smoke base | Bark looks muddy red, flavor becomes oddly papery |
| Brown Sugar | 2 tbsp | Bark formation, caramelization, sweetness | Burns before bark sets on high-heat grills; muddy sweetness |
| Kosher Salt | 2 tbsp | Moisture draw, protein denaturing, flavor amplifier | Oversalted meat; excessive moisture loss if left overnight |
| Garlic Powder | 1 tbsp | Umami depth, Maillard reaction contributor | Bitter, “burnt garlic” notes; garlic-forward flavor dominates |
| Black Pepper (coarse) | 1½ tbsp | Aromatic terpenes, bark texture, fresh heat | Overpowering pepper heat; masks other flavors |
| Cayenne | 1 tsp | Back-of-throat heat, capsaicin depth | Overwhelming heat; children and heat-sensitive guests suffer |
| Dry Mustard | 1 tsp | Emulsification aid, subtle tang, bark binding | Bitter, sharp mustard flavor overwhelms other notes |
| Ground Cumin | 1 tsp | Earthy depth, Tex-Mex bridge note | Tastes like taco seasoning rather than BBQ rub |
For more context on how rubs pair with specific BBQ styles and sauces, our guide to the best barbecue rubs and best barbecue sauces will show you how seasoning layers stack through a complete cook.

4. Sugar Science: Bark, Crust & Caramelization
Sugar is the most misunderstood ingredient in a BBQ rub. Home cooks often view it as a sweetener. Serious pitmasters know it is primarily a bark agent — a structural compound that transforms the exterior of your meat through controlled thermal chemistry. Getting the sugar right changes everything about how your finished cook looks, feels, and tastes.
How Sugar Builds Bark
When sugar hits the surface of seasoned meat and enters a low-and-slow smoker, a cascade of events occurs. At around 115°F, hygroscopic sugars begin drawing additional surface moisture out of the meat, creating a slightly tacky pellicle that causes smoke particles to adhere more effectively. At around 160°F, the sugar begins to caramelize — a set of over 100 distinct chemical reactions that produce the caramel, toffee, and slightly bitter compounds responsible for dark, complex bark flavor. At 220°F+, the Maillard reaction between amino acids in the meat surface proteins and the sugars creates hundreds more flavor compounds that are entirely absent in unseasoned or sugar-free preparations.
The critical implication: if you are cooking at high temperature (375°F+ for grilling), high-sugar rubs will burn before bark has time to form. This is why rubs designed for the grill use less sugar or use turbinado (raw) sugar, which has a higher burning threshold. Conversely, low-and-slow smoker cooks can use more sugar because the long, low heat allows caramelization to occur before combustion.
Sugar Types and Their BBQ Behavior
| Sugar Type | Caramelization Temp | Best For | Flavor Notes | Burn Risk |
|---|---|---|---|---|
| Dark Brown Sugar | ~160°F | Low-and-slow smoking (ribs, brisket, pork) | Molasses, toffee, deep caramel | High above 300°F |
| Turbinado (Raw) Sugar | ~170°F | Grilling, high-heat cooks | Light caramel, mild molasses | Medium |
| Coconut Sugar | ~175°F | Poultry, fish, medium heat | Butterscotch, light caramel | Medium |
| Maple Sugar | ~180°F | Pork, poultry, lamb | Maple, vanilla undertones | Low |
| White Granulated | ~165°F | Mixed-use rubs | Neutral sweet | High at high temps |
| Honey Powder | ~150°F | Chicken, ribs, light pork | Floral honey, light caramel | High — use sparingly |
The 3:2:1 Sugar Rule for Smoking
A practical guideline used by competition teams: in a smoked meat rub, the sugar-to-salt ratio should be approximately 3:2 by volume when cooking at 225–250°F. At higher temperatures (275°F+), drop to 2:2 or even 1:2 to prevent burning. At temperatures above 325°F (indirect grilling zone), use turbinado only and keep sugar below 15% of total rub volume.
💡 The Bark Recovery Technique
If you wrap your brisket or pork shoulder in butcher paper during the stall (the Brisket Texas Crutch method), the bark will soften from steam. To recover it, unwrap the meat for the final 45–60 minutes of the cook and raise temperature to 275°F. The residual sugars in the rub will re-crisp beautifully.
For those working with equipment that has specific heat management characteristics, understanding charcoal grill temperature control becomes crucial when deciding on your rub’s sugar load. Unpredictable temperature swings can turn a perfectly balanced rub into a charred crust.
5. Layering Heat: Peppers & Spice Logic
Heat in a BBQ rub is not a single ingredient — it is a spectrum. Different pepper compounds activate at different temperatures, dissolve in different carriers (fat versus water), and hit different parts of your mouth and throat. A sophisticated rub does not simply add cayenne; it architects a heat experience with texture, timing, and depth.
The Three Heat Zones
Front-of-mouth heat is produced by black and white pepper’s piperine compound, which activates immediately on contact with the tongue and dissipates quickly. This is the bright, snappy heat you taste in the first bite of a well-peppered brisket slice.
Mid-palate heat comes from milder chile powders — ancho, guajillo, New Mexico red — which contain capsaicin relatives (capsaicinoids) that build more slowly but create a rounder, less sharp sensation. They also contribute color and a subtle smokiness distinct from smoked paprika.
Back-of-throat heat is the territory of cayenne, habanero powder, and ghost pepper extracts. Capsaicin binds to the TRPV1 receptor and creates a sustained burning sensation. This is the heat that makes your guests ask “what is in this?” well after they’ve swallowed. It is powerful in small doses and can easily overwhelm a blend if over-applied.
Heat Layering in Practice
Here is a practical heat-layering formula for a medium-heat all-purpose rub serving 6–8 people:
Heat Component Spectrum — Medium Rub Profile
Adjusting for Audience and Event
When cooking for families with children, pull cayenne to ¼ tsp and increase smoked paprika to compensate for volume. When cooking for heat enthusiasts, layer in chipotle morita (smoky, medium heat) and increase cayenne gradually in ¼ tsp increments, tasting as you go. Never add more than 2 tsp of cayenne to a ½-cup batch — beyond that point, the heat becomes medicinal rather than pleasurable.
White pepper is your secret weapon for heat stability in rubs that will be stored for months. Piperine in white pepper is more oxidatively stable than capsaicin, which means your heat level remains more consistent over a 3–6 month storage period. Many competition teams use a 60:40 white-to-black pepper split in their master blends specifically for this reason.
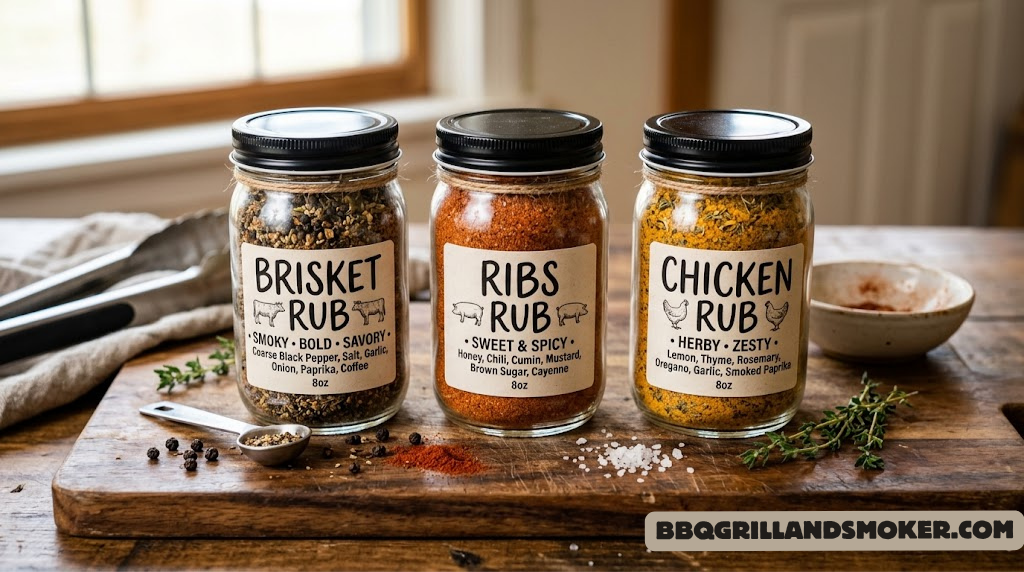
6. Cut-Specific Rub Variations: Tailoring Your Blend
The master base recipe gives you a reliable all-purpose foundation, but the best rubs are cut-specific. Brisket, ribs, pork shoulder, and chicken each have different fat compositions, cooking temperatures, target textures, and flavor affinities. Optimizing your rub for each cut is what separates a good backyard cook from a great one.
| Cut | Cook Style | Sugar Adjust | Salt Adjust | Key Additions | Remove from Base |
|---|---|---|---|---|---|
| Beef Brisket | 225–250°F, 12–18hr | Reduce sugar 30% or remove | Keep; dry brine separately | Coarse black pepper (double), espresso powder, smoked salt | Cumin, oregano |
| Baby Back Ribs | 225°F, 5–6hr | Increase sugar 25% | Moderate | Turbinado sugar for sweet glaze, celery salt, dry mustard | Nothing |
| Pork Shoulder/Butt | 225–250°F, 8–14hr | Keep or increase slightly | Increase | Brown sugar, cinnamon pinch, ginger powder, apple cider vinegar powder | Nothing |
| Whole Chicken | 275–325°F, 2–3hr | Reduce; use turbinado | Reduce | Dried herbs (thyme, rosemary, sage), lemon zest powder, garlic double | Cayenne or halve it |
| Chicken Thighs | 275–325°F, 1.5–2hr | Low sugar | Normal | Smoked paprika double, oregano, fennel seed | Cumin |
| Pork Ribs (St. Louis) | 225°F, 6–7hr | High sugar | Moderate | Maple sugar, chipotle, extra garlic | Nothing |
| Salmon/Fish | 180–225°F, 2–4hr | Use only brown or coconut sugar, light hand | Very light | Dill, lemon pepper, fennel, white pepper | Cumin, cayenne, black pepper (or cut to ¼) |
| Beef Short Ribs | 250°F, 8–10hr | Low | High | Espresso, ancho chile, extra black pepper | Sugar mostly |
The Brisket Rub: Keep It Simple, Make It Count
The Central Texas approach to brisket seasoning is deliberately stripped-back: equal parts kosher salt and coarse-cracked black pepper, sometimes with a touch of garlic powder. This “SPG” (Salt-Pepper-Garlic) rub has dominated competition BBQ for decades because it does not compete with the deep, funky, beefy flavor of a well-managed brisket cook. The coarse black pepper creates a visually dramatic, crackly bark. The salt dry-brines for 24+ hours. The garlic powder adds a whisper of Maillard depth without imposing its own flavor narrative.
Adding paprika or significant sugar to a brisket rub is not wrong — it is just a different style. Kansas City and Memphis traditions both incorporate sweeter brisket rubs. The key is understanding that paprika and sugar change the bark color dramatically (from dark brown to deep mahogany-red) and add sweetness that may clash with a bold, fatty brisket unless your sauce bridges the gap.
For detailed brisket smoking technique, our guide on how to keep smoked meat moist through temperature and moisture control pairs directly with rub application strategy. And to understand smoke ring formation and meat color changes, knowing your rub chemistry is the first step.
The Rib Rub: Sweet, Sticky, Complex
Baby back ribs are the canvas that loves a sweet rub. The relatively thin meat and high collagen content means they cook faster and benefit from more sugar-forward bark development. A great rib rub builds a sticky, lacquered exterior that caramelizes beautifully when you glaze with sauce in the final 30 minutes of cooking. If you want to master the 3-2-1 method for ribs, our guide on smoking ribs with the 3-2-1 method pairs directly with rub design choices. For baby back rib recipe inspiration, see our BBQ baby back ribs recipe.

7. Salt Ratios & Pre-Salting Strategy
Salt is the most powerful ingredient in your rub — and the most dangerous to mismanage. It is also the ingredient that most home cooks get wrong, often in the same way: they season and immediately cook, missing out on the profound textural and flavor benefits of strategic pre-salting.
How Salt Transforms Meat at the Molecular Level
When salt contacts raw meat, osmosis begins immediately. In the first 20–30 minutes, salt draws moisture to the surface — you will see droplets forming. This is the “wrong time” window: if you cook now, you are essentially steam-cooking the surface with the meat’s own expelled moisture, which inhibits crust formation.
If you wait 45–60 minutes, the salt-brine reabsorbs back into the meat via diffusion, carrying dissolved flavor compounds with it. The surface is now drier than it was, which is ideal for bark formation. If you wait 8–24 hours (dry brining), the full protein denaturing and moisture-redistribution cycle completes. The meat’s proteins restructure to hold moisture more effectively during the cook — the result is noticeably juicier finished meat despite the extended surface drying.
Salt Type Matters More Than You Think
Diamond Crystal kosher salt is the industry standard for dry rubs and brining. It has larger, hollow flake crystals that measure differently by volume than Morton kosher salt (which is denser and more irregularly shaped) and table salt (which is fine-ground and nearly twice as salty by volume). Always specify which salt type your rub uses, because the same “2 tablespoons” instruction will produce significantly different results depending on the salt.
For reference: 1 tablespoon Diamond Crystal ≈ 0.75 tablespoon Morton ≈ 0.5 tablespoon table salt in terms of effective salinity. Never swap salt types without adjusting quantities.
The Professional Approach: Salt-Free Rub + Separate Dry Brine
Many competition pitmasters keep their spice rub entirely salt-free and apply salt separately as a dry brine 12–24 hours before the cook. This approach offers three advantages: (1) you can adjust the salt level per cut and per cook without reformulating your rub, (2) the spice rub can be stored indefinitely without hygroscopic salt drawing moisture out of other ingredients, and (3) you can experiment with different salt types (smoked salt, sel gris, fleur de sel) on the same base rub for varied results.
This technique aligns closely with how grilling versus smoking heat and time mechanics work differently: smokers give you time for a full dry-brine cycle, while grills often don’t, changing your salt strategy entirely.
8. Blending Herbs & Aromatics: The Finishing Layer
Herbs are the most overlooked component of a great BBQ rub. Most standard recipes treat them as an afterthought — a pinch of oregano or thyme added for visual interest. In reality, dried herbs provide a complexity layer that no amount of additional paprika or pepper can replicate.
Why Herbs Behave Differently on the Smoker
Fresh herbs would simply burn in a long cook environment. Dried herbs, however, concentrate their volatile oil content during the drying process and then slowly release those oils during a smoke cook. The key is understanding which herbs survive long cooks (woody herbs like thyme, rosemary, and oregano) versus which herbs should only be used for short, higher-heat cooks (delicate herbs like basil, tarragon, and parsley, which lose their aromatic character and turn weedy-tasting in extended heat).
Ground dried herbs also integrate differently than whole dried herbs. Ground oregano, for example, releases more surface area for flavor extraction immediately, while dried whole thyme leaves hold their flavor longer during a multi-hour cook. For the best of both worlds, use a blend: ⅔ ground herb for immediate integration, ⅓ whole dried leaf for sustained fragrance through a long smoke.
| Herb | Flavor Profile | Best Cuts | Heat Survival | Suggested Amount (per ½ cup rub) |
|---|---|---|---|---|
| Dried Thyme | Earthy, slightly floral, minty | Chicken, pork, lamb | Excellent | ½–1 tsp |
| Dried Oregano | Slightly bitter, warm, herbaceous | Beef, pork, chicken | Excellent | ½ tsp |
| Dried Rosemary (ground) | Piney, resinous, camphoraceous | Lamb, pork loin, chicken | Very good | ¼–½ tsp (potent) |
| Dried Sage | Earthy, slightly peppery, savory | Pork, turkey, duck | Very good | ¼–½ tsp |
| Dried Marjoram | Sweeter than oregano, floral | Pork, lamb, poultry | Good | ½ tsp |
| Celery Seed | Savory, slightly bitter, umami | All cuts — universal | Excellent | ½ tsp |
| Dried Basil | Sweet, slightly anise-like | Chicken only, short cooks | Poor in long smoke | ¼ tsp (short cooks only) |
The Aromatic Anchors: Garlic and Onion Powder
Garlic powder and onion powder are not merely convenience ingredients — they are fundamental aromatic anchors with specific chemistry. Garlic powder contains S-allyl cysteine sulfoxide compounds that transform through Maillard reactions into novel flavor compounds not present in fresh garlic. The resulting flavor is simultaneously sweet, savory, and deeply umami — different from fresh garlic’s sharp, pungent character. This is why garlic powder is not inferior to fresh garlic for BBQ applications; it is simply a different ingredient with a different role.
The ideal garlic-to-onion ratio in a general-purpose rub is approximately 1:1 by volume. Some pitmasters favor 2:1 garlic-to-onion for beef (where the deeper savory note complements bold beef flavor) or 1:2 for pork (where the slightly sweeter, milder onion character suits the pork’s natural sweetness).
Umami Boosters: The Advanced Layer
Once you are comfortable with the base ratios, consider adding umami-boosting ingredients that elevate perceived savoriness without changing the flavor profile’s character. Mushroom powder (porcini or shiitake) adds a subtle, woodsy, deeply savory note that is essentially undetectable as mushroom but dramatically amplifies every other savory component. A pinch of MSG is equally effective and the most direct umami delivery mechanism available. Soy sauce powder or aminos powder adds salt-flavored umami with a slightly fermented depth that works beautifully in beef and pork rubs.
These umami boosters are why some BBQ rubs seem to produce more complex, restaurant-quality flavor even with simple base spice ratios. The umami amplification creates the perception of depth and complexity that makes judges and guests pause and ask “what is in this rub?” For more on what makes a great rub in competition and backyard settings, see our round-up of the best barbecue rubs and how commercial versions measure up.
9. Application Methods & Timing
Even a perfect rub can underperform if applied incorrectly. The method, timing, quantity, and surface preparation before application all meaningfully affect how the rub adheres, penetrates, and performs during the cook.
Surface Preparation
Before applying any rub, pat the meat surface completely dry with paper towels. Wet surface proteins do not allow rub adhesion — the moisture creates a barrier that prevents the spice blend from bonding with the outer meat layer. This is especially critical for poultry and fish. For beef and pork with fat caps, score the fat in a crosshatch pattern (½-inch grid, cutting through fat but not into muscle) to allow the rub to penetrate below the fat surface. This prevents the classic problem where beautifully-rubbed brisket has a perfectly seasoned bark on the meat side but a flavorless, pale fat cap.
The “Press, Don’t Rub” Principle
Despite being called a “rub,” the most effective application technique is pressing the spice blend into the meat surface rather than rubbing it in. Aggressive rubbing grinds the larger particles (cracked pepper, sugar crystals, herb flakes) into fine powder and creates an uneven surface texture. Instead, apply the rub generously by sprinkling from 10–12 inches above the meat for even distribution, then press the spice layer firmly into the surface with clean hands or the back of a spoon. The result is a more visually dramatic bark and more even coverage.
Binders: When and Why to Use Them
Binders are thin coatings applied to the meat surface before the rub to improve adhesion. Common binders include:
- Yellow mustard — the classic. Mild flavor that disappears during cooking. Slightly acidic, helps tenderize surface proteins. Cannot taste mustard in finished product.
- Hot sauce — adds heat and a slight vinegar note. Works beautifully on chicken and pork.
- Worcestershire sauce — deepens umami character. Excellent for beef.
- Olive oil or neutral oil — promotes fat-soluble spice compound penetration. Best for lean cuts like pork loin, chicken breast, and fish.
- Mayonnaise — controversial but effective. The emulsified egg-and-oil base creates an exceptionally sticky, even surface that holds rub with remarkable tenacity. Results in deeply flavored, crispy-skinned poultry.
Fatty cuts (brisket, pork butt, bone-in ribs) rarely need a binder because the natural surface fat provides sufficient rub adhesion. Lean cuts benefit significantly from a thin binder coat.
Quantity Guidelines by Cut
Under-rubbing is as common a mistake as over-rubbing. As a reference:
- Brisket (12–14 lbs, full packer): 4–6 tablespoons total
- Pork shoulder (8–10 lbs): 3–4 tablespoons
- Rack of baby backs: 2 tablespoons per rack
- Whole chicken (4–5 lbs): 2–3 tablespoons, including inside the cavity
- Chicken thighs (per piece): 1 teaspoon each
- Salmon fillet (1.5 lbs): 1–1.5 tablespoons

10. Storage, Shelf Life & Batch Scaling
One of the most practical advantages of making your own rubs is the ability to batch-produce them efficiently and store them for months without quality loss. The economics become even more compelling when you factor in economies of scale from buying whole spices in bulk.
Storage Requirements
Three variables destroy stored spice blends: light, heat, and humidity. Store your rubs in:
- Opaque or dark glass jars — brown or amber glass UV-filters better than clear glass. Mason jars stored in a cabinet are acceptable.
- Cool, consistent temperature — spice cabinet above the stove is actually one of the worst locations due to heat and steam exposure from cooking. The best location is a dedicated shelf away from the stove, oven, and dishwasher.
- Airtight seal — moisture infiltration is the primary enemy of stored rubs. Use metal lid mason jars or high-quality plastic containers with gasket seals.
Shelf Life by Ingredient Category
| Ingredient Type | Peak Flavor Window | Maximum Storage | First Signs of Degradation |
|---|---|---|---|
| Whole dried spices (pepper, cumin, coriander) | 1–2 years | 3–4 years | Loss of pungency, flat aroma |
| Ground spices (paprika, cayenne, chili) | 6–12 months | 2–3 years | Color fading, loss of heat |
| Dried herbs (thyme, oregano, rosemary) | 6–12 months | 1–2 years | Dusty, hay-like smell |
| Garlic powder / Onion powder | 6–12 months | 1.5–2 years | Clumping, sulfur-forward smell |
| Salt (no additives) | Indefinite | Indefinite | Clumping from humidity (not spoilage) |
| Brown Sugar in rub blend | 3–6 months | 8–12 months | Hardening, moisture absorption |
| Complete blended rub (with sugar) | 3–4 months | 6–8 months | Color change, reduced fragrance |
| Complete blended rub (sugar-free) | 6–8 months | 12 months | Flat aroma, heat reduction |
Batch Scaling Formula
The master base recipe produces approximately ½ cup (8 tablespoons). Here is how to scale for common batch sizes:
Covers 6–8 racks ribs or
2 full briskets
Full season supply
for 1 grill family
Competition season or
large catering events
Test a new variation
before committing
When scaling, always taste-test the scaled batch before using it on a full cook. The relative intensity of spices can shift subtly at different scales due to particle distribution and blending dynamics.
Proper storage and batch planning is part of overall barbecue maintenance essentials — keeping your pantry as well-maintained as your grill ensures every cook starts from the best possible position.
11. Rub vs. Marinade vs. Injection: Knowing When to Use Each
Dry rubs, wet marinades, and meat injections each operate through fundamentally different mechanisms and achieve different results. The most sophisticated BBQ cooks combine all three strategically, understanding which tool is appropriate at each stage of the cook.
How Each Method Works
The Three Seasoning Methods Compared
Dry Rubs work primarily on the surface. Their impact zone is the bark layer and the first 2–3mm of meat. They control crust character, bark color, and exterior flavor. No amount of rub application will significantly change the flavor of the interior of a thick brisket — that is not their job.
Wet Marinades penetrate slightly deeper than rubs (up to 4–5mm with acid-based marinades) due to the liquid carrier vehicle and acidic breakdown of surface proteins. However, contrary to popular belief, most marinade flavor impact remains near the surface. Their primary benefit for thick cuts is surface tenderization and moisture retention from the oil component.
Meat Injections are the only method that delivers flavor directly to the center of large cuts. Competition pitmasters inject brisket flats, pork shoulders, and whole poultry with butter-based or broth-based injection liquids that carry flavor compounds (and moisture) into the muscle fibers where no rub or marinade can reach.
| Factor | Dry Rub | Wet Marinade | Injection |
|---|---|---|---|
| Flavor penetration depth | Surface (2–3mm) | Near-surface (4–5mm) | Full depth (to center) |
| Bark contribution | Excellent | Moderate | None |
| Moisture retention | Moderate (salt draws then reseals) | Moderate (oil coating) | Excellent |
| Best for | All cuts, all methods | Chicken, thin cuts, grilling | Brisket, pork shoulder, whole turkey |
| Time required | 15 min – 24 hr (dry brine) | 2–24 hours | 1 hour before cook |
| Equipment needed | Bowl, spoon | Bag or container | Meat injector syringe |
The Competition Stack: Using All Three
For maximum flavor on a competition brisket or pork shoulder, competition pitmasters often layer all three methods:
- Inject with beef tallow + beef broth + Worcestershire mixture 1–2 hours before seasoning
- Apply dry brine (kosher salt only) and refrigerate 12–24 hours
- Apply the full spice rub blend 30–60 minutes before the cook
- Optionally apply a thin sauce or glaze in the final 30–45 minutes
This approach aligns with the techniques described in our smoked pulled pork recipe and smoked beef short ribs recipe, both of which benefit from a layered seasoning strategy.
For those interested in how rubs and smoke interact differently across equipment types, our comparison of grilling vs. smoking heat, time, and flavor mechanics provides the full technical picture.

12. Competition-Grade Tips: The Details That Win Ribbons
Competition BBQ raises every element of the craft to its highest level of refinement. The rub differences between a first-place finish and an also-ran are often subtle — a minor adjustment in coarse-to-fine ratio, a touch less sugar to prevent burning at a higher cook temperature, an unexpected herb that lifts the profile from “delicious” to “unforgettable.” Here are the professional techniques and insights that separate good rubs from great ones.
The Freshness Protocol
Competition teams toast and grind their own spices immediately before blending each batch. Whole cumin seeds toasted in a dry skillet for 90 seconds and then ground produce a dramatically more aromatic, nuanced cumin powder than anything that has spent months pre-ground in a jar. The same applies to coriander, fennel seed, and mustard seed. The investment in a quality spice grinder — even a $15 electric coffee grinder dedicated exclusively to spices — yields returns that are immediately perceptible in the finished rub’s aroma and depth.
🏆 The Toasting Technique
Toast whole spices in a dry skillet over medium heat for 60–90 seconds, stirring constantly, until fragrant. Watch carefully — they burn in seconds. Let cool completely on a plate before grinding. The volatile aromatic oils in whole spices are activated and partially transformed by heat in a way that dramatically intensifies flavor without the bitter notes that come from over-toasting.
Color Theory in Rub Design
Judges eat with their eyes before their palates. The mahogany-to-black bark spectrum communicates cook quality and seasoning depth before anyone takes a bite. Paprika is your primary color agent — sweet paprika gives a bright red, smoked paprika gives a deeper, browner-red, and ancho chile gives an almost burgundy-black coloring to bark. Coffee and cocoa powders add depth to dark, dramatic bark without significantly altering the flavor profile when used at ½ tsp per ½-cup batch.
Layered Application: Double-Rub Technique
Some competition teams apply two rounds of rub rather than one heavy application. The first layer (fine-ground rub, applied 24 hours ahead) dry-brines and creates the adhesion base. The second layer (slightly coarser rub with more sugar, applied 1 hour before cooking) builds the bark texture and outer flavor profile. This double-application creates more complex bark structure than a single application can achieve.
Regional Style Adaptations
| Regional Style | Dominant Rub Character | Key Signature Ingredients | Best For |
|---|---|---|---|
| Kansas City | Sweet, smoky, moderate heat | Heavy brown sugar, smoked paprika, garlic, onion | Ribs, pulled pork, chicken |
| Texas (Central) | Salt + pepper, minimal sugar | Coarse black pepper dominant, kosher salt, minimal additions | Brisket, beef ribs |
| Memphis | Dry-rubbed, herb-forward, moderate sweet | Paprika, oregano, celery seed, moderate sugar | Ribs (dry), pork shoulder |
| Carolina | Mustard and vinegar in rub, less sweet | Dry mustard, apple cider vinegar powder, garlic, lighter sugar | Pulled pork, chicken |
| Alabama | Poultry-focused, moderate, herbed | Thyme, sage, white pepper, garlic, lemon pepper | Chicken (smoked), turkey |
| Lexington NC | Vinegar-forward, peppery, light | Coarse black pepper, red pepper flakes, light sugar | Pork shoulder |
The Tasting Protocol
Never evaluate a dry rub by tasting it raw on your fingertip alone. The true test is cooking a chicken thigh at 275°F for 90 minutes with the rub applied. Raw spice flavor is dramatically different from cooked spice flavor — sugars transform, volatile aromatics evolve, and heat compounds change register. Professional tasters always evaluate on cooked test pieces before committing a recipe to competition or production.
If you are looking for equipment that will complement your rub development journey, our comprehensive best barbecue round-up covers every price point and style, and our must-have BBQ accessories for precision and efficiency will help you invest in the right tools. For those looking to give the gift of great BBQ seasoning, our guide to barbecue gifts for grill masters and pit enthusiasts has curated options for every level.

13. Frequently Asked Questions About Homemade BBQ Rubs
The ideal window depends on your goals. For same-day cooking, apply the rub at least 45–60 minutes before putting meat on the smoker or grill — this allows the initial osmotic moisture pull to reabsorb, creating a drier, more bark-friendly surface. For maximum flavor and moisture retention, apply a dry brine (salt only) 12–24 hours ahead, then apply the full spice rub 1 hour before cooking. For maximum simplicity, applying the rub right before placing on the grill produces perfectly good results for thin cuts like chicken thighs and pork chops.
Yes, but adjust the sugar content for higher grilling temperatures. At grill temperatures above 325°F, high-sugar rubs will char before the meat reaches safe internal temperature. For grilled chicken, use no more than 1 tablespoon of brown sugar per ½-cup batch, or switch entirely to turbinado (raw) sugar which has a higher burning point. Alternatively, apply the rub only for the last 20 minutes of grilling after the chicken has cooked most of the way through using indirect heat. This produces a beautifully caramelized exterior without burning. See our grilled chicken thighs BBQ recipe for the full technique.
Clumping is almost always caused by humidity infiltrating the storage jar, combined with the hygroscopic (moisture-absorbing) nature of brown sugar and salt. Solutions include: using truly airtight glass containers with gasket lids, storing jars away from heat and steam sources, adding a small food-safe silica desiccant packet to each jar, or simply breaking up the clumps with a fork before use (clumping does not affect flavor quality). Some pitmasters also add a small piece of food-grade terra cotta disk (soaked in water then dried overnight) to their salt containers to regulate humidity — the same terra cotta disks sold for keeping brown sugar soft.
The general guideline is 1–1.5 tablespoons of rub per pound of meat for thin-cut or moderate-sized pieces. For large cuts with substantial surface area relative to weight (brisket, whole pork shoulder), you may need slightly less per pound because the surface area doesn’t scale linearly with weight. For ribs, think in terms of surface area rather than weight: 2 tablespoons per rack of baby backs, 2.5 tablespoons per rack of St. Louis-style spare ribs. The most important principle is that the rub should coat every visible surface area completely — patchy coverage creates uneven bark and uneven flavor.
Yes, but dry the meat thoroughly first. Pat with paper towels until the surface is as dry as possible, then apply the rub. This is particularly effective for chicken that has been marinated in buttermilk or yogurt — after marinating, patting dry and applying a spice rub creates a dramatically better crust because the proteins in the dairy-based marinade create an excellent binding surface for the rub. If you skip the patting dry step, the wet surface prevents rub adhesion and the spices will slide off during cooking.
Absolutely — and the results can be outstanding. Vegetables benefit enormously from a light coating of olive or avocado oil first (for adhesion), followed by a light dusting of rub. Reduce sugar content for vegetables as they contain their own natural sugars that caramelize quickly. For root vegetables (sweet potato, beets), a sweet-forward rub works beautifully. For corn on the cob, a moderate rub with smoked paprika and garlic creates excellent grill-side flavor. See our guide on how to grill vegetables like a pro for more techniques.
A dry brine is simply kosher salt — sometimes with a small amount of sugar — applied to meat and left for 8–48 hours to draw moisture out and then reabsorb it, redistributing through the muscle fibers and dramatically improving juiciness and seasoning depth throughout the meat’s interior. A BBQ rub is the complete spice blend applied closer to cook time, primarily for surface flavor and bark development. They serve different functions. The most effective approach combines both: dry brine with salt 12–24 hours ahead, then apply the full spice rub 1 hour before cooking.
From a purely culinary standpoint, MSG is one of the most effective umami-boosting ingredients available for a dry rub, and there is no credible scientific evidence of harm from normal culinary use. A pinch of MSG — roughly ¼ teaspoon per ½-cup batch — amplifies every savory note in the rub without adding detectable MSG flavor itself, much like salt amplifies other flavors without tasting salty when used appropriately. Many top competition teams use it routinely. Whether to include it is a personal choice based on dietary preferences and cooking philosophy, but food science fully supports its culinary utility in this application.
Yes — this is an excellent and underused technique. Adding 1–2 teaspoons of your BBQ rub directly into a homemade barbecue sauce creates spice consistency between the bark and the sauce, producing a unified flavor profile where the sauce complements rather than competes with the meat’s exterior. For burgers, mixing 1 teaspoon of rub per pound of ground beef directly into the patty creates internal seasoning — particularly effective for smash burgers and thick patties where surface seasoning alone doesn’t reach the center. See our guide on making juicy grilled burgers with the right temperature and fat ratio for the full technique.
Sugar-free BBQ rubs can still produce excellent bark and flavor — they just produce a darker, slightly less sweet crust with less gloss. To substitute for the caramelization role of sugar, increase smoked paprika by 50% (it contributes color and some sweetness from natural pepper sugars), add ½ teaspoon of sweet paprika for additional mild sweetness, and consider adding powdered erythritol (½ teaspoon) if you want some caramelization chemistry without the glycemic impact — erythritol can caramelize similarly to sugar at high temperatures. The salt-forward, pepper-forward Texas SPG style naturally produces a sugar-free bark that is widely considered among the finest in American BBQ.
Under the skin is where the magic happens for smoked whole chicken and spatchcocked birds. The skin is essentially waterproof — it does not allow spice compounds to penetrate into the meat beneath it during a cook. Applying rub directly to the meat under the skin ensures that the seasoning contacts the flesh directly. Apply rub both under the skin (liberally, directly on the meat) and over the skin (for bark and visual color) for best results. For crispy-skinned chicken, ensure the surface over the skin is completely dry before applying rub — any moisture prevents the skin from crisping during the cook.
The smoke ring — that pink band below the bark surface — forms from nitric oxide and carbon monoxide in wood smoke binding to myoglobin in the outermost meat layer. It is primarily a function of smoke exposure at lower temperatures (below 140°F internal meat temperature), not of the rub itself. However, certain rub ingredients can enhance smoke ring development: celery salt and celery seed contain natural nitrates that chemically mimic the smoke ring formation process, producing a more pronounced pink band even without intense smoke. Keep your smoker temperature at 225°F or below for the first 2 hours and avoid wrapping the meat during this phase to maximize smoke ring depth. Our guide on assessing smoke ring formation and meat color changes covers the full science.
Start Blending Your Signature Rub Today
The difference between a forgettable BBQ and one that people talk about weeks later often comes down to the rub. Understanding the chemistry, the ratios, the cut-specific adjustments, and the application methods transforms what could be a simple spice mixture into the foundation of your personal BBQ style. The master base recipe in this guide is your starting point — every tweak you make, every test batch you cook, every adjustment after tasting moves you closer to a signature blend that is uniquely yours. That is the real reward of making your own rub: you are not following a recipe, you are building a craft.
🏆 Explore More Rub GuidesRelated Guides & Resources
Continue building your BBQ knowledge with these related resources from BBQ Grill & Smoker:
- Smoked Pulled Pork Recipe — full technique guide
- BBQ Baby Back Ribs Recipe with rub & glaze strategy
- Smoked Beef Short Ribs — Texas-style seasoning
- Smoked Whole Chicken — under-skin rub technique
- Grilled Chicken Thighs — high-heat rub application
- Best Barbecue Smokers — find the right cooker for your rubs
- Best Barbecue Grills — equipment that complements your seasoning
- Wood Chips vs. Wood Chunks — choosing smoke to match your rub
- Hickory vs. Mesquite — matching smoke to your rub profile
- Keep Smoked Meat Moist — temperature and moisture control guide