Your Complete Pellet Grill Maintenance Guide: From Deep Cleans to Seasonal Storage
You spent hundreds — maybe thousands — of dollars on a pellet grill. It produces silky smoke rings, perfectly rendered brisket, and ribs that slide clean off the bone. But here’s the part nobody talks about at the showroom: every single cook leaves behind grease, ash, and oxidized pellet dust that quietly chips away at your grill’s performance, accuracy, and lifespan.
Whether you’ve owned your pellet smoker for three weeks or three years, this guide covers everything — from the two-minute wipe-down you should do after every session to the full annual teardown that keeps your investment running strong for a decade or more. We’ll walk through the exact steps, the right tools, the products worth buying, and the warning signs you should never ignore.
If you’ve ever wondered why your pit runs hot in one corner, why your temperature swings wildly, or why those pellets keep jamming in the auger, poor maintenance is almost always the culprit. Let’s fix that — permanently.
Why Pellet Grill Maintenance Is Non-Negotiable
Pellet grills are fundamentally different from gas or charcoal units. They’re electromechanical cooking systems — with auger motors, induction fans, digital controllers, RTD probes, and igniter rods all working in concert. Every component that moves or senses is vulnerable to grease buildup, ash accumulation, and moisture infiltration. Neglect any one of them long enough, and you’re not just looking at a dirty grill — you’re looking at a broken one.
Here’s what poor maintenance actually costs you in real terms:
| Neglected Task | Short-Term Consequence | Long-Term Damage |
|---|---|---|
| Ash buildup in firepot | Failed ignitions, temp swings | Blown igniter rod ($30–$60 to replace) |
| Grease in drip tray | Flare-ups, flavor contamination | Grease fire, barrel damage |
| Wet pellets in hopper | Auger jams, incomplete combustion | Burned-out auger motor ($80–$200) |
| Dirty RTD probe | Inaccurate temperature readings | Overcooked or unsafe food |
| Uncovered storage | Rust on lid and barrel | Structural deterioration, paint failure |
| Clogged grease chute | Smoke flavor off-notes | Bucket overflow, fire risk |
A pellet grill that’s properly maintained will hold tighter temperature windows, use pellets more efficiently, produce cleaner smoke flavor, and simply last longer. If you’re comparing different cooker styles and wondering how your pellet unit stacks up, our pellet grill vs. charcoal grill breakdown covers the fundamental operational differences — which makes the maintenance differences make a lot more sense.
The good news is that most pellet grill maintenance tasks are genuinely simple. You don’t need a degree in mechanical engineering or a garage full of specialized tools. What you do need is a consistent routine — and that’s exactly what this guide gives you.

Grillinator BBQ Grill Brush & Scraper — Top Rated on Amazon
Stainless steel bristles, ergonomic handle, built-in scraper. Works on pellet grill grates, porcelain, and cast iron.
🛒 Check Price on AmazonThe Master Pellet Grill Maintenance Schedule
Consistency beats intensity every time when it comes to grill maintenance. Doing a little after every cook is infinitely more effective than a heroic annual scrub-down. Here’s how to structure your time across different intervals:
After Every Cook
- Brush cooking grates
- Empty grease bucket
- Wipe down lid interior
- Check pellet level
Every 3–5 Cooks
- Vacuum ash from firepot
- Wipe RTD probe
- Check grease chute
- Inspect igniter rod
Monthly
- Full interior wipe-down
- Inspect auger/fan operation
- Clean drip tray liner
- Check hopper for fines
Seasonally / Annually
- Full deep clean
- Re-season grates
- Inspect all wiring
- Grease auger shaft
- Cover or winterize
This schedule applies broadly across most pellet grill brands, including Traeger, Pit Boss, Camp Chef, and Z Grills — though the specific access points vary by model. If you’re running a higher-end unit like a Yoder or a recteq, the same principles apply; you just have more stainless surface to love. Speaking of brand differences, our Pit Boss vs. Traeger comparison digs into how the two brands differ in design and what that means for your cleaning routine.
After Every Cook: The 10-Minute Routine
The single most impactful maintenance habit you can build costs you less than ten minutes. Done consistently, this short routine prevents 80% of the problems pellet grill owners eventually face. Here’s exactly what to do while the grill is still warm (not hot):
Raise the Temperature to 400°F for a 10-Minute Burn-Off
After you’ve pulled your food, bump the grill to 400–450°F for 10–15 minutes. This carbonizes residual grease and food particles, making them much easier to brush off. Don’t skip this — it’s the foundation of clean grates.
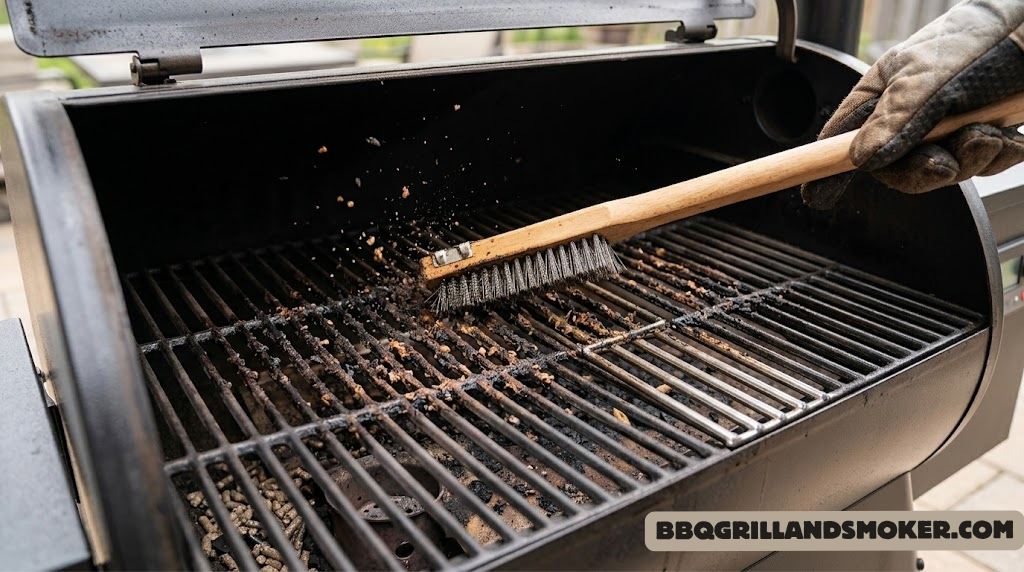
Brush the Cooking Grates While Warm
Use a quality grill brush — wire for stainless or cast iron, nylon or wooden scraper for porcelain-coated grates. Brush in firm, overlapping strokes along the bars, then across them. Warm grates release debris far more easily than cold ones. Finish with a paper towel dipped in a tiny amount of high smoke-point oil (avocado or grapeseed) to condition the surface.
Empty and Wipe the Grease Bucket
Never let your grease bucket more than half fill. A full bucket is a fire waiting to happen — liquid grease at cooking temperatures is genuinely dangerous. Dump it, wipe it with a paper towel, and either line it with a foil liner (sold by most grill manufacturers) or just leave it clean. This takes 60 seconds and prevents 90% of pellet grill grease fires.
Quick Lid Wipe-Down
Open the lid and use a damp cloth or paper towel to wipe the interior lid surface while it’s still warm. Black, shiny buildup on the interior is polymerized grease — it’s normal and actually helps season the barrel. But flaking chunks of built-up carbon can fall onto your food. Wipe off any loose flakes and you’re done.
For a deeper dive into the tools that make these tasks easier and safer, our best barbecue tools roundup covers everything from grate brushes to specialized grill vacuums with hands-on testing notes.
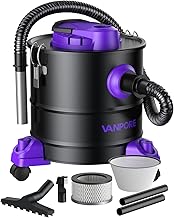
Stanley SL18116P Wet/Dry Shop Vacuum — Ideal for Pellet Grill Ash
6-gallon capacity, 4.5 peak HP. Perfect for vacuuming ash from firepot and barrel without creating a dust cloud.
🛒 Check Price on AmazonEvery 3–5 Cooks: The Deeper Routine
Every three to five cooking sessions, it’s time to go slightly deeper than the basic post-cook brush. These tasks address the parts of your pellet grill that accumulate residue more slowly but cause serious problems when ignored.
Vacuuming the Ash from the Firepot
This is the single most important “periodic” maintenance task for pellet grill owners. The firepot is where pellets combust — it’s a small metal cup beneath the cooking grates that the auger feeds into. Over time, fine ash and unburned carbon accumulate in and around the firepot. When it gets too full:
- The igniter rod can’t make consistent contact with incoming pellets
- Airflow from the induction fan gets restricted, starving the fire of oxygen
- You get incomplete combustion, which produces dirty, acrid smoke instead of clean thin blue smoke
- Temperature swings become unpredictable and wide
To clean it: remove the cooking grates, heat shield/deflector plate, and drip tray to access the firepot. Use a small shop vacuum (or a dedicated grill vacuum) to suck out all the ash. Wipe the interior of the firepot with a dry cloth. That’s it — five minutes of work that prevents your most common performance problems.
Checking and Cleaning the RTD Temperature Probe
Your grill’s digital controller governs everything based on what the RTD (Resistance Temperature Detector) probe reads. If grease and carbon coat this probe, it reads inaccurately — and that’s how you end up with undercooked chicken or overcooked ribs even though your controller says the right number.
Find the probe (usually a small stainless rod positioned in the cooking chamber) and wipe it down with a paper towel or cloth dampened with a little warm water. Avoid harsh chemicals on or near the probe. You should also periodically verify its accuracy with a separate digital thermometer — see our must-have BBQ accessories guide for our preferred instant-read thermometer picks.
Inspecting the Grease Chute and Drain
Pellet grills use a sloped deflector plate that channels grease toward a chute and down into the grease bucket. This chute can build up a thick rim of hardened grease over time, eventually blocking flow. When the chute clogs, grease pools on the deflector plate and can ignite — causing a grease fire inside the barrel. Every few cooks, use a putty knife or stiff brush to scrape the chute clear.
Want to understand more about why your grill may not be heating up to spec even after cleaning? Our article on why your grill isn’t heating — fuel and airflow factors covers this in depth and is worth a read for any pellet grill owner experiencing temp problems.
The Complete Deep Clean: Step-by-Step
Every season — or after every 40–50 hours of cooking time — your pellet grill needs a complete teardown and deep clean. This is the equivalent of a full oil change and tune-up. Budget 2–3 hours the first time you do it; once you know your grill’s layout, it gets faster.
What You’ll Need
- Shop vacuum with fine dust filter
- Stiff grill brush (wire or brass)
- Putty knife or plastic scraper
- Heavy-duty degreaser (we recommend non-toxic options)
- Paper towels — lots of them
- Rubber gloves
- Bucket of warm soapy water
- Food-safe grate oil (flaxseed, canola, or avocado)
- Replacement foil drip tray liner
Disassemble the Cooking Chamber
Start from top to bottom. Remove the cooking grates, heat shield or deflector plate, and the drip tray. Set them aside on a large surface (old cardboard or a tarp works well). Removing everything gives you full access to the barrel interior and firepot.
Vacuum Out All Ash and Debris
With everything removed, use your shop vacuum to thoroughly vacuum the bottom of the barrel. Work from the back toward the front. Pay special attention to the corners and around the firepot. Get into the firepot itself — a crevice attachment works perfectly here. Don’t rush this step; thorough ash removal is the foundation of everything else.
Scrape and Degrease the Barrel Interior
Use your putty knife to scrape hardened grease from the bottom of the barrel. Work in the direction of the grease chute slope so debris falls toward the drain. Apply a food-safe degreaser to a paper towel — not directly to the barrel — and wipe all surfaces. The interior walls don’t need to sparkle; a light coat of polymerized seasoning is fine and desirable. Focus on removing thick, flaking buildup and any pooled grease.
Clean and Re-Season the Cooking Grates
Soak the cooking grates in hot soapy water for 15–20 minutes if they have significant buildup. Scrub with a stiff brush, rinse well, and dry completely. Then apply a thin layer of high smoke-point oil and heat them on the grill at 400°F for 20–30 minutes to re-season. This maintains the non-stick surface and protects against rust. Our guide on how to season cast iron grill grates walks through this in full detail.
Clean the Grease Chute and Replace the Foil Liner
Scrape the grease chute with your putty knife, wipe with a degreaser-dampened towel, and verify the path to the bucket is clear. Install a fresh heavy-duty foil liner on the deflector/drip plate. Reinstall all components in reverse order — drip tray, deflector plate, grates — making sure each sits level and in the correct position.

Citrusafe BBQ Grid & Grill Cleaner — Food-Safe, Non-Toxic
Plant-based, food-safe formula. Cuts through grease and carbonized residue on grates, barrels, and drip trays. No harsh fumes.
🛒 Check Price on AmazonFirepot, Auger & Fan: The Mechanical Heart of Your Pellet Grill
Most pellet grill problems — temperature inconsistency, failed startups, jammed augers, error codes — trace back to one of three mechanical components: the firepot, the auger, or the induction fan. Understanding how these work together helps you maintain them correctly and troubleshoot problems when they arise.
The Firepot
The firepot is a cylindrical or rectangular metal cup, usually made of heavy-gauge steel, positioned at the center bottom of the cooking chamber. Pellets are delivered here by the auger, and the hot rod igniter (a glorified electric heating element) ignites them. The induction fan then supplies oxygen to sustain combustion. When ash fills this cup, it insulates the igniter from fresh pellets and chokes airflow. Clean it every 3–5 cooks without exception.
Also inspect the firepot itself periodically for cracks, warping, or excessive corrosion. A cracked firepot allows fire to escape into unintended spaces and should be replaced. Replacement firepots are available from manufacturers like Traeger, Pit Boss, and Camp Chef for around $20–$40.
The Igniter Rod (Hot Rod)
The igniter rod is an electric heating element that glows red-hot to light your pellets. It operates for roughly 3–5 minutes at startup. Signs that your igniter is failing include:
- Grill starts smoking but never actually lights — you see pellets but no flame
- Startup takes significantly longer than usual (normal is 3–5 minutes)
- Grill trips an error code related to temperature not rising
- You can see the rod but it doesn’t glow orange when powered
Test the igniter with a multimeter — it should show 30–60 ohms of resistance. No reading means it’s burned out and needs replacement. Igniters typically cost $20–$50 and are brand-specific. Keeping ash clear of the firepot dramatically extends igniter life.
The Auger System
The auger is a spiral-threaded rod that acts like a large wood screw, rotating to push pellets from the hopper into the firepot at a controlled rate. The controller adjusts auger rotation speed to increase or decrease heat. Auger problems are almost always caused by one of three things:
| Auger Problem | Cause | Solution |
|---|---|---|
| Auger jam / pellet bridge | Swollen or expanded pellets (moisture) | Empty hopper, remove jam manually, run only dry pellets |
| Auger motor failure | Forced against a hard jam too long | Replace motor ($80–$200); prevent by checking pellet quality |
| Pellet fines buildup | Dusty/low-quality pellets | Empty hopper, vacuum fines, use quality pellets |
| Noisy auger operation | Dry auger shaft bearing | Apply food-grade grease to auger shaft annually |
| Slow or erratic feed rate | Worn auger motor or controller issue | Test motor amperage; replace if outside spec |
Annual lubrication of the auger shaft with food-grade grease keeps it spinning freely and protects the motor from overload. To access it, remove the pellet hopper and locate the auger shaft where it passes through the housing bushing. Apply a small amount of food-grade grease (not WD-40 — it evaporates and leaves residue) and reassemble.
The Induction Fan
The induction fan provides combustion air and also circulates heat through the cooking chamber. A dirty or damaged fan blade can reduce airflow enough to cause temperature problems. Inspect the fan once a year: access it via the back panel on most models, remove any dust or grease buildup from the blades, and spin it by hand to check for wobble or resistance. It should spin freely and silently.
If you’re experiencing specific brand-related error codes, our troubleshooting guides can help. We have dedicated articles on the Pit Boss ErH code, Traeger overheating, and Green Mountain Grill auger noise.
Grates, Drip Trays & Deflector Plates: Material Matters
Not all pellet grill grates are created equal, and the right cleaning approach depends entirely on what yours are made of. Using the wrong method — like a wire brush on a porcelain-coated grate — can scratch the coating, exposing the underlying steel to rust and making your grate stick like velcro.
| Grate Material | Cleaning Method | Avoid | Re-Season? |
|---|---|---|---|
| Cast iron | Stiff wire brush, hot water, light oil coat | Soap, soaking, dishwasher | ✓ After every wash |
| Stainless steel | Stainless brush, degreaser, rinse | Steel wool (scratches) | ✗ Not required |
| Porcelain-enameled steel | Nylon brush, soft cloth, warm soapy water | Wire brushes, abrasives | ✗ Not required |
| Porcelain-coated cast iron | Nylon brush, gentle degreaser | Wire brushes, metal scrapers | ✗ (coated) |
For a detailed comparison of cast iron versus stainless grates — including heat retention, reactivity, and long-term durability — our cast iron vs. stainless steel grill grates guide gives you the full picture.
Dealing with Rust on Cast Iron Grates
Surface rust on cast iron is not a death sentence — it’s a maintenance task. Here’s the process:
- Scrub the rust with a wire brush or steel wool until bare grey metal appears
- Wash with warm soapy water and dry immediately and completely (oven or grill heat works best)
- Apply a very thin layer of flaxseed or food-grade vegetable oil to all surfaces
- Heat at 400–500°F for 1 hour — the oil polymerizes and forms a new protective layer
- Repeat 2–3 times for deep seasoning, then maintain with oiling after each cook
Drip Tray and Deflector Plate Maintenance
Stainless steel deflector plates can be soaked in hot soapy water and scrubbed. The key here is ensuring the plate is flat and properly positioned — warped deflector plates create hot spots and uneven cooking. Inspect yours annually. If it’s warped significantly (you can feel a rock when you place it on a flat surface), replace it.
Our detailed guide on how to clean barbecue grates covers restoration techniques for even heavily neglected surfaces if you’re dealing with a grill that hasn’t been cleaned in a while.

Traeger BAC406 Drip Tray Liners (5-Pack) — Fit Most Traeger Models
Heavy-duty foil liners. Line your drip tray and swap them out instead of scrubbing — cuts cleaning time drastically and prevents grease fires.
🛒 Check Price on AmazonTemperature Probe Care: Calibration & Accuracy
Your pellet grill’s built-in temperature probe is the feedback loop for the entire system. The controller adjusts pellet feed rate based on what this probe reads. If the probe is dirty, coated in grease, or drifting in accuracy, the whole chain of logic breaks down. You might be cooking at 250°F thinking you’re at 225°F — and that can make a meaningful difference on a 14-hour brisket cook.
Cleaning the RTD Probe
The RTD probe typically looks like a small stainless rod or clip positioned inside the cooking chamber, usually near the back or side wall. Clean it every 3–5 cooks:
- Wait for the grill to be completely cool
- Dampen a cloth with warm water (mild dish soap is acceptable; avoid harsh chemicals)
- Gently wipe the probe rod in a single direction — don’t scrub aggressively
- Dry with a clean cloth
- Verify it’s still firmly attached to its bracket
Verifying Probe Accuracy
At least twice a season, verify your probe’s accuracy with a reliable independent thermometer. Place a calibrated instant-read or leave-in probe thermometer near your RTD probe and compare readings at 250°F and 350°F. A difference of more than 15°F indicates your probe needs replacement or recalibration (if your controller allows it).
When to Replace the RTD Probe
RTD probes are wear items — they’re designed to be replaced. Replace yours if:
- Readings are erratic — jumping 50°F+ without cause
- The controller shows an “HEr” or temperature sensor error code
- Physical damage: bent, broken, or the wire coating is cracked
- Accuracy drift exceeds 25°F compared to a reference thermometer
Replacement RTD probes are brand-specific and typically cost $15–$35. Installation usually requires only a screwdriver and 10 minutes. For deeper context on temperature accuracy and its effect on your results, see our article on how temperature and moisture control affect smoked meat quality.
Pellet Storage: The Overlooked Variable That Ruins Everything
Here’s a truth that many pellet grill owners learn the hard way: wood pellets are hygroscopic. That means they actively absorb moisture from the air. And once they do, they swell, crumble, and become completely unsuitable for use. Wet pellets don’t combust cleanly, create incomplete burns, can jam the auger, and produce thick white smoke instead of the clean thin blue smoke you want.
Proper pellet storage is maintenance. It’s as important as cleaning your grates.
✅ Good Pellet Storage Habits
- Store in a sealed, airtight container
- Keep in a cool, dry location (garage, shed — not outside)
- Use within 6 months of purchase
- Empty and dry the hopper between long-term storage
- Use a moisture-absorbing insert in the storage container
- Check pellets visually — they should be glossy, hard, and uniform
❌ Pellet Storage Mistakes
- Leaving the bag open in a shed or garage
- Storing near concrete floors (moisture wicks up)
- Leaving pellets in the hopper between extended cooking gaps
- Using pellets that feel soft, ashy, or crumble easily
- Mixing old and new pellets in the hopper
- Storing outdoors, even under cover
The Right Pellet Storage Container
The original paper bag is not acceptable for storage beyond immediate use. Transfer your pellets to a food-grade plastic bin with a tight-fitting lid — something like a 5-gallon bucket with a Gamma Seal lid, or a purpose-built pellet storage bin. Many grill manufacturers sell purpose-designed pellet storage containers. Gamma Seal lid buckets cost about $15 and hold 20–25 lbs of pellets — a practical and affordable solution.
Emptying the Hopper Between Cooks
If you’re not cooking for more than a week, empty your hopper. Most pellet grills have a hopper cleanout/dump mechanism — a door or slide at the bottom of the hopper that lets you drain pellets back into their container. If yours doesn’t, use a small shop vacuum to remove them. Store those pellets in your sealed container and reload fresh ones at the start of your next cook.
Testing Pellet Quality
Before loading a new bag, squeeze a pellet hard between your fingers. A good pellet snaps cleanly. A bad pellet crumbles, feels soft, or leaves a dust cloud. Also, drop a pellet in a glass of water: a good-quality pellet sinks and begins to dissolve after 30+ seconds. A poor-quality pellet starts disintegrating immediately. Trust this test — it’s surprisingly accurate.

Traeger BAC362 Pellet Storage Bin — 20 lb Capacity
Airtight seal, carry handle, stackable design. Keeps pellets dry, prevents dust contamination, and makes transport easy. Works with any brand pellets.
🛒 Check Price on AmazonSeasonal Storage: Winterizing Your Pellet Grill
If you live in a climate with cold, wet winters and you’re not planning to grill year-round (though many people do), proper winterization will make a significant difference in how your grill comes back to life in spring. Neglected winter storage is the primary cause of rust, paint failure, and corrosion on pellet grills.
Perform a Full Deep Clean Before Storage
Never store a dirty grill. Grease and food residue hold moisture against metal surfaces all winter, accelerating rust. Do your full deep clean before storage — not in spring when you’re eager to cook. This one habit will dramatically extend your grill’s lifespan.
Empty the Hopper and Auger Completely
Pellets left in the system all winter will absorb moisture, swell, and potentially jam the auger before you even fire up for the first cook of spring. Drain the hopper via the cleanout, then run the grill on “Feed” or a low temperature setting for 10–15 minutes to push any remaining pellets through the auger into the firepot, where they burn off cleanly.
Apply a Light Coat of Cooking Oil to All Metal Surfaces
After cleaning, wipe all interior metal surfaces — the barrel walls, firepot, deflector plate, and grates — with a very thin layer of high smoke-point cooking oil. This creates a moisture barrier against winter humidity. Do NOT oil the electrical components, probe, or fan.
Protect the Exterior
Even the toughest powder-coat finishes aren’t truly weatherproof for months of winter exposure. A quality grill cover is essential. Look for covers that are waterproof on the outside but breathable underneath — non-breathable covers trap condensation and actually accelerate rust. Your grill manufacturer likely sells a fitted cover; third-party options from brands like Classic Accessories are also excellent.
Protect the Electronics and Controller
The digital controller and any WiFi modules are the most expensive and delicate components on your grill. Keep the controller face free of moisture by ensuring your cover seals well around it. Some owners choose to remove the controller entirely for storage and keep it inside. Also check that no wiring is exposed or that gaskets aren’t cracked before buttoning up for winter.
Troubleshooting Common Pellet Grill Problems
Even with a solid maintenance routine, things occasionally go wrong. Here’s how to diagnose and solve the most common pellet grill problems — the ones that fill BBQ forums and that we’ve seen in our own testing.
Problem: Temperature Swings More Than 25°F
A well-maintained pellet grill should hold temperature within ±15°F of the set point. Larger swings usually point to one of these causes:
| Symptom Pattern | Likely Cause | Fix |
|---|---|---|
| Swings up, then drops sharply | Ash buildup in firepot | Vacuum firepot, check airflow |
| Temp always runs 30°F+ low | Dirty RTD probe, ambient cold | Clean probe; add a grill blanket |
| Temp runs high and won’t drop | Grease fire in barrel | Shut down immediately; clean drip tray |
| Random swings with no pattern | Wet or low-quality pellets | Swap to fresh, dry, quality pellets |
| Swings worse in cold/wind | Environmental — heat loss | Use an insulated grill blanket |
Problem: Grill Won’t Ignite / Failed Startup
Failed startup is the most alarming pellet grill problem because it means no cook. The diagnostic order is: (1) check pellets — are there any in the hopper and are they dry? (2) check the firepot — is it overflowing with ash? (3) test the igniter — does it glow? (4) check the fan — is it running? Walking through this sequence resolves 95% of startup failures.
Problem: Thick, White, Billowing Smoke Instead of Thin Blue
Thin, barely-visible blue smoke is what you want — it’s a sign of clean, efficient combustion producing the flavor compounds you’re after. Thick white smoke is a sign of incomplete combustion, and it produces acrid, over-smoked food. Causes include wet pellets, a dirty firepot, or insufficient airflow from a clogged or failing fan.
Our article on smoke ring formation and meat color explains why smoke quality matters so much to your end result — worth reading if you’re chasing better smoke flavor.
Problem: Grill Shows Mold Inside
Yes, it can happen — especially if a grill was stored with food residue or moisture got in over winter. Our guide to grill mold causes and cleaning covers the full remediation process. The short version: scrub thoroughly with soapy water, rinse, dry, and run a 400°F burn-off cycle before cooking.
Problem: Auger Jam (Won’t Feed Pellets)
Auger jams almost always come from moisture-swollen pellets. To clear a jam: unplug the grill, remove pellets from the hopper, access the auger (usually from the hopper side), and manually turn the auger shaft to dislodge the jam. Once clear, vacuum out the hopper and tube, and reload only dry, high-quality pellets. Consider adding a small silica gel packet to your hopper to absorb ambient humidity.
Best Tools & Products for Pellet Grill Maintenance
You don’t need a lot of specialized tools to maintain your pellet grill — but having the right ones makes the job faster, easier, and more effective. Here’s what we actually use and recommend, organized by task.
| Tool / Product | Best For | What to Look For | Price Range |
|---|---|---|---|
| Shop Vacuum (2–6 gal) | Ash removal | Fine-dust filter, crevice attachment | $40–$80 |
| Stiff Grill Brush (wire) | Cast iron / stainless grates | Long handle, scraper end | $12–$25 |
| Nylon Grill Brush | Porcelain-coated grates | Heat-resistant nylon, angled head | $10–$20 |
| Putty Knife / Scraper | Grease and carbon removal | 4″ blade, comfortable grip | $5–$12 |
| Food-Safe Degreaser | Interior barrel, grates | Non-toxic, citrus-based formula | $10–$18 |
| High Smoke-Point Oil | Grate seasoning, metal protection | Flaxseed, avocado, or grapeseed | $8–$15 |
| Foil Drip Tray Liners | Deflector plate protection | Brand-specific fit, heavy gauge | $10–$20 (5-pack) |
| Food-Grade Grease | Auger shaft lubrication | NSF-rated, high-temp rated | $8–$15 |
| Grill Cover | Exterior weather protection | Waterproof, breathable, fitted | $30–$70 |
| Pellet Storage Bin | Keeping pellets dry | Airtight seal, 20–50 lb capacity | $20–$40 |
For expanded tool recommendations with hands-on reviews, our best barbecue tools guide and the best barbecue grill cleaners roundup are the two most relevant resources. We also have a dedicated barbecue maintenance essentials guide that covers maintenance across all cooker types.
Maintenance-Specific Products by Brand
Most major pellet grill brands sell their own line of maintenance accessories — and they’re usually worth buying since fit and compatibility are guaranteed. Here’s a quick overview:
- Traeger: Sells drip tray liners, bucket liners, grill covers, and their own all-natural cleaner
- Pit Boss: Offers brand-specific covers, auger tools, and grill brush sets
- Camp Chef: Has one of the best cleanout systems with their hopper cleanout door; also sells covers and cleaning kits
- Green Mountain Grills: Sells fitted covers and standard cleaning accessories
- recteq: Known for heavy stainless construction that’s easier to clean; sells all accessories including covers
If you’re in the market for a new pellet grill and wondering which brands have the best build quality for long-term durability and ease of maintenance, our comparison of Yoder vs. Traeger, the Camp Chef Woodwind vs. Traeger Ironwood, and our recteq DualFire 1200 review cover build quality in depth.

GRILLART Grill Cleaning Kit — 18-Piece Professional Set
Includes wire brush, cleaning cloth, scraper, handle brush, and accessories. Works for pellet grills, gas grills, and charcoal. High ratings, high build quality.
🛒 Check Price on AmazonFrequently Asked Questions
At minimum, brush your cooking grates and empty the grease bucket after every cook. Vacuum the ash from the firepot and wipe the RTD probe every 3–5 cooks. Perform a full deep clean every season or after approximately 40–50 hours of cooking time. If you cook frequently (multiple times per week), you’ll likely need to deep clean monthly.
No — never use a pressure washer on a pellet grill. The high-pressure water will penetrate the controller, auger housing, and wiring, causing serious electrical damage. You can wash the cooking grates and drip tray with a hose and scrubbing, but keep water away from all electronic components, the auger system, the hopper, and the firepot area.
Bad pellets have a few telltale signs: they crumble when squeezed instead of snapping cleanly; they feel soft or powdery; the surface looks dull instead of glossy; you can find visible spots of mold or discoloration. When burned, bad pellets produce thick white smoke instead of thin blue smoke, and may cause auger jams. When in doubt, don’t use them — a bag of pellets costs $15–$20 and isn’t worth risking your cook or damaging the auger motor.
Yes, absolutely. New pellet grills should be seasoned before first use. This involves running the grill at a high temperature (typically 350–400°F) for 45–60 minutes with no food inside. This burns off manufacturing oils, paint fumes, and any protective coatings from the factory, and begins building up the polymerized seasoning layer that improves cooking performance and protects the metal interior. Our guide to seasoning a new grill walks through this in detail.
For cooks within the same week: leaving pellets in the hopper is generally fine as long as you store the grill in a dry location with a cover. For longer gaps — two weeks or more — or in humid climates, empty the hopper and store pellets in a sealed container. Always empty the hopper for seasonal storage (winter months). Pellets left in a covered hopper are protected to a degree, but high ambient humidity will eventually cause swelling, fines accumulation, and potential auger jams.
The three keys are: keep it covered with a quality, breathable grill cover; dry the interior after any exposure to rain before closing the lid; and coat all interior metal surfaces with a thin layer of cooking oil during extended storage. For the exterior, inspect the paint/powder coat annually and touch up any chips with high-heat grill paint before they spread. Storing on a surface that doesn’t pool water (wood deck planks rather than flat concrete without drainage) also helps considerably.
Bitter or acrid smoke almost always comes from incomplete combustion. The main causes are: wet or low-quality pellets, excessive ash in the firepot restricting airflow, a failing induction fan providing insufficient oxygen, or buildup of old grease inside the barrel creating off-flavored combustion byproducts. Work through each: swap to fresh quality pellets, vacuum the firepot, verify the fan is running at full speed, and do a deep clean of the barrel interior. In most cases, one of these solves it.
Many people do, but it requires more diligent maintenance than indoor storage. If you leave your grill outside year-round: use a premium weatherproof grill cover with UV protection, ensure the cover fits snugly and doesn’t trap water on top, inspect the cover after major storms, empty the hopper during extended non-use periods, and do a more thorough inspection and deep clean before your first spring cook. In milder climates, year-round outdoor storage on a covered patio with a good cover is perfectly fine for most pellet grills.
Igniter rods (hot rods) typically last 2–5 years with regular use and proper maintenance. Keeping the firepot ash-free dramatically extends their life because they’re not having to work against insulation. Signs it needs replacement: startup takes longer than usual, the grill sometimes fails to light on first attempt, or you can see the rod but it doesn’t glow orange-red when the grill powers on. Always check the firepot ash level before assuming the igniter is bad — a clogged firepot mimics igniter failure symptoms.
The shiny black coating inside the lid is polymerized grease and smoke residue — essentially a naturally developed seasoning layer, similar to cast iron seasoning. A thin, adherent black coating is completely normal and desirable. What you do need to address is when this coating begins to flake — chunks of carbonized grease that can fall onto food. Wipe the lid interior with a paper towel after each cook while it’s still warm to remove loose flakes before they build up thick enough to peel off in sheets.
Final Thoughts: Maintenance Is the Secret to Great BBQ
Here’s the truth that separates great BBQ from good BBQ: the quality of your cook depends as much on the condition of your equipment as it does on your technique or your recipe. A well-maintained pellet grill holds consistent temperatures, produces clean smoke flavor, ignites reliably, and gives you confidence on every cook. A neglected one fights you — unpredictable temps, bad smoke, jams, and error codes.
The routine itself isn’t demanding. Brush the grates after every cook. Vacuum the firepot every few sessions. Do a deep clean every season. Store your pellets correctly. Cover your grill. These habits, sustained over time, make a $500 pellet grill cook like a $1,000 one — and make a $1,000 grill last as long as a $2,500 one.
Whether you’re smoking brisket low-and-slow, doing weekend ribs with the 3-2-1 method, or experimenting with smoked salmon on your pellet grill, the cleaner and better-maintained your pit is, the better your results will be.
Now go check that firepot.
Browse Top Grill Cleaning Products →