
BBQ Baby Back Ribs Recipe: Fall-Off-the-Bone Perfection Every Single Time
Why Baby Back Ribs Are the Crown Jewel of BBQ
There are few things in the culinary world that command the same primal, visceral reverence as a perfectly cooked rack of baby back ribs. That deep mahogany crust. The whisper of smoke threading through each bite. The way the meat clings to the bone just enough — pulling clean with a satisfying tug, never falling away before you’re ready. This is what backyard BBQ is built on.
But here’s the honest truth that most recipe sites won’t tell you: great BBQ baby back ribs don’t happen by accident. They’re the product of understanding your meat, respecting your fire, and making deliberate choices at every step — from the rub you build to the wood you choose to the moment you decide the ribs are done. This guide gives you all of that, in full detail, without shortcuts or vague instructions.
Whether you’re working with a classic charcoal grill, a dedicated BBQ smoker, or a modern electric smoker, the principles in this recipe apply universally. We’ll cover every variable — temperature, smoke, time, moisture, and sauce — so you walk away with not just a recipe but a complete understanding of why each step matters and what to do when things don’t go exactly to plan.
This is the BBQ baby back ribs guide you’ve been waiting for. Let’s get after it.
Understanding Baby Back Ribs: The Cut, the Anatomy, and Why It Matters
Not all ribs are created equal, and confusing baby back ribs with spare ribs — or St. Louis-style ribs — is one of the most common mistakes home cooks make when they first venture into serious BBQ territory. Understanding what you’re working with changes everything about how you approach the cook.
What Exactly Are Baby Back Ribs?
Baby back ribs come from the upper portion of the pig’s rib cage, running along the loin muscle near the backbone. The “baby” in the name doesn’t refer to a young pig — it refers to the fact that these ribs are shorter than spare ribs, typically ranging from 3 to 6 inches in length. A full rack contains between 10 and 13 bones and weighs anywhere from 1.5 to 2.5 pounds.
Because they come from the loin area — one of the least-worked muscle groups on the pig — baby back ribs are naturally more tender and leaner than spare ribs. They cook faster and forgive heat fluctuations a bit more readily. This makes them an ideal starting point for those new to rib cookery, though the techniques involved still reward patience and precision.
Baby Back Ribs vs. Spare Ribs vs. St. Louis Style
| Feature | Baby Back Ribs | Spare Ribs | St. Louis Style |
|---|---|---|---|
| Location on pig | Upper loin, near spine | Lower belly, near sternum | Spare ribs, trimmed flat |
| Bone length | 3–6 inches | 6–8 inches | 5–6 inches (uniform) |
| Fat content | Moderate (leaner) | High | Moderate-high |
| Cook time (low & slow) | 4–6 hours | 5–7 hours | 5–6 hours |
| Flavor profile | Mild, tender, meaty | Rich, fatty, porky | Rich, uniform, meaty |
| Best for | Beginners & competition | Flavor-chasers | Competition BBQ |
| Price point | Higher | Lower | Moderate |
The Membrane: Your First and Most Important Prep Step
On the bone side of every rack of baby back ribs lies a tough, papery membrane called the periosteum — more commonly called the silverskin. If you leave it on, it becomes a near-impenetrable barrier that prevents smoke and rub from penetrating the meat, and it never softens during cooking. The result is a chewy, unpleasant layer that ruins an otherwise perfect rack.
Removing it takes less than 90 seconds once you know the trick. Slip a butter knife or the handle of a spoon under the membrane at the widest bone end, work it free, then grab it with a dry paper towel and pull firmly. It should peel away in one or two clean strips. This single step makes the difference between good ribs and great ribs — don’t skip it.
For more on how smoking transforms different cuts of meat, check out our deep dive on selecting the right smoker for low and slow ribs and brisket — it’s an excellent companion to this recipe guide.
Essential Equipment for Perfect Baby Back Ribs
You don’t need a $3,000 competition smoker to cook extraordinary baby back ribs. What you do need is reliable heat, a means to maintain it, and a few key tools that help you work with confidence rather than guesswork.
Choosing Your Cooker
The beauty of this recipe is that it adapts to virtually any cooking vessel. Here’s an honest breakdown of what each brings to the table — and what trade-offs you’ll make:
| Cooker Type | Ease of Use | Smoke Flavor | Temperature Control | Best For |
|---|---|---|---|---|
| Offset Smoker | ⭐⭐ | ⭐⭐⭐⭐⭐ | ⭐⭐⭐ | Flavor purists |
| Kettle Charcoal Grill | ⭐⭐⭐ | ⭐⭐⭐⭐ | ⭐⭐⭐ | Most home cooks |
| Pellet Smoker | ⭐⭐⭐⭐⭐ | ⭐⭐⭐⭐ | ⭐⭐⭐⭐⭐ | Set & forget cooks |
| Gas Grill (indirect) | ⭐⭐⭐⭐ | ⭐⭐ | ⭐⭐⭐⭐ | Convenience seekers |
| Electric Smoker | ⭐⭐⭐⭐⭐ | ⭐⭐⭐ | ⭐⭐⭐⭐⭐ | Apartment & beginners |
| Kamado (Big Green Egg) | ⭐⭐⭐ | ⭐⭐⭐⭐⭐ | ⭐⭐⭐⭐ | Versatility |
If you’re in the market for a new cooker, our comprehensive guides on the best BBQ grills and the best BBQ smokers break down the top picks across every category and budget. For those specifically comparing pellet vs. charcoal options, our pellet grill vs. charcoal grill comparison is required reading.
Must-Have Tools
- Instant-read thermometer — Non-negotiable. The Thermapen ONE or any NIST-calibrated probe is worth every cent. Stop guessing; start knowing.
- Leave-in probe thermometer — Set it and monitor the cook without lifting the lid repeatedly and bleeding heat.
- Aluminum foil (heavy duty) — Essential for the wrap phase of the 3-2-1 method.
- Spray bottle — For spritzing ribs with apple juice or cider vinegar during the cook to maintain moisture and build bark.
- Rib rack (optional) — Allows you to stand multiple racks vertically, maximizing smoker space and promoting even airflow.
- Long tongs — For maneuvering ribs safely without piercing the meat.
- Sharp boning or fillet knife — For membrane removal and slicing between bones when serving.
- Cutting board (large) — You need room to work when slicing a full rack.
- Pastry brush or silicone basting brush — For applying sauce cleanly in the final phase.
For a complete rundown of every tool that belongs in your outdoor cooking arsenal, our guide to the best barbecue tools covers everything from spatulas and tongs to injectors and rib racks.

Recommended: ThermoPro TP25 Wireless Thermometer
4-probe Bluetooth meat thermometer. Monitor up to four cuts simultaneously from your phone. Essential for managing long rib cooks without babysitting your smoker.
Check Price on Amazon →Building the Perfect Dry Rub for Baby Back Ribs
The dry rub is where a rack of ribs finds its identity. It’s the first layer of flavor, the precursor to bark formation, and the element that makes your ribs distinctly yours. A great rub balances four fundamental flavor categories: sweet, savory, smoky, and heat — with each component serving a specific purpose beyond just taste.
The Science Behind Dry Rubs
When a dry rub hits the surface of raw pork, osmosis begins immediately. Salt draws moisture out of the meat’s surface, which then dissolves the surrounding spices and creates a brine that’s slowly reabsorbed into the meat over time — typically 12 to 24 hours in the refrigerator. This process doesn’t just season the exterior; it penetrates the muscle fibers, creating depth of flavor that no sauce alone can replicate.
The sugar components in a rub serve a different purpose: Maillard reaction and caramelization. As the ribs cook at low-and-slow temperatures, sugars on the surface slowly caramelize and bond with amino acids in the meat proteins, creating the dark, crackling, flavor-packed crust we call bark. This is the hallmark of great BBQ — and it’s the reason you should never rush the first phase of the cook.
If you want to explore even more custom rub formulations, our guide on the best barbecue rubs and our homemade BBQ rub recipe are excellent starting points for building your own signature blend.
The Master Baby Back Rib Rub (This Recipe)
🔥 Signature Baby Back Rib Dry Rub
Yields: Enough for 2 full racks · Store excess in an airtight jar for up to 6 months
- 3 tablespoons dark brown sugar (packed)
- 2 tablespoons smoked paprika
- 1 tablespoon kosher salt
- 1 tablespoon garlic powder
- 1 tablespoon onion powder
- 1½ teaspoons black pepper (coarsely ground)
- 1 teaspoon cayenne pepper (adjust to taste)
- 1 teaspoon dry mustard powder
- ½ teaspoon ground cumin
- ½ teaspoon dried thyme
- ¼ teaspoon ground allspice
Rub Variation Guide
| Style | Key Modifications | Best Paired With |
|---|---|---|
| Kansas City Classic | Extra brown sugar, add cinnamon | Thick tomato-molasses sauce |
| Memphis Dry | No sugar, more black pepper & paprika | No sauce (ribs are served dry) |
| Texas Bold | Remove sugar, double black pepper & cumin | Light mop sauce, beef tallow |
| Carolina Sweet-Heat | More brown sugar, add chipotle powder | Vinegar-based or mustard sauce |
| Competition Style | Add MSG, reduce salt, fine-grind everything | Light cherry glaze |
| Coffee-Cocoa | Add 1 tbsp ground espresso + 1 tsp cocoa | Bourbon-based BBQ sauce |

Top Pick: Traeger Pork & Poultry Rub
When you want a reliable, well-balanced rub right off the shelf, Traeger’s Pork & Poultry blend delivers every time. Perfect as a starting point or backup when you haven’t had time to mix your own.
Check Price on Amazon →Wood Selection and Smoke: The Invisible Ingredient That Makes or Breaks Your Ribs
Ask any serious pitmaster what separates good BBQ from transcendent BBQ, and they’ll almost always bring up smoke. Not just the presence of smoke, but the right smoke — the right wood species, the right density, and the right timing. Smoke is a spice, and like any spice, it can elevate a dish or overwhelm it.
Understanding Smoke Quality
The goal is what pitmasters call thin blue smoke (TBS) — a barely visible, almost translucent wisp of smoke that carries clean, complex flavors into the meat. Thick white or billowing gray smoke indicates incomplete combustion: wood burning without enough oxygen, producing creosote and acrid compounds that will make your ribs taste bitter and harsh.
This is one of the most common mistakes new smokers make — piling on wood chips and wondering why their ribs taste like an ashtray. More smoke is not better smoke. The goal is quality and consistency over quantity.
Best Woods for Baby Back Ribs
| Wood | Flavor Profile | Intensity | Best For |
|---|---|---|---|
| Apple | Mild, sweet, fruity | ⭐⭐ | Baby backs, poultry |
| Cherry | Mild-sweet, slightly tart | ⭐⭐ | Pork, gives mahogany bark color |
| Hickory | Strong, bacon-like, classic BBQ | ⭐⭐⭐⭐ | Spare ribs, pork shoulder |
| Pecan | Nutty, rich, medium intensity | ⭐⭐⭐ | Baby backs (excellent choice) |
| Maple | Delicate, slightly sweet | ⭐⭐ | Light smoke profile preference |
| Mesquite | Bold, earthy, assertive | ⭐⭐⭐⭐⭐ | Beef (use sparingly on pork) |
For baby back ribs specifically, the two winning combinations are: cherry + hickory (2:1 ratio for color and classic smoke flavor) and apple + pecan (50/50 for a sweeter, more delicate smoke). Both deliver exceptional results.
Our detailed guide on wood chips vs. wood chunks and the comparison of hickory vs. mesquite for smoking will give you everything you need to make the right call based on your setup. For managing smoke in your specific grill, the smoke box comparison is also worth your time.
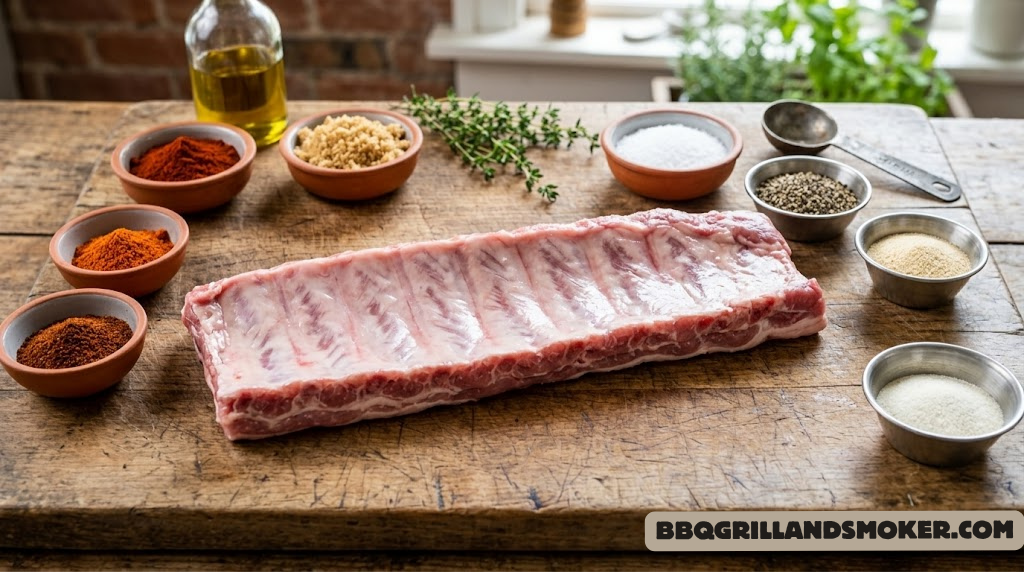
BBQ Baby Back Ribs: Full Recipe, Ingredients, and Preparation
🍖 Classic Smoked BBQ Baby Back Ribs
The definitive backyard rib recipe — tested and refined across multiple cooker types
For the Ribs
- 2 racks baby back ribs (approx. 2 lbs each)
- 4 tablespoons yellow mustard (binder)
- Full batch Signature Dry Rub (recipe above)
For the Mop / Spritz
- ½ cup apple juice (unsweetened)
- ¼ cup apple cider vinegar
- 2 tablespoons water
- 1 tablespoon hot sauce (optional)
For the Foil Wrap (Braise)
- 4 tablespoons unsalted butter (cut into pats)
- 2 tablespoons honey
- ¼ cup apple juice
- 1 tablespoon brown sugar
For the Glaze (Optional)
- 1 cup your favorite BBQ sauce (or homemade — see below)
- 2 tablespoons honey or maple syrup
- 1 teaspoon apple cider vinegar
Wood Smoke
- 3–4 chunks cherry wood (or apple/pecan blend)
- 1–2 chunks hickory (for depth)
The Night-Before Prep: Why It Matters
The single biggest improvement most home cooks can make to their rib game has nothing to do with the cook itself — it’s what happens the night before. Applying your rub 8 to 24 hours in advance and refrigerating the ribs uncovered allows the salt to draw out surface moisture, dissolve the rub ingredients, and reabsorb everything back into the meat in a process that genuinely changes the texture and depth of flavor at the core.
If you’re short on time, a minimum 2-hour rest after rubbing will still give you noticeably better results than rubbing and immediately cooking. But plan for the overnight rest when possible. It’s one of those small disciplines that separates consistently outstanding BBQ from occasionally great BBQ.
Step-by-Step: How to Cook BBQ Baby Back Ribs
Now we get to the heart of it. The following steps represent the complete, uncompromised process for cooking baby back ribs on a smoker or charcoal grill using the 3-2-1 method — the most reliable framework for producing fall-off-the-bone ribs with a proper bark and a gorgeous glaze. Each step is fully explained so you understand not just what to do but why.
Remove the Membrane and Trim
Lay the rack bone-side up on your cutting board. Locate the thin, shiny membrane stretched across the bones. Slide a butter knife or spoon handle under the edge of the membrane at one end, work it free, then grab it firmly with a dry paper towel and pull firmly toward the opposite end. It should peel away cleanly. Discard the membrane.
Next, inspect the rack. Trim away any excessive flaps of loose meat on the edges that would dry out before the main rack is done. If there’s a thick “flap” of meat on the bone side (the “skirt”), leave it — it protects moisture. Pat the entire rack dry with paper towels before applying the binder.
Apply the Binder and Dry Rub
Spread a thin, even layer of yellow mustard over all surfaces of the rack — bone side, meat side, and edges. The mustard acts as a binder, helping the rub adhere and forming a thin flavor layer that virtually disappears during cooking (you will not taste mustard in the finished product).
Immediately after applying the mustard, coat the rack generously with your dry rub. Don’t be timid — press the rub firmly into the meat on all surfaces. Bone side first, then edges, then the meat side last. The meat side should have the heaviest coating, as this is where you want the most bark development. Wrap loosely in plastic wrap and refrigerate overnight (or at least 2 hours).
Set Up Your Smoker for Low-and-Slow Indirect Heat
Remove the ribs from the refrigerator 45 minutes to 1 hour before cooking to let them come closer to room temperature. This promotes more even cooking from edge to center.
Target temperature: 225°F to 250°F (107–121°C) at the grate level. This is the sweet spot for baby back ribs — hot enough to break down collagen over time, but cool enough to develop bark and allow smoke penetration without drying out the surface.
For charcoal grills: Set up a two-zone fire — coals on one side, ribs on the other. Use the snake/minion method for extended burns without adding coals. Add wood chunks directly to the lit coals.
For pellet grills: Set to 225°F, Super Smoke mode if available, and load your preferred pellets. No further setup required.
For offset smokers: Fire the firebox with a chimney of lit coals, then add splits of wood. Maintain temperature by managing the size of the fire and airflow through the intake and exhaust dampers.
For deep guidance on temperature management across different grill types, see our resource on charcoal grill temperature control and the grilling vs. smoking comparison for the heat and flavor mechanics involved.
Load the Ribs — Meat Side Up, Bone Side Down
Place the racks bone side down (meat side up) on the grate in the indirect heat zone. If using a rib rack, stand them vertically. The meat side should face the heat source — this promotes better bark development on the surface with the most exposed meat.
Close the lid and resist the urge to open it for the first 90 minutes. Every time you lift the lid, you lose heat and smoke, extending your cook time and disrupting the all-important smoke penetration phase. The smoke ring (that prized pink layer just under the bark) forms predominantly in the first 2 hours — let it happen.
The Spritz Phase — Building Bark with Moisture
Beginning at the 90-minute mark, open the smoker every 45 minutes and spritz the exposed meat side of the ribs with your apple juice/cider vinegar mixture. Use a spray bottle set to a fine mist — you’re not drenching the ribs, you’re adding a light coating of moisture to prevent the bark from drying out too fast and cracking, while also adding a thin layer of flavor with each pass.
The spritz also helps smoke adhere to the surface. As it evaporates, it creates a slightly tacky surface that catches smoke particles more effectively. Keep your spritz applications light and consistent — every 45 minutes for the first 3 hours of the cook (the unwrapped phase).
The Foil Wrap — Locking in Tenderness
After approximately 3 hours of smoking (the “3” in 3-2-1), your ribs should have developed a solid, dark bark and a beautiful smoke ring visible from the exposed bone ends. Now it’s time to wrap them in foil — this is the steam-braise phase that drives tenderness.
Tear two large sheets of heavy-duty aluminum foil and lay them out flat. Place the ribs meat side down on the foil. Distribute pats of butter, a drizzle of honey, a splash of apple juice, and a sprinkle of brown sugar around the ribs. Wrap tightly, ensuring no steam can escape. Return to the smoker at 225°F.
Unwrap and Finish — Firming the Bark
After 2 hours in the foil (the “2” in 3-2-1), carefully unwrap the ribs — the foil packet will be full of rendered pork juices, butter, and honey. Reserve some of this liquid if you want to reduce it into a drizzle sauce. Return the ribs meat side up to the grate, unwrapped, for the final 1-hour phase.
This final hour accomplishes two things: it firms the bark that was softened by the steam in the foil wrap, and it sets the glaze if you’re applying BBQ sauce. Apply your first coat of sauce at the 30-minute mark of this phase, then a second coat at 15 minutes, allowing each to caramelize before the next application. Pull the ribs when they reach the doneness indicators described in the temperature section below.
The 3-2-1 Method: A Complete Breakdown and When to Modify It
The 3-2-1 method is the most widely taught and practically reliable framework for cooking baby back ribs on a smoker. The numbers represent hours: 3 hours of smoking unwrapped, 2 hours wrapped in foil, and 1 final hour unwrapped to firm the bark and set the glaze. At 225°F, this typically yields ribs that are deeply tender with well-developed bark and a gorgeous caramelized exterior.
But — and this is important — the 3-2-1 method is a starting framework, not a law. Racks vary in thickness, fat content, and starting temperature. Smokers vary in airflow and temperature consistency. Weather affects cook times. The numbers should inform your cook, not dictate it. Your thermometer and your eyes are your real guides.
3-2-1 Phase Breakdown
| Phase | Duration | Temp | Goal | What’s Happening |
|---|---|---|---|---|
| Phase 1 (3 hrs) | 3 hours | 225°F | Smoke + Bark | Smoke penetration, bark formation, Maillard reaction begins |
| Phase 2 (2 hrs) | 2 hours | 225°F | Tenderness | Steam braise breaks down collagen into gelatin, meat becomes tender |
| Phase 3 (1 hr) | 1 hour | 225–250°F | Bark + Glaze | Bark firms back up; sauce caramelizes into lacquered glaze |
Adjusting the Method for Baby Back Ribs
The 3-2-1 method was originally developed for spare ribs, which are thicker, fattier, and take longer to cook. For baby back ribs — which are leaner and thinner — a 2-2-1 modification is often preferable: 2 hours of smoke, 2 hours wrapped, and 1 hour unwrapped. This prevents over-tenderizing, which causes the meat to fall completely off the bone rather than pulling clean — a sign of overcooked ribs in competition circles.
Here’s a quick reference for choosing your method:
| Method | Best For | Result |
|---|---|---|
| 3-2-1 | Spare ribs, thick baby backs | Very tender, slight fall-off-bone |
| 2-2-1 | Baby back ribs (preferred) | Tender with clean bite, firm bark |
| No-wrap (6+ hrs) | Competition-style, all rib types | Maximum bark, drier, chewier bite |
| 1.5-1-0.5 | Hot-and-fast (325°F+) | Less smoke flavor, faster, tender |
For a full deep dive into the smoke and time metrics of different methods, our resource on the 3-2-1 rib smoking method gives you all the detail you need. Also check our comparison on direct vs. indirect grilling methods — it provides great context for understanding why indirect heat is non-negotiable for ribs.

Essential: Reynolds Heavy Duty Foil (200 sq ft)
The foil wrap phase of the 3-2-1 method requires heavy-duty foil that won’t tear or puncture under the weight of ribs and hot liquids. Reynolds Wrap heavy-duty is the gold standard in competition BBQ kitchens.
Check Price on Amazon →BBQ Sauce: Timing, Styles, and How to Nail the Glaze
BBQ sauce is perhaps the most divisive topic in American barbecue. In Memphis, the very suggestion of saucing ribs might earn you a dirty look. In Kansas City, thick tomato-molasses sauce is practically mandatory. In the Carolinas, vinegar-based or mustard-based sauces reign supreme. In Texas, the meat speaks for itself and sauce is something you find on the table as an option, not a component of the cook. There’s no single right answer — but there are some fundamental principles that apply regardless of your regional allegiance.
The Golden Rule of BBQ Sauce Timing
Never apply BBQ sauce before the final 30–45 minutes of cooking. Most commercial BBQ sauces contain significant amounts of sugar, and sugar burns rapidly at smoking temperatures. Apply it too early and you’ll end up with a bitter, black, acrid exterior that masks all the beautiful bark you worked so hard to build.
The correct approach for the 3-2-1 method is to apply your first coat of sauce about 30 minutes before you plan to pull the ribs, then a second coat at 15 minutes. Two thin coats, each allowed to set and caramelize, produce a far better glaze than one thick coat applied late.
Regional BBQ Sauce Styles
| Style | Base | Sweetness | Acidity | Heat | Best Pairing |
|---|---|---|---|---|---|
| Kansas City | Tomato + molasses | High | Low | Mild | Baby back, spare ribs |
| Memphis | Tomato + vinegar | Medium | Medium | Mild-medium | Served dry or light sauce |
| Eastern NC | Vinegar + pepper | None | Very High | Medium | Pulled pork primarily |
| SC Mustard | Yellow mustard + vinegar | Low-medium | High | Mild | Pork ribs, whole hog |
| Alabama White | Mayo + vinegar | None | High | Medium | Chicken, turkey |
| Texas Mop | Beef broth + Worcestershire | None | Low | Medium | Beef ribs, brisket |
For our full guide to the best commercial sauces across every style, see our best barbecue sauces roundup. And if you’re a label reader, you might want to check whether your sauce is gluten-free — many contain malt vinegar or soy sauce, which are not. We also cover whether Sweet Baby Ray’s is gluten-free specifically, since it’s the most popular commercial sauce in America.
Quick Homemade Baby Back Rib Glaze
If you want something simple and stunning:
🍯 Honey-Bourbon Rib Glaze
Ready in 10 minutes · Makes enough for 2 full racks
- 1 cup ketchup
- ¼ cup bourbon (or apple juice for alcohol-free)
- 3 tablespoons honey
- 2 tablespoons brown sugar
- 1 tablespoon apple cider vinegar
- 1 tablespoon Worcestershire sauce
- 1 teaspoon smoked paprika
- ½ teaspoon garlic powder
- ½ teaspoon black pepper
- ¼ teaspoon cayenne
Combine all ingredients in a saucepan over medium heat. Simmer 8–10 minutes until slightly thickened. Cool before applying to ribs.
Temperature Mastery: Knowing When Your Ribs Are Actually Done
This is where a lot of home cooks get frustrated, because baby back ribs don’t behave like steak. You can’t set a single target internal temperature and call it done. The reason has everything to do with collagen — the connective tissue that runs through the rib meat — and how it transforms during cooking.
The Collagen Conversion Window
Collagen begins to convert to gelatin at around 160°F (71°C), but this conversion happens over time, not instantly. To complete the process and achieve the “pull” that defines great BBQ ribs — where the meat releases from the bone cleanly with moderate resistance — you typically need internal temperatures between 195°F and 205°F (90–96°C), held for a sustained period. Below 190°F, the ribs will be cooked but tough. Above 210°F, they’ll begin falling off the bone.
The Bend Test: Your Visual Confirmation
Even with a thermometer, experienced pitmasters rely on what’s called the bend test as their primary doneness indicator. Pick up the rack from one end with your tongs, and let the other end hang freely. Well-cooked baby back ribs will bend sharply — to about 45 degrees or more — and the bark will crack visibly across the surface. The meat will begin to pull back from the bone ends by ¼ to ½ inch. A rack that stays stiff and resists bending needs more time.
The Toothpick Test
Insert a toothpick or skewer between two bones at the thickest part of the rack. It should slide in and out with virtually no resistance — like pushing through softened butter. Any springiness or resistance indicates more time is needed. This is particularly useful during the foil wrap phase when visual cues aren’t available.

The Thermometer Pitmasters Trust: ThermoWorks Thermapen ONE
1-second read time, ±0.5°F accuracy, waterproof. If you’re serious about BBQ, this is the single best investment you can make. Stop guessing; start knowing exactly where your ribs stand.
Check Price on Amazon →Serving, Slicing, and Perfect Side Dishes for Baby Back Ribs
You’ve invested 5+ hours into these ribs. The way you serve them matters. A few crucial steps between the smoker and the table will elevate the experience from great to unforgettable.
The Rest: Non-Negotiable
Pull the ribs from the heat and let them rest for at least 10 minutes before slicing — ideally 15 to 20 minutes. During this rest, muscle fibers that contracted during cooking begin to relax and reabsorb the juices that were pushed toward the center. Cut into ribs immediately off the heat and those juices run all over your cutting board. Wait 15 minutes, and they stay in the meat where they belong.
How to Slice Baby Back Ribs Properly
Use a sharp, thin boning knife or a carving knife. Position the rack bone-side up, and cut between each bone using a gentle sawing motion — don’t force the knife through. Let the blade find the natural gap between bones. The goal is clean cuts that leave a full “lollipop” of meat on each bone, not ragged tears.
For a crowd or potluck presentation, consider leaving the rack whole and letting guests cut their own portions. There’s a visual drama to a full slab of beautifully glazed baby back ribs that individual bones simply can’t match.
Ideal Side Dishes
Classic Pairings
- Creamy coleslaw (the acid cuts the richness perfectly)
- Smoked baked beans with bacon and brown sugar
- Buttery corn on the cob (grilled corn recipe here)
- Loaded baked potatoes
- Mac and cheese (smoked mac and cheese)
Elevated Pairings
- Pickled jalapeños and bread and butter pickles
- Charred broccoli with lemon and parmesan
- Smoked potato salad
- Grilled peach and arugula salad
- Jalapeño cornbread
Leftovers and Storage
Leftover baby back ribs reheat beautifully. Wrap individual portions or the whole slab tightly in foil with a small splash of apple juice or water to add steam. Reheat in a 275°F oven for 20–25 minutes until heated through. Avoid microwaving ribs — it drives out moisture and makes the meat tough and rubbery. For longer storage, ribs freeze well vacuum-sealed for up to 3 months. Thaw overnight in the refrigerator before reheating.
Curious about storing other BBQ meats? Our guide on freezing pulled pork barbecue covers the same principles with detailed thawing and reheating guidance.
Troubleshooting Common Baby Back Rib Problems
Even experienced pitmasters run into problems. The difference is knowing what caused the issue and how to course-correct. Here’s your comprehensive diagnostic guide:
| Problem | Likely Cause | Solution |
|---|---|---|
| Ribs too tough/chewy | Undercooked — collagen not fully converted | Wrap in foil and cook another 30–45 min at 250°F |
| Ribs fall off the bone | Overcooked — spent too long in foil wrap | Reduce wrap time by 30 min next cook; target 2-2-1 |
| Bark is too soft/mushy | Too much time wrapped; too much sauce applied early | Extend the final unwrapped phase; apply sauce only last 30 min |
| Bitter, acrid smoke flavor | Dirty smoke; too much wood; low oxygen combustion | Use less wood; ensure proper airflow; aim for thin blue smoke |
| Dry, tight meat | Too hot; insufficient spritz; poor-quality rack | Lower temp; spritz more frequently; choose better meat |
| No smoke ring | Meat too warm when placed on smoker; wrong wood | Start ribs cold from fridge; use real wood (not charcoal alone) |
| Uneven cooking across rack | Hot spots in smoker; rack too close to heat source | Rotate racks halfway through; use water pan for heat diffusion |
| Sauce burning black | Applied too early; temp too high in final phase | Apply only in last 30 min; watch temp carefully at end of cook |
The Stall: What It Is and How to Handle It
At some point during your cook — usually around 160–170°F internal temperature — you’ll notice that the meat temperature stops rising and may even drop slightly. This plateau can last anywhere from 30 minutes to 2+ hours. This is called the stall, and it’s caused by evaporative cooling: moisture evaporating from the meat’s surface drops the temperature faster than the smoker’s heat can raise it.
The foil wrap is your most effective tool for powering through the stall — it stops evaporative cooling completely and allows heat to drive the internal temperature forward. If you’re cooking without a wrap (competition-style), simply be patient. The stall will resolve on its own. Don’t be tempted to crank the temperature — you’ll dry out the surface before the internal temperature catches up.
For related troubleshooting on your equipment, check out our guides on why your grill isn’t heating properly and why your Traeger is running too hot. Equipment issues can masquerade as cooking mistakes — rule them out first.
✅ Signs of a Great Cook
- Dark mahogany bark with visible crackling
- Pink smoke ring penetrating ¼ inch beneath bark
- Meat pulls clean from bone with moderate resistance
- Bend test shows 40–50° flex
- Juices run clear when poked
- Bones pull free individually without force
- Rich, complex smoke and pork aroma
❌ Warning Signs
- Meat falls off bone before pulling
- Gray or pale color throughout
- Surface is black and bitter-smelling
- Rack stays stiff in bend test
- Rubbery or tough texture when bitten
- Strong bitter or acrid smoke aftertaste
- Pooled liquid inside foil is pale/thin

Essential Starting Tool: Weber Rapidfire Chimney Starter
Every charcoal cook starts here. The Weber chimney starter lights coals evenly and quickly without lighter fluid — a cleaner start that means better smoke flavor from the first minute.
Check Price on Amazon →Advanced Tips and Pitmaster Secrets for Competition-Level Ribs
You’ve mastered the fundamentals. Now let’s talk about the details that separate good ribs from the kind that make people stop mid-bite and look at you differently.
Injection: The Underused Secret Weapon
While most home cooks focus entirely on the exterior rub and surface smoke, competition pitmasters often inject their ribs before rubbing. A simple injection of warm apple juice, honey, butter, and a pinch of rub pushed directly into the meat between the bones from the bone side adds interior moisture and flavor that no amount of surface work can replicate.
Use a meat injector with a fine needle. Inject 3–4 spots per rack, angling the needle between bones and depositing about 1–2 tablespoons of injection liquid at each point. Allow the injection to settle for at least 30 minutes before applying the rub.
The Competition Bite Standard
In competition BBQ, judges evaluate ribs on a standard called the “clean bite” — when you bite into a rib, the meat should come away cleanly with your teeth in a perfect crescent without the bone pulling out of the remaining rack. The meat should offer a slight resistance — what judges describe as having a “little tug” — before releasing. Fall-off-the-bone ribs, while loved by many, are actually penalized in competition because they indicate overcooking.
Color Strategy: Managing the Bark’s Visual Appeal
The final color of your ribs’ bark is heavily influenced by your wood choice and your rub’s sugar content. Cherry wood gives pork a deep burgundy-red color that photographs beautifully. Adding cherry wood to your smoke blend — even if you’re using hickory as the primary driver — will produce a more visually appealing bark. Meanwhile, reducing white sugar and increasing brown sugar in your rub creates a darker, richer caramelization without the risk of white sugar burning.
Managing Multiple Racks
When cooking more than two racks, rotation becomes essential. The rack closest to the heat source will always cook faster — sometimes by as much as 30 minutes. Rotate racks front-to-back and top-to-bottom at the 90-minute mark and again at the 3-hour mark. If using a rib rack to stand them vertically, the rack nearest the firebox needs the most attention.
For an excellent reference on scaling up your rib production — including how much meat to plan for a crowd — see our guide on how many pounds of BBQ per person.
The Cooler Rest (Competition Trick)
After pulling your ribs, wrap them tightly in foil, then in a few layers of clean towels, and place them in a preheated (then emptied) cooler. This method — called “faux Cambro” after the commercial food-holding units used in restaurants — holds ribs at perfect serving temperature for up to 4 hours without loss of quality. It’s the competition pitmaster’s secret for managing timing when multiple proteins are on the smoker simultaneously.

Cook More at Once: Stainless Steel BBQ Rib Rack
Stand up to 5 full racks of ribs vertically, dramatically increasing your smoker’s capacity while promoting even airflow and more uniform cooking across every rack.
Check Price on Amazon →Frequently Asked Questions About BBQ Baby Back Ribs
For baby back ribs cooked low and slow, the ideal internal temperature is between 195°F and 205°F (90–96°C). At this range, the collagen in the meat has fully converted to gelatin, creating that tender, juicy texture. However, internal temperature alone isn’t the best doneness indicator — always combine it with the bend test and the toothpick test for the most reliable results. The meat should release from the bone cleanly when gently pulled, and the rack should flex 40–50 degrees in the bend test.
At 225°F, baby back ribs typically take 4.5 to 6 hours total using the 3-2-1 or 2-2-1 method. The variation depends on rack thickness, fat content, starting temperature, and your specific smoker’s airflow dynamics. Plan for at least 5 hours and have a buffer of another hour just in case. A rack that finishes early can always be held in a foil-wrapped cooler for several hours without degrading — a rack that’s rushed cannot be undone.
Yes, always remove the membrane. The periosteum (silverskin) on the bone side of the rack is a tough, papery barrier that prevents smoke and seasoning from penetrating the meat, and it never softens during cooking. To remove it, slide a butter knife under the edge of the membrane at the widest bone, work it free, grip it with a dry paper towel, and pull firmly. It should come off in one or two strips in under 90 seconds. This is one of the highest-impact prep steps in the entire recipe.
Baby back ribs come from the upper loin area near the backbone and are shorter (3–6 inches), leaner, more tender, and typically more expensive than spare ribs. Spare ribs come from the lower belly area near the sternum, are longer (6–8 inches), fattier, and richer in flavor. St. Louis-style ribs are spare ribs that have been trimmed into a uniform rectangular shape. For a beginner, baby backs are more forgiving. For maximum flavor, spare ribs deliver more fat-driven richness. Both are excellent — it comes down to personal preference.
Absolutely. Set up your gas grill for indirect cooking by lighting only one or two burners on one side and placing the ribs on the unlit side. Target 225–250°F at the grate level using your grill’s built-in thermometer (adjusting for lid temperature vs. grate temperature if needed). Add smoke by using a foil packet of wood chips or a dedicated smoke box placed directly over a lit burner. The ribs will cook just as well — the only limitation is that gas grills typically produce less smoke flavor than charcoal or dedicated smokers. Our guide on preventing flare-ups on a gas grill is useful reading here.
Tough ribs after a long cook almost always indicate one of two things: either the internal temperature never reached the collagen conversion zone (195°F+), or the cook temperature was too high (above 275°F), which drove the surface temperature up rapidly before the interior had time to tenderize. The fix is to increase the foil wrap time by 30–45 minutes, which adds the steam braise needed to push through tough connective tissue. In the future, ensure your smoker is maintaining a consistent 225–250°F throughout and use a leave-in probe thermometer to track internal temp in real time.
Apply BBQ sauce only in the final 30–45 minutes of cooking. Most sauces are high in sugar, which burns and turns bitter at low-and-slow temperatures if left on too long. The correct approach is two thin coats: first coat 30 minutes before pulling, second coat 15 minutes before pulling. Each coat should have time to set and caramelize slightly before the next is applied. Never sauce ribs before or during the foil wrap phase — it will create a gummy, steamed texture rather than a lacquered glaze.
The best woods for baby back ribs are fruit woods — particularly apple and cherry — either alone or blended with a small amount of hickory or pecan for additional depth. Apple provides a mild, slightly sweet smoke that complements pork beautifully without overpowering it. Cherry adds a beautiful reddish-mahogany color to the bark. Adding one chunk of hickory alongside two of cherry creates a well-rounded smoke profile that’s both complex and accessible. Avoid mesquite on baby backs — it’s too assertive and can make pork taste harsh over a long cook.
A smoke ring forms when nitrogen dioxide from burning wood reacts with myoglobin in the meat’s surface. This reaction only occurs below approximately 140°F — once the meat surface reaches that temperature, the reaction stops. To maximize smoke ring formation: start with cold ribs straight from the refrigerator (this extends the low-temperature window), use real wood rather than charcoal alone, and ensure the smoke is clean and consistent in the first 2 hours of the cook. Some pitmasters lightly mist the ribs’ surface with water just before placing them in the smoker, which also promotes the chemical reaction.
Yes, you can make excellent ribs in the oven, though you won’t get authentic smoke flavor. Follow the same rub and prep steps. Cook at 275°F wrapped tightly in foil on a baking sheet for 2.5–3 hours. Unwrap, apply your sauce, and return to the oven at 375°F for 15–20 minutes to caramelize the glaze. For some smoke character, add a small amount of liquid smoke to your rub or sauce — use sparingly as it’s very concentrated. Finishing the oven-cooked ribs for 3–5 minutes under the broiler will help firm the exterior. The result is genuinely delicious, even without a smoker.
The best method for reheating ribs is the low-and-slow oven method: wrap the ribs tightly in foil with 2–3 tablespoons of apple juice or water, and reheat at 275°F for 20–25 minutes until heated through. The added liquid creates steam inside the foil that prevents the meat from drying out. For the last 5 minutes, unwrap and apply a fresh light coat of sauce if desired, then return to the oven unwrapped to refresh the exterior. Avoid the microwave — it produces uneven heating and forces moisture out of the meat rapidly, resulting in tough, dry ribs.
Your Best Rack of Ribs Starts Right Now
There’s a reason BBQ baby back ribs sit at the top of the backyard cook’s hierarchy. They demand patience, attention, and genuine respect for the process — and they reward every ounce of that effort with something no other cooking method can produce: deep smoke-kissed meat, crackling bark, and that perfect pull from the bone that makes the whole backyard go quiet.
You now have everything you need: the understanding of the cut, the rub science, the 3-2-1 framework, the smoke selection guide, the temperature targets, and the troubleshooting knowledge to course-correct when needed. The only thing left is to fire up your smoker, trust the process, and let time do what time does best.
Start with one rack. Apply the method faithfully. Take notes. Then do it again. BBQ mastery is cumulative — each cook teaches you something the last one didn’t. That’s the beauty of it.
Now light that fire.
Find Your Perfect Smoker →Continue Your BBQ Journey
Ready to level up beyond ribs? Here’s what to cook next:
- Smoked Pulled Pork Recipe — The ultimate low-and-slow project
- Smoked Beef Short Ribs — Rich, beefy, and deeply satisfying
- Smoked Pork Belly Burnt Ends — BBQ candy you’ll be obsessed with
- BBQ Grilled Chicken Thighs — Weeknight BBQ done right
- Smoker Guide for Beginners — The complete foundation for new smokers

Take Your BBQ to the Next Level
A quality pellet smoker is the single biggest upgrade you can make to your BBQ game. Set-and-forget temperature control, consistent wood smoke, and enough capacity to cook for a crowd — all in one unit. Browse our top picks and start cooking like a pitmaster.
Shop Pellet Smokers on Amazon →