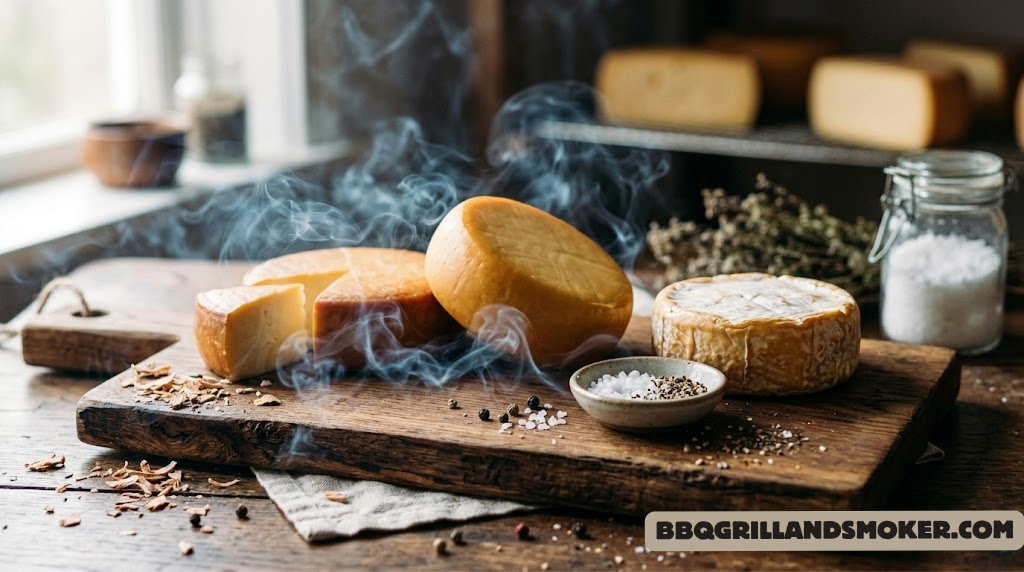
The Art of Cold Smoke Cheese at Home: Your Complete Pit Master’s Handbook
There’s a moment — somewhere between setting up your smoker on a quiet Saturday morning and pulling out a block of impossibly aromatic, golden-hued smoked cheddar two hours later — when you realize you’ve unlocked something that most home cooks never discover. Cold smoke cheese at home sits at the intersection of ancient preservation technique and modern backyard craft. It requires no special culinary school training, no commercial kitchen, and no expensive restaurant equipment. What it does require is patience, a little knowledge, and the right guidance.
This guide is that guidance. Whether you’re working with a dedicated cold smoker, a simple pellet grill, a classic kettle charcoal setup, or even a cardboard box rig, the principles remain the same. We’re going to walk through every layer of the cold smoking process — from the molecular-level science of smoke penetration into cheese fat to the practical reality of maintaining temperatures below 90°F in the middle of summer, and every step in between.
Cold smoked cheese has become one of the most rewarding hobbies for backyard pit masters precisely because the barrier to entry is so low and the results are so dramatic. A three-dollar block of grocery store gouda transforms into something that tastes like it came from a high-end charcuterie board. That’s the magic we’re chasing here.
What Is Cold Smoking Cheese? (And Why It’s Different from Hot Smoking)
Before we get into technique, it’s worth establishing exactly what we mean when we say cold smoking. The confusion between hot and cold smoking trips up a lot of beginners, and understanding the distinction is fundamental to getting cheese right.
Hot smoking — the kind you use when cooking pulled pork, ribs, or beef short ribs — applies both smoke and significant heat simultaneously. The food cooks all the way through, reaching safe internal temperatures. That combination of smoke and heat is what gives you that beautiful smoke ring and deeply penetrated flavor that enthusiasts obsess over.
Cold smoking is fundamentally different. The smoke is generated remotely or in a way that allows it to cool before reaching the food. The chamber temperature stays below 90°F — ideally between 68°F and 86°F — which means the food doesn’t cook at all. Instead, it absorbs aromatic smoke compounds purely through surface contact and diffusion. Think of it less as cooking and more as flavoring and, in some traditional applications, mild preservation.
✓ Advantages of Cold Smoking Cheese
- Preserves natural texture — cheese stays firm or creamy as intended
- Deeper, more complex flavor profile than liquid smoke
- No melting risk when done correctly
- Works with virtually any cheese variety
- Affordable — you can start for under $30
- Scales easily from one block to several pounds
- Results age and develop over days in the fridge
✗ Challenges to Anticipate
- Temperature management is critical and requires attention
- Hot weather makes the process significantly harder
- Freshly smoked cheese needs 1–2 weeks rest to peak
- Over-smoking creates harsh, bitter flavors
- Some setups require dedicated equipment purchase
- Condensation management takes practice
It’s also worth pointing out what cold smoking cheese is not: it is not a food safety method for making cheese shelf-stable in the way that salt-curing or full hot smoking of meats can be. The cheese still needs refrigeration. The smoke imparts flavor and creates a slightly protective rind on the exterior, but the fundamental preservation comes from continued cold storage.
For those interested in exploring the full spectrum of smoke-based cooking, understanding where cold smoking fits relative to grilling versus smoking methods provides excellent context. The low-and-slow philosophy that makes great ribs and brisket achievable also informs the patience required for successful cold smoking.
The Science Behind Smoke and Cheese: What Actually Happens
Understanding why cold smoking works the way it does makes you a better operator. When you know what’s happening at a chemical level, you can make smarter decisions about wood selection, exposure time, and post-smoke aging. This isn’t a chemistry lecture — it’s practical knowledge dressed in a lab coat.
Smoke Composition and Cheese Absorption
Wood smoke is not a simple substance. When wood smolders at the relatively low temperatures needed for cold smoking (400°F–700°F in the smoke source, not the chamber), it releases hundreds of compounds. The ones that matter most for cheese are:
- Phenols — These are the primary flavor compounds that give smoked cheese its characteristic aroma. Guaiacol and syringol are the most recognizable, and they’re responsible for the “sweet smoke” notes you identify in well-smoked gouda.
- Carbonyl compounds — Acetaldehyde, diacetyl, and furfural contribute to the complex layered flavor that freshly smoked cheese lacks but develops during the post-smoke rest period.
- Organic acids — Acetic and formic acids contribute to slight sharpness and help inhibit surface microbial growth, which is the mild preservation effect smoke provides.
- Polycyclic aromatic hydrocarbons (PAHs) — The compounds you want to minimize. They’re present in all smoke but are more concentrated in heavy, thick smoke. Thin blue smoke keeps PAH content low.
🔬 Temperature’s Role in Smoke Penetration
Cheese is primarily fat and protein. Both absorb smoke compounds differently, and temperature affects this absorption dramatically:
The Fat-Smoke Affinity
Here’s a counterintuitive fact: higher-fat cheeses tend to absorb smoke more readily than lower-fat varieties. Smoke compounds are largely lipophilic — they bind to fats. A rich, creamy gouda has more surface fat available for smoke bonding than a low-moisture part-skim mozzarella. This is why full-fat versions of any cheese always produce a more satisfying smoke result.
This also explains why aged cheeses respond differently than fresh ones. An aged sharp cheddar has a more crystalline protein matrix with concentrated fat pockets — smoke distributes itself differently through that structure than it does through the more uniform, elastic matrix of fresh mozzarella. Neither is wrong, but the texture and fat distribution shape what’s possible.
The moisture content of cheese also matters significantly. High-moisture fresh cheeses like ricotta or cottage cheese are poor candidates for cold smoking because their water content dilutes smoke compounds and creates a weepy, unpleasant texture after exposure. The ideal candidates have moisture content in the 30%–45% range — which covers most hard and semi-hard cheeses.
Why the Rest Period Is Non-Negotiable
Many first-time cold smokers taste their product right off the smoker and are disappointed by a sharp, acrid, almost chemical edge to the smoke flavor. They assume they did something wrong. Usually, they didn’t — they just didn’t wait.
The compounds deposited on and near the cheese surface during smoking need time to equilibrate. In the first 24–48 hours after smoking, the volatile top-notes (which are often harsh) dissipate. Over the following week, the deeper phenolic compounds migrate inward from the rind toward the center of the block. By days 10–14, what you have is a balanced, integrated smoke flavor that tastes natural and complex rather than applied and sharp.
“Fresh-smoked cheese is like a great Scotch just poured from the still — the potential is all there, but it needs time to become what it’s meant to be.”
This is one of the most important lessons in cold smoking, and it separates the people who do it once and give up from the ones who become genuinely passionate about it.
The Best Cheeses to Cold Smoke: A Comprehensive Selection Guide
Not every cheese is equally suited to cold smoking. Some transform into something magnificent. Others become rubbery disasters. The deciding factors are moisture content, fat percentage, and the inherent flavor profile of the cheese — does it have enough complexity to partner with smoke, or will the smoke simply overpower it?
Tier 1: The Cold Smoking Hall of Fame
🧀 Sharp Cheddar
⏱ 2–3 hours · Medium woodThe benchmark cold smoke cheese. Its firm texture, dense fat structure, and assertive flavor stand up beautifully to smoke without being overwhelmed. Aged varieties (2+ year) are exceptional.
🧀 Gouda
⏱ 1.5–2.5 hours · Mild woodPerhaps the single best beginner cheese. Its naturally buttery, caramel-like sweetness harmonizes with smoke in a way that seems almost purpose-built. Smoked gouda at home puts any grocery-store version to shame.
🧀 Gruyère
⏱ 2–3 hours · Fruit or mild woodThe nutty, slightly sweet character of gruyère pairs wonderfully with cherry or apple wood smoke. Exceptional on a cheese board or melted into smoked fondue or grilled sandwiches.
🧀 Mozzarella (Low-Moisture)
⏱ 1–2 hours · Light woodLow-moisture mozzarella — the kind sold in block or log form, not fresh buffalo — takes smoke beautifully. The smoke firms the exterior and adds incredible depth for pizza, caprese, and pasta applications.
🧀 Provolone
⏱ 2–2.5 hours · Hickory or appleA traditional Italian smoked cheese that translates perfectly to the home smoker. Its mild tang picks up savory, meaty smoke notes that make it a natural partner for charcuterie boards.
🧀 Monterey Jack
⏱ 1.5–2 hours · Apple or cherryMild enough to let the smoke lead, firm enough to hold its shape. An excellent gateway cheese for beginners and a reliable crowd-pleaser for parties and sandwiches.
🧀 Havarti
⏱ 1–1.5 hours · Mild fruit woodButtery and semi-firm, Havarti absorbs delicate smoke beautifully. Its creamy baseline flavor amplifies subtle wood nuances — ideal for alder or apple wood sessions.
🧀 Brie / Camembert
⏱ 45 min–1 hour · Ultra-lightAdvanced. The bloomy rind needs to be very cold and firm before smoking. Keep it short and the results are stunning — subtle smoke against the earthy, mushroomy rind and creamy interior is extraordinary.
Cheeses to Approach with Caution
| Cheese Type | Challenge | Verdict | If Attempted |
|---|---|---|---|
| Fresh Mozzarella (water-packed) | Very high moisture, soft texture, weeps badly | Avoid | Drain overnight on rack first; keep session under 45 min |
| Ricotta / Cottage Cheese | Too wet and loose — cannot hold form on grate | Skip | Use as ingredient post-smoking (smoke other ingredients instead) |
| Blue Cheese (Gorgonzola, Roquefort) | Very soft, mold cultures can react unexpectedly | Caution | Keep very cold, 30-min max, mild wood only |
| Parmesan / Pecorino | Extremely dry — smoke can over-penetrate rapidly | Careful | Keep sessions to 1 hour max; mild wood; cut into smaller blocks |
| String Cheese / Processed Cheese | Low fat content, melts easily, uninteresting results | Skip | Not worth the effort — results are rarely satisfying |
| Cream Cheese | Very soft; needs careful handling and brief sessions | Advanced only | Place in small ramekin, keep under 75°F chamber temp, 45 min max |

Camerons Cold Smoke Generator — Top-Rated for Cheese
Generates up to 6 hours of cold smoke from any wood dust. Works with most grills and smokers. Perfect starting point for home cheese smoking.
→ Check Price on Amazon Affiliate link · As an Amazon Associate we earn from qualifying purchasesEquipment You Need to Cold Smoke Cheese at Home
One of the most appealing aspects of cold smoking cheese is that you likely already own most of what you need. At minimum, you need a vessel that can contain smoke around food, a way to generate smoke at low temperatures, and a grate to keep the cheese off the surface. Beyond that, the world is your oyster — or your gouda.
The Smoke Chamber (What You’re Already Using)
Almost any covered cooking device can serve as a cold smoking chamber:
- Kettle charcoal grill (like the Weber 22″ kettle) — One of the best cold smoking vessels available at any price point. The lid vent controls airflow, the indirect setup prevents heat from reaching the cheese, and the dome shape creates excellent smoke circulation.
- Pellet grill — Modern pellet smokers like the Traeger Pro 575 can run very low with the right cold smoke attachment. Some have dedicated “super smoke” modes that work for cold smoking. The challenge is keeping temps below 90°F on a dedicated pellet system.
- Offset smoker — A traditional offset smoker like the Oklahoma Joe Highland works well. With the firebox barely smoldering and the main chamber far from the heat, temperature control is very manageable.
- Electric smoker — Electric smokers with separate cold smoke adapters, like those from Masterbuilt, are excellent for cold smoking because you can disconnect the heating element entirely and use only the cold smoke generator.
- Dedicated cold smoker cabinet — Top-end option. These are purpose-built chambers with excellent temperature regulation, often paired with external smoke generators.
- DIY cardboard box rig — Yes, really. A clean, food-safe cardboard box with a smoke tube inside is a legitimate and effective cold smoking chamber. We’ll cover this in the advanced techniques section.
Smoke Generation Methods
| Method | Cost | Smoke Duration | Heat Output | Best For |
|---|---|---|---|---|
| Smoke Tube (pellets) | $15–30 | 2–5 hours | Very low | Beginner, any grill setup |
| Maze Smoke Generator (dust) | $25–50 | 4–8 hours | Minimal | Long sessions, full-flavor batches |
| Cold Smoke Generator (chip/dust) | $30–80 | 4–8 hours | Negligible | Best overall control and results |
| Pellet Grill with Cold Smoke Attachment | $20–60 attachment | Controller-dependent | Low (monitor carefully) | Those who already own a pellet grill |
| Dry Ice Method | Variable | Session-specific | Cooling effect | Hot weather smoking only |
Essential Supporting Tools
- Instant-read or digital thermometer — Non-negotiable. You must know your chamber temperature at all times. A wireless probe thermometer that lets you monitor from inside your house is ideal.
- Wire cooling rack — Elevates cheese for even smoke exposure on all surfaces. A standard kitchen cooling rack on top of your grill grates works perfectly.
- Cutting board and sharp knife — To portion blocks before smoking. Smaller pieces smoke more evenly than large ones.
- Cheese paper or vacuum sealer — Critical for the post-smoke rest and storage period.
- Ice tray or sheet pan with ice — Your temperature management backup for hot-weather smoking sessions.
If you’re serious about expanding your smoking capabilities, it’s also worth considering your overall backyard setup. A good pair of barbecue tools makes management much easier, and understanding barbecue maintenance fundamentals ensures your equipment stays in shape for session after session.
Wood Selection Guide: Matching Wood to Cheese Like a Sommelier
Wood selection in cold smoking is analogous to wine pairing. There are rules of thumb, there are classic combinations, and there’s personal taste that should ultimately guide you. But unlike wine pairing, the rules here are rooted firmly in science — different wood species produce genuinely different smoke chemistry, and the resulting flavors are distinct enough that the wrong pairing can ruin an otherwise perfect session.
Apple Wood
Light, sweet, mildly fruity smoke. Universally compatible. The safest choice for beginners and the most versatile option across cheese types.
Cherry Wood
Slightly richer and more aromatic than apple. Beautiful reddish-gold color on cheese exterior. Adds a mild fruit-forward sweetness that pairs with complex cheeses exceptionally.
Alder
The traditional Pacific Northwest smoking wood. Very mild, clean smoke with an almost neutral flavor profile. Allows the cheese’s own character to dominate while adding a delicate background smoke.
Pecan
Midpoint between mild fruit woods and assertive hardwoods. Rich, nutty, slightly sweet. One of the most beloved cheese-smoking woods among experienced pit masters.
Hickory
Bold, assertive, bacon-like smoke. Use sparingly and with shorter sessions. The classic American BBQ wood translates to cheese at a much lower dose than you’d use for meat.
Maple
Sweet, mild, slightly woody. Very gentle on cheeses and excellent for those who want a subtle smoke presence. Often blended with apple or cherry for added complexity.
Oak
Medium-heavy smoke with earthy, wine-barrel notes (especially wine-infused oak). Versatile for strong cheeses that can hold up to more assertive flavors.
Mesquite — Use with Extreme Caution
Very aggressive, pungent smoke. Can overpower cheese entirely in short sessions. Even experienced smokers are cautious. Not recommended for cold smoking cheese in most cases.
For a deeper dive into comparing wood options across different smoking applications, the wood chips vs. wood chunks guide and the hickory vs. mesquite comparison are excellent resources. For cold smoking specifically, you’ll typically want fine wood dust rather than chips or chunks — dust produces cooler, more consistent smoke that’s easier to control and less likely to spike chamber temperatures.
Blending Wood for Complexity
Once you’ve mastered single-wood sessions, blending opens up an entirely new dimension. Common effective blends for cheese include:
- Apple + Cherry (60/40) — Sweet, fruity, beautiful reddish tint on the rind. Works with almost any cheese.
- Alder + Pecan (70/30) — Clean base with nutty depth. Exceptional with mozzarella and Havarti.
- Apple + Hickory (80/20) — Mild with a backbone. Elevates aged cheddar without overwhelming it.
- Cherry + Maple (50/50) — Sweet-forward with complex layering. Outstanding with gouda.
Temperature Control Mastery: The Make-or-Break Factor
If wood selection is the art of cold smoking cheese, temperature control is the science. Get the wood wrong and you’ll still get smoked cheese. Get the temperature wrong and you’ll get a melted, sweaty, oily disaster that no amount of rest will save. Temperature is where most beginners fail, and it’s where experienced smokers focus most of their attention.
Understanding the Cold Smoking Temperature Window
The target window for cold smoking cheese is 68°F to 86°F inside the chamber. Below 68°F, absorption slows significantly — not a disaster, but you’ll need more time. Above 86°F, cheese begins to soften and sweat. Above 90°F, consider your session failed for most cheeses.
The challenge is that this window is narrow, and the ambient environment is often working against you. The smoke generator itself adds some heat. Direct sunlight heats the chamber. Outdoor air temperature fluctuates. You need strategies for all of these variables.
Seasonal Strategy
| Season / Condition | Challenge Level | Recommended Strategy |
|---|---|---|
| Winter (35°F–50°F outdoor) | Easy | Natural conditions handle temperature for you. Ideal season. Longer sessions possible without concern. |
| Fall / Spring (50°F–65°F outdoor) | Ideal | Perfect conditions. Minimal management needed. The serious cold smoker’s preferred season. |
| Early Summer (65°F–75°F outdoor) | Moderate | Smoke early morning (5–8 AM), keep sessions short (1.5 hrs max), use ice tray in chamber. |
| Peak Summer (above 80°F outdoor) | Difficult | Smoke at night or predawn only. Use multiple ice trays. Keep sessions to 45–60 minutes. Consider skipping until fall. |
The Ice Tray Method for Hot Weather
When outdoor temperatures make cold smoking difficult, a simple solution is placing a tray of ice directly beneath the cheese rack inside your smoking chamber. The ice absorbs ambient heat and keeps the immediate microenvironment around the cheese cooler than the rest of the chamber. Replace ice as it melts. This single technique extends the usable cold smoking season by months.
A variation used by experienced cold smokers is the 2-1-2 rotation method: smoke for 2 hours, rest the cheese in the refrigerator for 1 hour, then resume smoking for 2 more hours. This prevents heat accumulation over long sessions and is particularly effective in warm weather.
Monitoring Temperature in Real Time
You need to know what’s happening inside that chamber continuously, not just when you check it. A wireless thermometer with a remote display — or one that reports to your phone — is the right tool. Place the probe at cheese level, not at the top of the dome (where heat stratifies and readings will be higher than where your cheese actually is).
For those managing overall grill and smoker performance across multiple setups, understanding fuel and airflow factors that affect temperature and general pellet grill maintenance both contribute to better temperature consistency across sessions.
Step-by-Step: How to Cold Smoke Cheese at Home
This is the operational core of everything we’ve discussed. We’re going to walk through the complete process from start to finish, with enough detail that a first-timer can follow along confidently and an experienced smoker can refine their technique.
Prepare and Portion the Cheese
Start by pulling your cheese from the refrigerator 20–30 minutes before your session. This allows the surface to dry slightly (critical — wet surfaces lead to uneven smoke adhesion) and the internal temperature to rise just enough to improve smoke compound uptake.
Cut blocks into pieces no larger than 4″ × 4″ × 2″. Smaller pieces mean more surface area for smoke contact relative to mass, which means more efficient flavor absorption. If you’re smoking a large wheel, consider quartering it. Pat any moisture from the surface with a clean paper towel before placing on the rack.
Set Up Your Cold Smoke Generator
Fill your smoke generator — whether a tube, maze, or traditional cold smoke generator — with your chosen wood dust or fine pellets. Pack it moderately firmly: too loose and it burns too fast and hot; too compressed and it may not draw properly and will go out.
For smoke tubes, use a butane torch to light one end until it’s fully ignited with a flame, then blow out the flame and allow it to smolder. Place it at the far end of your chamber, away from the cheese, to allow smoke to travel and slightly cool before contact. For maze generators, light one end of the maze and allow the smolder to begin before placing it in the chamber.
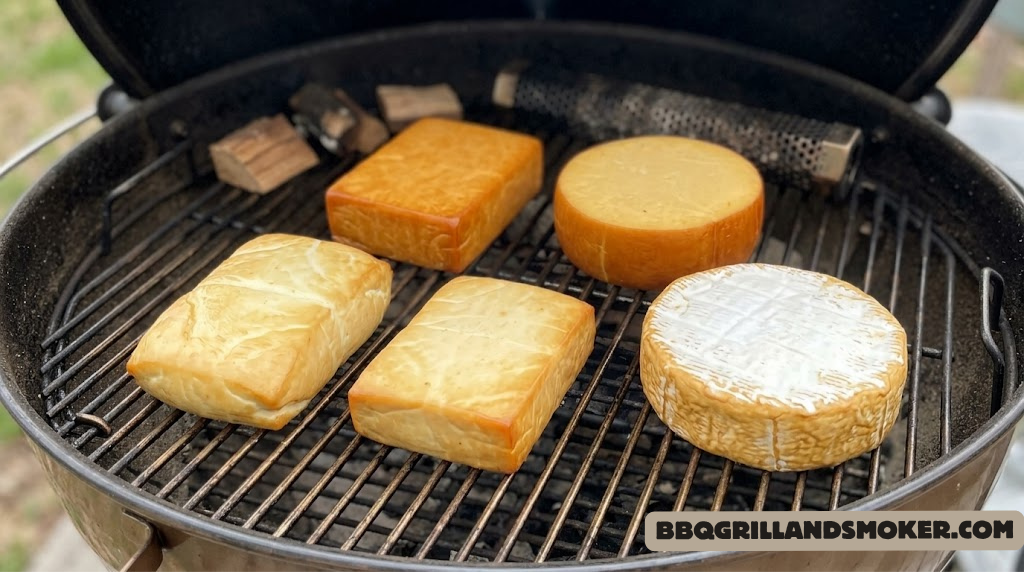
Arrange Cheese on the Rack and Begin Smoking
Place your cheese pieces on a wire rack elevated above any drip surface, with at least 1 inch of space between each piece for smoke circulation. Position the rack at the opposite end of the chamber from your smoke source.
Close the lid but ensure your chamber has adequate airflow — a vent or small gap to allow smoke to circulate and not stagnate. Stale smoke is worse than no smoke; you want slow, steady movement, not a sealed box of old smoke. Insert your temperature probe at cheese level and begin monitoring immediately.
Manage Temperature Throughout the Session
Once your session begins, check the chamber temperature every 20–30 minutes. In cooler weather, this may require no intervention at all. In warmer conditions, have ice trays ready to swap in and keep the lid-open time minimal.
If the temperature exceeds 85°F, act quickly. Open vents to increase airflow, add ice to the chamber below the rack, or temporarily crack the lid slightly (just a half-inch gap) to vent heat. If temperature hits 90°F, remove the cheese to a refrigerator immediately, cool your setup down, and resume when the chamber temperature drops back into range.
Rotate the cheese pieces 180 degrees at the halfway point to ensure even smoke exposure on all surfaces. This is the single most underrated step in the process — unrotated cheese can have dramatically different smoke levels on its top versus bottom face.
Remove, Air Dry, and Wrap
When your session time is complete, remove the cheese and place it on a clean wire rack in open air for 30–60 minutes. This allows the surface to firm up and the most volatile smoke compounds to off-gas. The cheese will look slightly darker on the exterior — that’s the beautiful rind forming.
After air-drying, wrap each piece individually. Cheese paper is ideal because it allows minimal gas exchange while controlling moisture. Vacuum sealing is excellent for long-term storage. Plastic wrap alone is the least preferred option — it can trap moisture and create condensation issues — but in a pinch, it works for short rests.
Rest and Refrigerate for 7–14 Days
This is the step most beginners skip, and it’s where the real transformation happens. Wrap your cheese and place it in the refrigerator. Do not open it, taste it, or judge it for at least 7 days. The ideal rest period for most cheeses is 10–14 days.
During this time, volatile compounds off-gas through the wrapper, and the deeper smoke phenolics migrate inward from the surface rind. What tasted harsh and smoky on Day 1 becomes integrated, complex, and balanced by Day 10. What seemed like a good result on Day 7 is genuinely extraordinary by Day 14.
Label each piece with the cheese type, wood used, smoke duration, and date. You’ll want this information later, both for replication and for understanding what worked best for your palate.

A-MAZE-N 12″ Smoke Tube — Best for Cheese Smoking
Up to 5 hours of consistent cold smoke. Works in any grill, smoker, or box. Compatible with pellets and fine wood dust. Essential tool for home cheese smoking.
→ Check Price on Amazon Affiliate link · As an Amazon Associate we earn from qualifying purchasesTiming and Smoke Duration: How Long Is Long Enough?
One of the most common questions from first-time cold smokers is: “How long should I smoke the cheese?” The answer is: it depends on the cheese, the wood, the temperature, and the intensity you’re after. But we can give you precise starting points and the logic to adjust from there.
Recommended Smoke Duration by Cheese Type and Intensity
| Cheese | Light Smoke (Subtle) | Medium Smoke (Balanced) | Heavy Smoke (Bold) | Notes |
|---|---|---|---|---|
| Cheddar (medium/sharp) | 1 hour | 2 hours | 3–4 hours | Ages well. Heavy smoke is excellent at 6+ months storage |
| Gouda | 45 min | 1.5 hours | 2.5 hours | Very receptive. Tend toward lighter sessions first time |
| Mozzarella (low moisture) | 45 min | 1.5 hours | 2 hours max | Over-smoking makes it rubbery and bitter |
| Gruyère | 1 hour | 2 hours | 3 hours | Develops beautiful complexity with longer sessions |
| Brie / Camembert | 30–45 min | 1 hour max | Not recommended | Delicate; short sessions only; must be very firm/cold |
| Provolone | 1 hour | 2 hours | 2.5 hours | Excellent results across all intensities |
| Monterey Jack | 45 min | 1.5 hours | 2 hours | Mild base flavor shows smoke clearly — great for evaluating wood types |
📐 The Starting Point Rule of Thumb
If you’re unsure, start at 1.5 hours with mild fruit wood for any semi-hard cheese. After the full 14-day rest, evaluate the result. If you want more smoke presence, add 30–45 minutes next time. It’s much easier to add smoke in a subsequent batch than to remove it from an over-smoked one. Patience and iteration are the path to your perfect formula.
Signs That You’ve Over-Smoked
Even without tasting, you can identify over-smoking by sight and smell right after the session:
- Deep black or very dark brown exterior (should be golden to medium brown)
- Pungent, acrid, or chemical smell (should smell pleasantly smoky, like a campfire or cured ham)
- Surface that feels tacky or oily after the air-dry period
- Visible cracks in the surface rind
If you suspect over-smoking, don’t throw the cheese out immediately. Wrap it and give it the full 14-day rest. Sometimes what seems extreme right after the session mellows considerably. The worst-case scenario for a mildly over-smoked batch is cheese that works better as a cooking ingredient (melted into sauces, grilled on burgers) than as a standalone eating cheese.
Resting, Storage, and Making It Last
The post-smoke handling of cold smoked cheese is as important as the smoking itself. Poor storage can ruin a batch that would otherwise be exceptional. Here’s a complete guide to handling your smoked cheese from the moment it leaves the chamber to the moment it reaches the cheese board.
The Pellicle Phase: Why Your Cheese Needs to Breathe First
Before wrapping, the 30–60 minute air-dry we mentioned in Step 5 creates what’s known as a pellicle — a tacky, slightly dried surface film that actually helps the cheese hold smoke compounds better during storage. If you wrap cheese that’s still warm and moist from the chamber, you trap moisture between the wrapper and the cheese, which can lead to excess condensation and an uneven, sometimes bitter surface flavor.
Wrapping Options in Detail
- Cheese Paper (Formaticum, Cut Cheese Wrap): Two-ply paper with a polyethylene inner layer allows gas exchange while controlling moisture. Ideal for the rest period. Keep cheese in the refrigerator’s cheese drawer (usually the warmest section of the fridge, around 40°F–45°F).
- Vacuum Seal Bags: Excellent for long-term storage after the initial rest period. Vacuum sealing removes all oxygen, which essentially halts further development and preserves the cheese at its peak. If you’ve smoked a large batch, rest for 14 days in cheese paper, then vacuum seal portions for storage up to 3–4 months.
- Butcher Paper + Loose Plastic: A reasonable middle-ground. Wrap in parchment or butcher paper, then loosely in plastic wrap (not tight — you want a small amount of gas exchange).
How Long Does Cold Smoked Cheese Last?
| Storage Method | Temperature | Shelf Life | Notes |
|---|---|---|---|
| Cheese paper in refrigerator | 38°F–42°F | 3–4 weeks after rest | Best quality window. Check weekly for moisture accumulation. |
| Vacuum sealed in refrigerator | 35°F–40°F | 3–4 months | Freezes flavor development. Open weekly for an hour if possible. |
| Vacuum sealed, frozen | 0°F or below | 6+ months | Texture changes slightly upon thawing. Better for cooking than eating. |
| Wax-coated whole wheel | Cool cellar (55°F) | 6–12 months | Advanced method. Allows continued aging and flavor development. |
The relationship between cold smoking and proper storage connects directly to understanding how to keep smoked foods moist through temperature and moisture control — the same principles that apply to smoked meats translate to smoked cheese in important ways.

Formaticum Cheese Paper — Professional Wrapping for Home Smokers
Two-ply breathable paper wrapping extends smoked cheese life and improves flavor development. Used by cheesemongers worldwide. Keeps rind firm without trapping moisture.
→ Check Price on Amazon Affiliate link · As an Amazon Associate we earn from qualifying purchasesTroubleshooting: The 12 Most Common Cold Smoking Problems and How to Fix Them
Every cold smoker encounters problems. The good ones learn from them. Here is a comprehensive troubleshooting reference for every issue you’re likely to encounter in your cold smoking journey.
| Problem | Cause | Fix / Prevention |
|---|---|---|
| Cheese has a bitter, acrid aftertaste | Over-smoked, or too much thick “dirty” smoke during session | Use thinner smoke (quality wood dust); reduce session time; ensure adequate chamber airflow to prevent smoke stagnation |
| Cheese sweated and became oily | Chamber temperature exceeded 90°F at some point | Better temperature monitoring; use ice; smoke in cooler hours/seasons; shorter sessions in warm weather |
| Smoke flavor is barely noticeable after rest | Too short a session, weak smoke generator, or cheese too cold for absorption | Extend session by 30–45 min; ensure cheese is at room temp (65–70°F) before smoking; let cheese warm before session |
| Uneven color — dark on one side, light on other | Forgot to rotate cheese at midpoint | Always rotate 180° at halfway point; use a rack elevated above the surface for better airflow underneath |
| Smoke tube goes out before session ends | Too much airflow, wet wood dust, or incorrect lighting technique | Use fully dry wood dust; light with torch for 30+ seconds; ensure adequate oxygen flow but reduce drafts |
| Cheese too salty/sharp post-smoking | Not a smoking issue — the cheese itself is too aged or the salt content too high | Select lower-salt, less-aged cheeses for your next batch; pair heavy smoke sessions with milder base cheeses |
| White residue on cheese surface | Normal crystallization in aged hard cheeses, or condensation from temperature swings during storage | Normal and harmless for crystallization; ensure consistent fridge temperature to reduce condensation rings |
| Cheese tastes like “liquid smoke” rather than wood smoke | Using chipboard, compressed wood, or off-brand pellets with added flavorings | Use 100% natural hardwood dust or pellets from reputable brands; never use flavored or treated wood products |
| Smoke is too hot inside chamber | Smoke generator too close to cheese, or generating too much combustion heat | Position generator as far as possible from cheese; use maze/tube style vs. chip tray; add a small barrier between source and food |
| Rest period cheese tastes worse after 14 days | Cheese was not wrapped properly or stored at inconsistent temperature | Use quality cheese paper; maintain steady refrigerator temperature; avoid frequent opening of storage area |
| Cheese develops cracks during rest | Moisture loss during air-dry was too aggressive, or storage too dry | Limit air-dry to 60 minutes max; wrap promptly; keep cheese in vegetable drawer (higher humidity) |
| Smoke has a plastic or chemical smell | Non-food-safe materials in the smoking chamber — rubber gaskets, plastic components, cheap metal coatings | Inspect chamber for non-food-safe components; season new smokers thoroughly before first use per grill seasoning guidelines |
If you’re consistently having issues with temperature control in your smoker, it may point to underlying equipment problems. Understanding why your smoker isn’t maintaining temperature and doing regular maintenance on your BBQ equipment can resolve many cold smoking challenges before they start.
Serving Ideas, Pairings, and Recipes: Getting the Most from Your Smoked Cheese
You’ve done the work. You’ve waited 14 days. Now it’s time to actually eat the thing. Here’s how to serve, pair, and cook with cold smoked cheese in ways that showcase everything you’ve put into it.
The Cold Smoked Cheese Board
A well-assembled cheese board is the highest-expression format for cold smoked cheese. The smoke adds a new dimension that transforms a standard charcuterie board into something exceptional. Some guiding principles:
- Temperature matters: Pull cheese from the refrigerator 30–45 minutes before serving. Cold cheese has muted flavor; room temperature (around 65°F) is when smoked cheese peaks in aroma and taste.
- Contrast is king: Pair your smoked cheese’s savory, roasted notes with sweet elements — honeycomb, fig jam, dried apricots, dark cherries. The contrast amplifies both.
- Crackers over bread (usually): Neutral crackers let the smoked cheese lead. Sourdough and rye work when the cheese is milder; they compete with heavily smoked varieties.
- Wine pairing: Smoked gouda → Pinot Noir or Riesling. Smoked cheddar → Cabernet Sauvignon or dry cider. Smoked mozzarella → Barbera or Soave. Smoked Gruyère → Chardonnay or Gewürztraminer.
- Beer pairing: The smoky notes in cold smoked cheese pair extraordinarily well with German Rauchbier (smoked lager), Scottish ales, brown ales, and robust porters. The complementary smoke in the beer creates a harmonious, layered experience.
Cooking Applications for Cold Smoked Cheese
Cold smoked cheese transforms every dish it touches, adding a layer of complexity that commercial smoked cheese rarely achieves:
- Smoked Mac and Cheese: Using home-smoked gouda and cheddar in your bechamel sauce creates a depth that commercial versions cannot approach. The smoke becomes background complexity rather than the starring note, making the overall dish more complex.
- Smoked Cheese Burgers: Melt cold smoked gruyère or provolone onto a well-seasoned patty. The smoke in the cheese complements the grill char on the meat for a layered flavor profile.
- Pizza: Smoked low-moisture mozzarella on a wood-fired or cast-iron pizza creates the kind of smoky-cheesy experience that premium pizzerias charge dearly for. If you’re passionate about backyard pizza, it’s a revelation.
- Smoked Cheese Quesadillas: Smoked Monterey Jack or pepper jack in a quesadilla is exceptional — the smoke interacts with the toasted tortilla for an almost barbecue-like complexity.
- Smoked Fondue: Equal parts cold smoked gruyère and cold smoked gouda, with white wine, kirsch, and nutmeg. One of the most impressive applications you can make from home-smoked cheese.
- Stuffed Chicken: A pocket of cold smoked brie inside a chicken breast, sealed and pan-seared, then finished in the oven. The smoke in the brie adds a dimension that makes this feel restaurant-level.
Cold smoked cheese also pairs beautifully as an accompaniment to other smoked and grilled foods. Alongside smoked pulled pork, it can be sliced for sandwiches. As part of a board with grilled lamb chops or BBQ grilled shrimp, the layered smoke notes across the board create a cohesive thematic experience.

Weber Kettle 22″ — The Classic Cold Smoking Chamber
The Weber kettle is one of the best-value cold smoking vessels available. Its vented dome design, precise airflow control, and durable build make it ideal for both cheese smoking and traditional grilling.
→ Check Price on Amazon Affiliate link · As an Amazon Associate we earn from qualifying purchasesAdvanced Techniques: Taking Your Cold Smoke Cheese to the Next Level
Once you’ve mastered the fundamentals, there’s a whole world of refinement available. The following techniques separate the dedicated cold smoking enthusiast from the occasional dabbler.
The DIY Cold Smoker Box
Before spending money on dedicated equipment, consider the surprisingly effective cardboard box cold smoker. This method costs essentially nothing and produces results that rival setups ten times the price.
You need a clean, food-safe cardboard box (a fresh, unprinted produce box is ideal), a smoke tube or maze generator, a wire rack that fits inside the box, and a small hole cut in the side near the bottom for the smoke tube or to push smoke in from outside. Place cheese on the rack, insert your smoke generator inside or directly adjacent to the entry hole, and close the box flaps loosely at the top for gentle airflow. In cool weather, this setup is remarkably effective and temperature-stable.
Multi-Wood Session Layering
Instead of using a single wood throughout the entire session, advanced cold smokers experiment with sequential wood use. Start with a mild fruit wood (apple or cherry) for the first half of the session, then switch to a slightly more robust wood (pecan or maple) for the second half. The result is a more complex, layered smoke flavor that develops differently from a single-wood approach. The light, bright fruit notes from the first wood settle into the middle register, while the earthier notes from the second wood anchor the finish.
The Brine-Before-Smoke Technique
Borrowed from traditional European cured cheese methods, a brief 15–30 minute soak in a mild brine (2 tablespoons kosher salt dissolved in 1 cup water) before the smoking session has two effects: it slightly firms the surface of semi-soft cheeses, making them more robust during the session, and it creates a slightly salty rind that balances the smoke. This technique is particularly effective with Havarti, fontina, and fresh mozzarella.
Cold Smoking at Different Elevations
Backyard smokers at altitude (above 3,000 feet) often find that their smoke generators burn hotter and faster due to the lower air pressure. At altitude, you may need to tighten the packing of your wood dust slightly and keep sessions shorter to compensate for the more efficient combustion. Monitor chamber temperature more frequently than at sea level.
Smoking Cheese for Aging
The most ambitious cold smokers use the smoking session as the beginning of a longer aging project. A semi-hard cheddar, smoked at the beginning of its aging process and then wrapped in cheesecloth and aged in a cool cellar (around 55°F, 85% humidity) for 3–6 months, develops a complexity that rivals professionally produced smoked aged cheeses from artisan creameries. The smoke compounds and the aging compounds interact in ways that neither produces alone.
The Cold Smoke Cheese Gift Strategy
Cold smoked cheese makes one of the most impressive and personal gifts in the BBQ enthusiast’s repertoire. A selection of home-smoked cheeses in different varieties and intensities, packaged in cheese paper, labeled with the date and wood used, and presented in a wooden box makes a gift that money genuinely cannot buy at a grocery store. For the BBQ enthusiast who has everything, a handcrafted smoked cheese selection demonstrates a level of craft and intention that resonates deeply. Similarly, for Father’s Day gift ideas for the grill-loving dad in your life, a smoked cheese set is something genuinely special.
Comparing Your Results: Building a Tasting Journal
The cold smokers who improve fastest keep records. A simple tasting journal noting the cheese type, weight, temperature at start and throughout, wood used, session duration, and post-rest impressions allows you to build a personal database of what works for your specific setup, your specific climate, and your personal flavor preferences. After six to ten sessions with consistent record-keeping, you’ll have a formula for your ideal smoked cheese that nobody else has because it’s been dialed in specifically for you.
This systematic approach parallels how serious pit masters approach comparing heat and smoke metrics between smoker types — data-driven iteration is how good becomes exceptional.
Frequently Asked Questions About Cold Smoking Cheese at Home
Do I need a special smoker to cold smoke cheese at home?
No. You can cold smoke cheese in almost any covered cooking device — a kettle charcoal grill, an offset smoker, a gas grill with the heat off, an electric smoker with the heating element disconnected, or even a clean cardboard box. The key tool is the cold smoke generator itself (a smoke tube, maze generator, or dedicated cold smoke adapter), not the chamber. The chamber simply needs to be able to contain smoke and have some airflow control. A standard Weber kettle is one of the most popular cold smoking vessels in the world precisely because it works so well for this purpose.
Is cold smoked cheese safe to eat without further cooking?
Yes, cold smoked cheese is completely safe to eat without cooking. The cheese does not reach cooking temperatures during cold smoking, so it retains its original food safety status — the same as the pre-smoked block you bought at the grocery store. The smoke adds a very mild antimicrobial surface effect, but the primary safety consideration remains proper refrigeration. Keep cold smoked cheese at or below 40°F and it will remain safe for the same shelf life as any properly stored cheese.
Why does my cold smoked cheese taste bitter right after smoking?
The bitterness you taste immediately after smoking is caused by the high concentration of volatile smoke compounds on and near the cheese surface. These compounds include aldehydes and certain phenolic acids that are genuinely acrid in high concentrations. The good news is that they’re the first to dissipate during the rest period. By day 3–5 of refrigerator rest, most of that initial bitterness fades. By day 10–14, it’s replaced by the balanced, pleasant smoke flavor that the heavier phenolics (which are less volatile) contribute. Patience is the remedy.
Can I cold smoke cheese in summer?
Yes, but it requires more management. The key challenge is keeping chamber temperature below 90°F when ambient temperatures are high. Strategies include smoking very early in the morning (5–8 AM) before peak heat, placing trays of ice inside the chamber below the cheese rack, using the 2-1-2 rotation method (2 hours smoke, 1 hour refrigerator rest, 2 more hours smoke), and keeping sessions shorter than you might in cooler months. Many experienced cold smokers simply wait for fall and winter for their major cheese smoking sessions and do small batches in summer using the ice method.
What’s the ideal block size for cold smoking cheese?
Blocks between 8 and 16 ounces (roughly 4″ × 4″ × 2″) tend to give the best results for a first cold smoke session. This size provides enough mass that the smoke doesn’t penetrate all the way through in a short session (which would make the whole block intensely smoky), but enough surface area relative to mass for the exterior to develop a good rind and absorb meaningful smoke. If you want more smoke penetration on smaller pieces, cut into 1″–1.5″ thick slabs rather than thick blocks. For aging projects with longer smoke exposure, larger blocks (2+ lbs) are better because their mass provides a buffer against over-smoking.
How long does home cold smoked cheese last in the refrigerator?
Properly wrapped in cheese paper and stored between 38°F–42°F, cold smoked hard and semi-hard cheeses (cheddar, gouda, gruyère, provolone) last 3–4 weeks after the rest period in good eating condition. Vacuum sealed, they last 3–4 months. If you want to extend shelf life further, wax dipping (the traditional method for aged cheeses) can extend refrigerator life to 6–12 months with continued aging. Soft smoked cheeses like smoked brie have a shorter window — consume within 2 weeks of the rest period completion for best quality.
Can I use my pellet grill for cold smoking cheese?
Yes, though it requires attention. Some modern pellet grills have a “Super Smoke” or minimum temperature mode that produces significant smoke at lower heat levels, but even the lowest setting on most pellet grills runs hotter than the cold smoking target. The most reliable method with a pellet grill is to turn it completely off, add a separate cold smoke tube inside the cooking chamber, and use the grill as just a smoke-containing vessel. This decouples the smoke from the heat entirely and gives you full temperature control through ambient conditions rather than the grill’s heating element.
What is the best wood for cold smoking cheese for beginners?
Apple wood is the near-universal recommendation for beginners, and for good reason: it produces a light, sweet, fruity smoke that is virtually impossible to overdo in normal session lengths, it pairs well with almost every cheese variety, and the result is universally appealing. Cherry wood is a close second and produces a slightly richer, more aromatic smoke with a beautiful golden color on the cheese rind. Starting with apple or cherry and mastering those before moving to more assertive woods like pecan or hickory is the most sensible progression. For fine-grained comparison of different wood smoking characteristics, the BBQ wood chips guide covers each species in depth.
Does cold smoking cheese require any special preparation before putting it in the smoker?
A few steps make a significant difference. First, remove cheese from the refrigerator 20–30 minutes before the session to allow the surface to warm slightly and dry. Second, pat all surfaces dry with a clean paper towel — residual moisture from the refrigerator will impede smoke adhesion and can create steam pockets on the surface during smoking. Third, cut into appropriately sized pieces (see the block size FAQ above). Some advanced practitioners use a brief brine soak for semi-soft cheeses, but this isn’t necessary for most beginners. The most important preparation is getting the surface dry and the cheese to ambient temperature before it goes into the chamber.
Can I cold smoke butter or other dairy products?
Absolutely — cold smoking extends beautifully to butter, cream cheese, and even heavy cream (which is then churned to smoked butter). Cold smoked butter is an extraordinary condiment: placed on a steak, spread on bread, or used in pan sauces, it adds a remarkable background smoke note. For butter, keep sessions very short (30–45 minutes) and the temperature low (below 70°F to prevent melting). Freeze butter for 30 minutes before the session for best results. Cream cheese requires similar handling — place in a small bowl or ramekin, keep the session under 45 minutes, and use the mildest wood available (alder is ideal).
Why is my smoke tube going out during the session?
The most common causes are insufficient lighting time at the start (the lit end needs to glow as a full ember before you close the lid, which means holding a flame on it for at least 30–45 seconds), slightly damp wood dust (even wood dust that feels dry to the touch can retain enough moisture to suppress smoldering — spread it on a sheet pan in a low oven for 30 minutes before loading), and too much airflow through the chamber (while some airflow is necessary for smoke circulation, high winds passing through open vents can extinguish a smoldering tube). Ensure your tube is packed firmly but not too tightly, and confirm the smolder is stable before closing the chamber.
What’s the difference between cold smoked cheese from the store and cold smoked cheese made at home?
Commercial “smoked cheese” products fall into two categories: those actually cold smoked (typically artisan and regional brands) and those flavored with liquid smoke (the majority of mainstream grocery products). Liquid smoke creates an approximation of smoke flavor without any real smoke exposure — the result is one-dimensional and often artificial tasting. True cold smoked commercial cheese exists but is expensive and often heavily processed for shelf stability. Home cold smoked cheese, made with good-quality whole blocks, real wood smoke, and proper rest time, produces a genuinely superior result — more complex, more natural, and more tailored to your preferences. The difference is comparable to the gap between fresh bread from your oven and store-bought sliced bread.
🔗 More From BBQ Grill & Smoker
Deepen your smoking knowledge with these related guides: