The Ultimate Smoked Pulled Pork Recipe: Low & Slow Mastery from Rub to Pull
Everything you need — the perfect rub, wood selection, temperature control, the Texas crutch, and the secrets to competition-worthy bark.
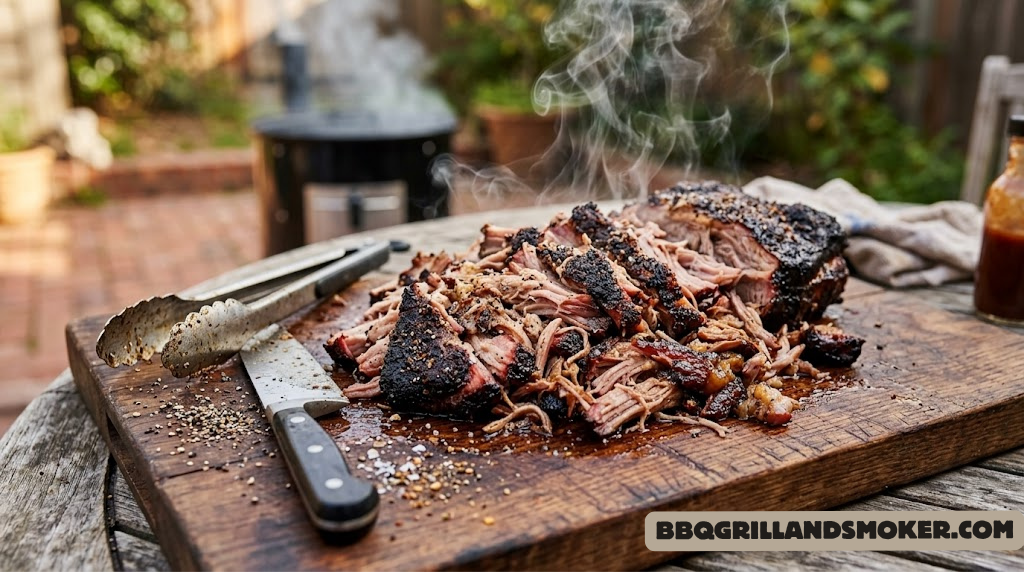
There is a moment — if you’ve been lucky enough to experience it — when a bone-in pork shoulder, after fifteen hours in the smoke, reaches a state of absolute perfection. You slide a probe in and it glides through with zero resistance, like a warm knife through butter. You peel back the butcher paper and the bark is deep mahogany, crackling at the edges, glistening with rendered fat. You pull on the bone and it slides out clean. Then you start shredding, and the steam rises, carrying with it that intoxicating marriage of smoke, pork, and spice.
That moment is what this guide is built around. This is not a shortcut recipe. This is the complete, uncompromising playbook for making smoked pulled pork that rivals anything you’ll find at a top BBQ joint — whether you’re cooking on an offset smoker, a pellet grill, or a kettle. We’ll cover every variable that matters: cut selection, rub chemistry, wood pairing, temperature management, the dreaded stall, the Texas crutch debate, resting protocols, and how to pull and serve like a professional pitmaster.
If you’ve already mastered BBQ baby back ribs or the 3-2-1 rib method, pulled pork is the natural next step — and in many ways, it’s the most forgiving low-and-slow cook you can attempt. The pork shoulder is a resilient cut that’s deeply marbled with fat and collagen. It almost wants to be great. Your job is simply to not get in the way — and to understand the principles that will help you optimize every cook, every single time.
1. Why Pork Butt Is the King of Low-and-Slow BBQ
Ask any pitmaster to name the single best cut for a beginner’s first smoke, and the vast majority will say the same thing: pork shoulder, specifically the Boston butt. It’s not arbitrary brand loyalty — it’s a combination of science, anatomy, and pure deliciousness that makes this cut almost uniquely suited to low-and-slow cooking.
The Boston butt comes from the upper portion of the pig’s front shoulder. Despite the misleading name (it has nothing to do with the rear end of the animal), it’s one of the most heavily worked muscles on the pig. Hard-working muscles are dense with connective tissue and intramuscular fat, both of which are liabilities at high heat but extraordinary assets at low heat. Specifically:
- Collagen converts to gelatin: The abundant connective tissue in the pork butt is largely collagen. When held above 160°F for extended periods, collagen hydrolyzes into gelatin — a rich, silky substance that coats every fiber and creates that mouthwatering, unctuous texture that defines great pulled pork. This conversion cannot be rushed; it needs time at temperature.
- Fat renders and bastes: The significant fat content — both the fat cap on the exterior and the intramuscular marbling — renders slowly during the cook, continuously basting the meat from within and from without. This is why pulled pork can stay moist over a 14-hour cook while a lean cut like pork loin would be dessert-dry within two hours.
- Wide margin of error: Unlike brisket, where the difference between perfect and dry can be a matter of 10–15 degrees of internal temperature, pork butt is forgiving. Anywhere between 198°F and 210°F will produce great results. The fat and collagen provide a buffer against overcooking that leaner cuts simply don’t have.
- Bark-building surface: The exterior fat cap, combined with a sugar-based rub, creates the ideal conditions for Maillard reaction and bark development — that dark, spiced, slightly caramelized crust that is the most prized element of a great smoked pork butt.
For context on the broader world of BBQ smoking, check out our smoker guide for beginners and our deep dive into grilling vs. smoking heat and flavor mechanics.
| Cut | Fat Content | Collagen | Cook Difficulty | Ideal For |
|---|---|---|---|---|
| Boston Butt | High (25–30%) | Very High | ⭐ (Easy) | Pulled Pork, Sandwiches |
| Picnic Shoulder | Medium-High | High | ⭐⭐ (Moderate) | Pulled Pork, Sliced Pork |
| Pork Spare Ribs | Medium | Medium | ⭐⭐ (Moderate) | Smoked Ribs |
| Pork Loin | Low | Low | ⭐⭐⭐⭐ (Hard) | Sliced Roast |
| Beef Brisket | Medium | High | ⭐⭐⭐⭐⭐ (Expert) | Sliced, Sandwiches |
The pork shoulder is so forgiving because it contains roughly 30% fat by weight. Brisket sits around 15–20%. That extra fat is your insurance policy against overcooking, making the pork butt the ideal teaching vehicle for mastering low-and-slow technique before you tackle a $70 whole packer brisket.
2. Choosing the Right Pork Shoulder: What to Look For at the Butcher
Not all pork butts are created equal. The cut you pick before you even fire up the smoker will have a profound impact on your final results. Here’s what to evaluate when selecting your pork shoulder:
Bone-In vs. Boneless
This is the most fundamental choice. Bone-in pork butts have the scapula (blade bone) running through the center. This matters for three reasons: the bone acts as a heat conductor that ensures more even cooking from the interior; collagen around the bone adds extra richness to the surrounding meat; and the bone-in presentation is visually dramatic — when the bone slides out cleanly, it’s one of the most satisfying signals that your cook is done. Boneless butts cook slightly faster and are easier to inject, but most serious pitmasters prefer bone-in.
Weight Range
The sweet spot is 8–10 pounds. Smaller butts (6 lbs and under) are fine but give you less margin for error and don’t develop the same bark-to-interior ratio. Larger butts (12+ lbs) are excellent but extend cook times significantly and can be challenging to fit in some smokers. For a first cook, an 8-pounder is ideal.
Fat Cap
Look for a fat cap that is uniform and at least ½ inch thick all the way around. Avoid butts with large irregular patches of hard fat interspersed with lean meat, as these don’t render as evenly. The fat cap should be white and firm, not yellow or soft, which can indicate older meat.
Marbling
When you can see a cross-section (as is often the case at a butcher rather than a grocery store), look for thin white lines of fat running through the red muscle meat. More intramuscular marbling equals more flavor and moisture retention. Heritage breed pork (Berkshire, Duroc, Red Wattle) consistently shows better marbling than commodity pork and is worth the premium for a long smoke.
Color
Fresh pork shoulder should be a consistent rosy-pink to deep red. Avoid any portions that appear grayish, which indicates age or oxidation. The fat should be a clean white-to-cream color.
Berkshire (Kurobuta) pork shoulder is widely considered the Wagyu of pork. It has 2–3x the intramuscular fat of conventional pork, a darker color, and a richer, nuttier flavor. It costs 2–3x more than commodity pork, but for a showpiece cook — a holiday, a competition, or feeding people who care — the difference is remarkable. Many specialty butchers and online retailers carry it.
How Much Pork to Buy
Raw pork shoulder loses approximately 35–45% of its weight during a long smoke due to fat rendering and moisture evaporation. An 8-pound raw butt will yield roughly 4.5–5 pounds of finished pulled pork — enough for about 12–15 pulled pork sandwiches. For a crowd of 20, plan on two 8-pound butts. For reference on portion planning, our guide on how many pounds of barbecue per person covers the math in detail.
| Raw Weight | Expected Yield | Sandwiches (1/3 lb each) | Est. Cook Time @ 225°F |
|---|---|---|---|
| 6 lbs | 3.3–3.9 lbs | 10–12 sandwiches | 9–12 hours |
| 8 lbs | 4.4–5.2 lbs | 13–16 sandwiches | 12–16 hours |
| 10 lbs | 5.5–6.5 lbs | 16–20 sandwiches | 15–20 hours |
| 12 lbs | 6.6–7.8 lbs | 20–26 sandwiches | 18–24 hours |
3. The Perfect Dry Rub: Science, Ratios, and Customization
The dry rub is the foundation of pulled pork flavor. It is not merely seasoning — it is a critical part of bark development, moisture management, and the complex flavor profile that makes great BBQ so satisfying. Understanding why each ingredient is included helps you customize intelligently rather than just following a formula blindly.
The Complete Pulled Pork Rub Formula
Competition-Style Pulled Pork Dry Rub
Makes enough for one 8–10 lb pork butt
Ingredients:
- 3 tbsp dark brown sugar
- 2 tbsp smoked paprika
- 1½ tbsp kosher salt
- 1 tbsp coarse black pepper
- 1 tsp garlic powder
- 1 tsp onion powder
- 1 tsp dry mustard
- 1 tsp cumin
- ½ tsp cayenne pepper
- ½ tsp celery salt
- ¼ tsp allspice
- 2 tbsp yellow mustard (binder)
Instructions:
- Combine all dry ingredients in a bowl. Mix thoroughly. Store in an airtight jar for up to 6 months.
- Pat the pork butt dry with paper towels. Apply a thin, even layer of yellow mustard all over — this acts as a binder, helping the rub adhere without adding any mustard flavor after the long cook.
- Apply the dry rub generously on all surfaces — top, bottom, and sides. Press and pat it in firmly.
- Wrap loosely in plastic wrap and refrigerate for at least 4 hours, ideally 12–24 hours.
The Chemistry Behind Each Ingredient
| Ingredient | Function | What Happens Without It |
|---|---|---|
| Brown Sugar | Caramelization, Maillard reaction, bark color, sweetness balance | Pale, less flavorful bark |
| Smoked Paprika | Base color, mild smokiness, earthy depth | One-dimensional flavor, washed-out color |
| Kosher Salt | Draws moisture out then back in (osmosis), seasons deep into meat | Bland, under-seasoned interior |
| Black Pepper | Heat, complexity, classic bark backbone | Flat, one-note flavor |
| Garlic Powder | Savory depth, umami enhancement | Missing foundational savoriness |
| Cayenne | Background heat, metabolic complexity | Sweet and one-dimensional |
| Cumin | Earthy, slightly smoky warmth — BBQ backbone note | Missing complexity layer |
| Dry Mustard | Emulsification aid, sharpness, bark structure | Softer bark texture |
Rub Customization by Style
The rub above is a versatile base. Depending on your preferred flavor profile or regional style, adjust as follows:
- Carolina Style (More tangy/vinegar focus): Reduce sugar to 1 tbsp, add 1 tsp dry mustard, and plan to serve with a vinegar-based sauce.
- Texas Style (Black pepper dominant): Double the black pepper, reduce sugar by half, add 1 tsp chili powder.
- Memphis Style (Savory and spice forward): Increase paprika to 3 tbsp, add ½ tsp thyme, ½ tsp oregano.
- Sweet and Heat: Increase brown sugar to 4 tbsp, increase cayenne to 1 tsp, add ½ tsp chipotle powder.
If you want to explore more rub options, our review of the best barbecue rubs covers both commercial options and DIY blends, and our homemade BBQ rub recipe offers several tested variations.
Applying your rub 12–24 hours before smoking makes a genuine, measurable difference. In the first few hours, the salt draws moisture to the surface. Over the next several hours, osmotic pressure pulls that moisture — now carrying dissolved salt and spice compounds — back into the meat. The result is seasoning that penetrates ½ to ¾ of an inch deeper than a rub applied right before cooking. It also produces a slightly tacky, drier surface that develops better bark during the smoke.

4. Smoker Setup and Fuel Management for a Long Cook
A 12–16 hour cook demands that your smoker maintain a consistent temperature for an extended period. This is where most beginners struggle — not with the technique itself, but with managing the cooking environment over the long haul. Here’s how to set up your smoker correctly for each type of equipment.
Target Temperature Range
For pulled pork, you want your smoker running between 225°F and 250°F. This is not an arbitrary number. At this range:
- Smoke production is rich and clean (not thin and white, not acrid).
- Collagen conversion to gelatin happens efficiently without the exterior drying out.
- The bark develops slowly and evenly over many hours.
- Fat renders completely without causing flare-ups or pooling.
Cooking hotter (275–325°F) will finish the pork faster but at a cost: the bark can harden too quickly before the interior is done, and moisture loss increases significantly. Many experienced cooks do run 250–275°F for efficiency, but for your best results — especially early in your pulled pork journey — stick to 225°F.
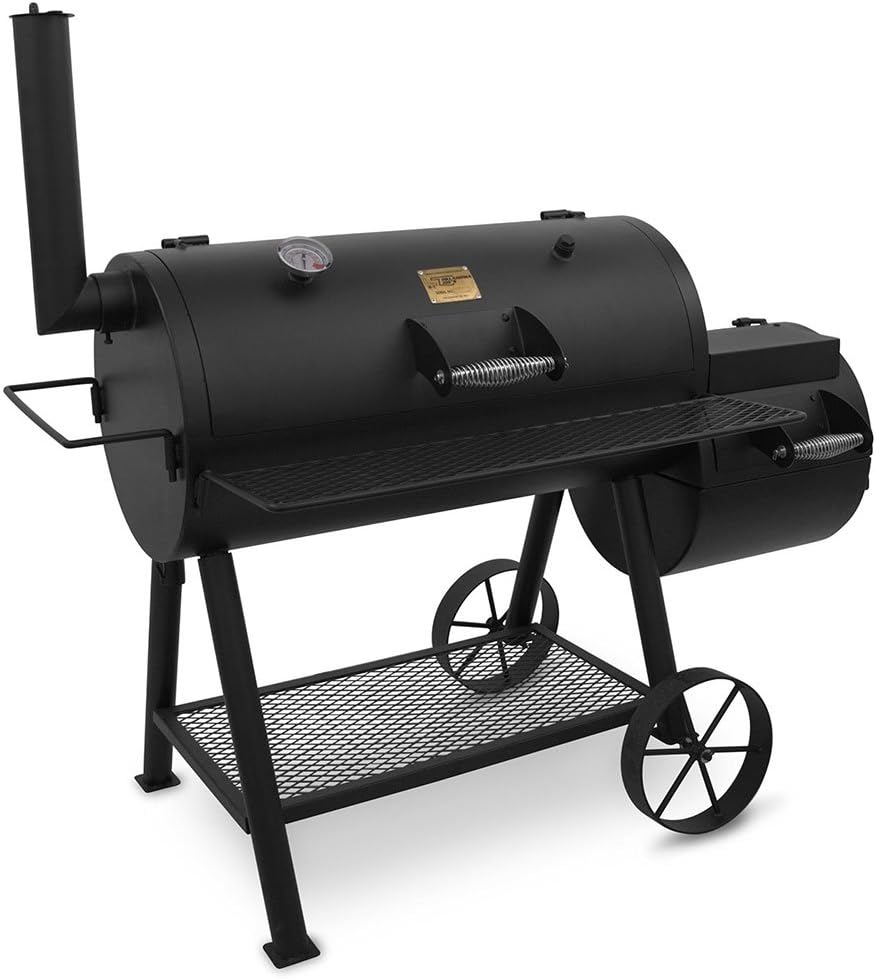
Offset Smoker Setup
Offset smokers require the most active management but produce the most authentic smoke flavor. Use a full load of charcoal briquettes in the firebox to establish a base temperature, then add wood chunks (not chips) every 45–60 minutes to maintain smoke. Keep the flue vent fully open and control temperature primarily through the intake vent on the firebox door. Learn more about charcoal temperature control for better fire management.
Pellet Grill Setup
Pellet grills are the most convenient option for a long pork butt cook. Simply set your desired temperature, fill the hopper, and the controller does the rest. For maximum smoke flavor, use the “smoke” or “super smoke” setting for the first 3–4 hours before stepping up to your cooking temperature. Compare options in our best barbecue smokers guide and our offset vs. pellet smoker comparison.
Kettle Grill Setup (Two-Zone Indirect)
A 22-inch kettle can absolutely smoke a pork butt using a two-zone setup. Place a full chimney of lit charcoal on one side, position the meat on the opposite side, and add wood chunks directly to the coals. Use the top vent above the meat side to draw smoke across the pork. You’ll need to add charcoal every 90–120 minutes. Our guide on direct vs. indirect grilling methods explains the setup in detail.
Electric Smoker Setup
Electric smokers offer excellent temperature consistency and are ideal for beginners. Load the wood chip tray before preheating, and refill it every 60–90 minutes for the first 4–6 hours (after which the smoke absorption into the meat levels off significantly). See our review of the best electric barbecue smokers for top picks, and for more details check our Masterbuilt 30 review.
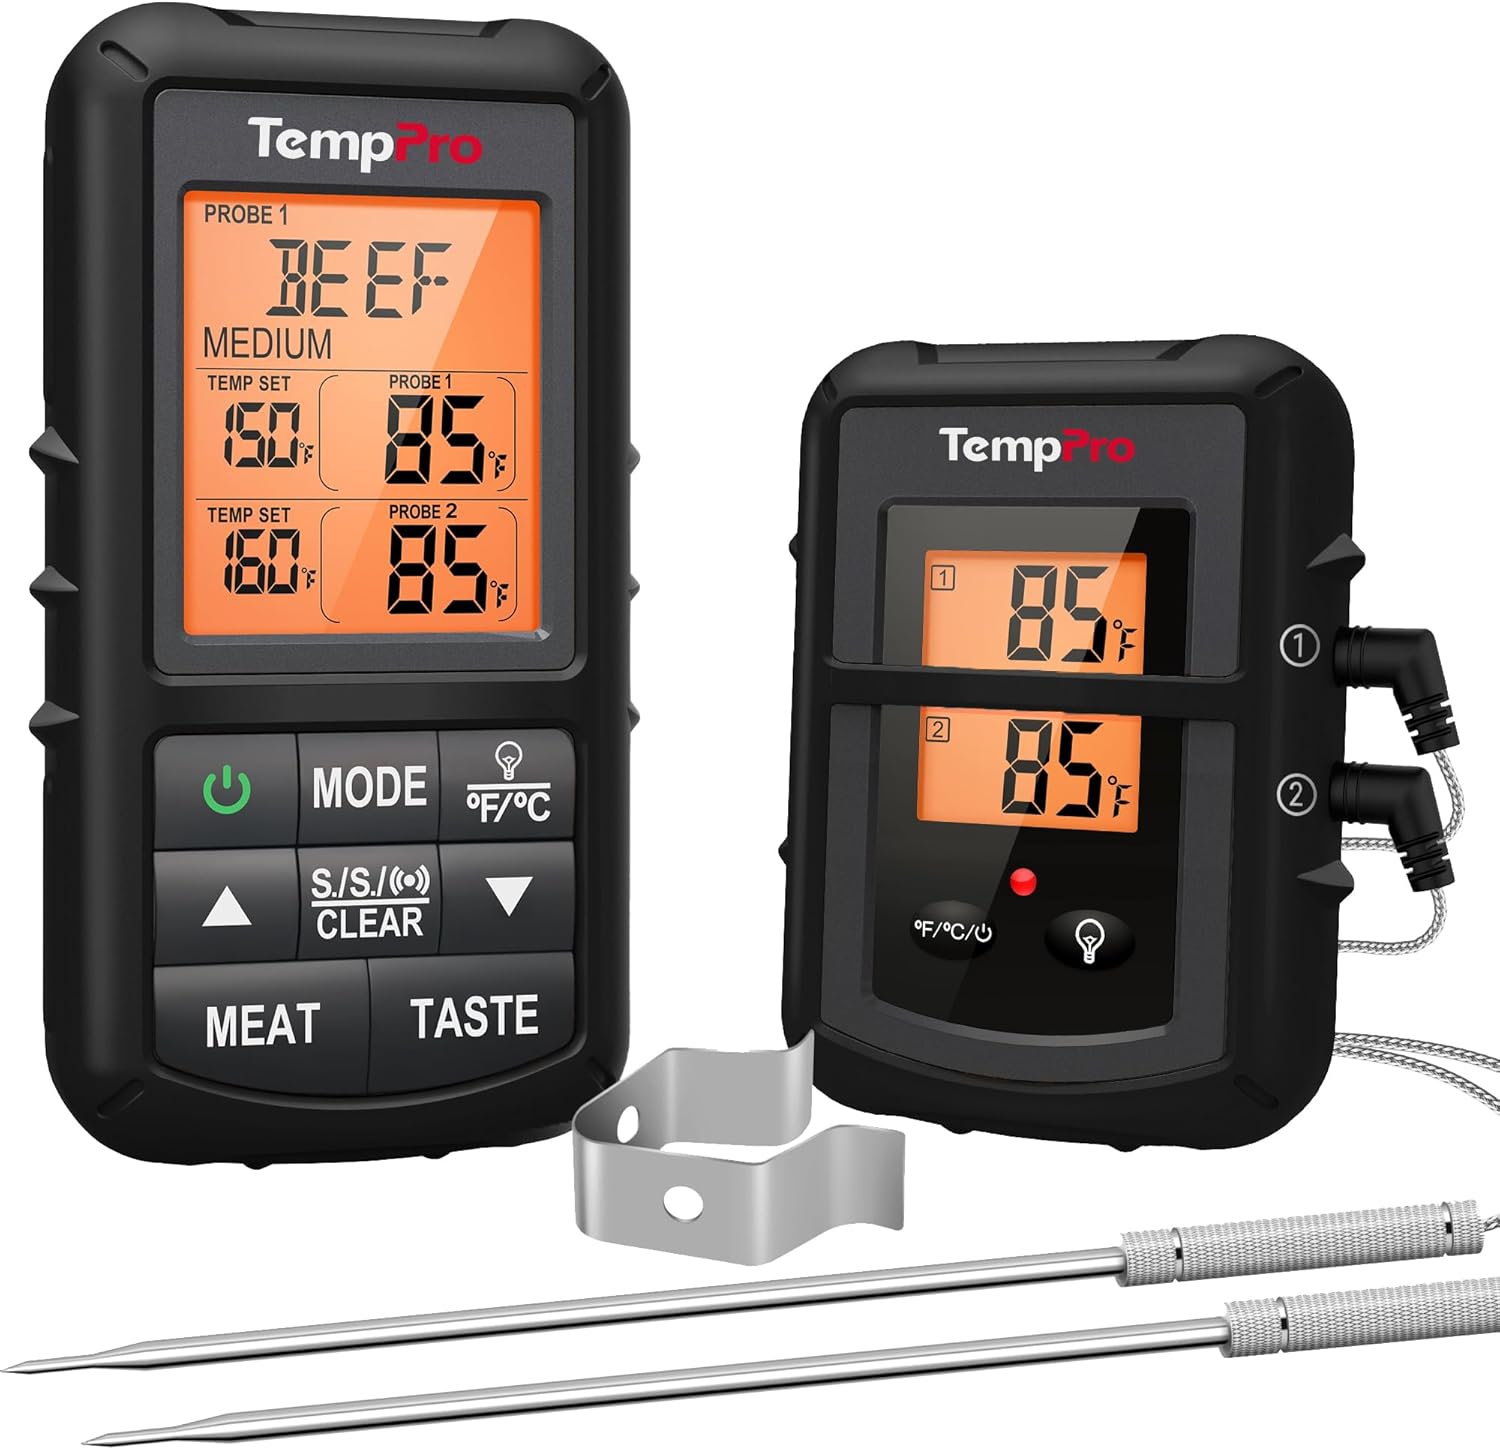
A dual-probe wireless thermometer — one probe in the meat, one clipped to the grate — is the single most valuable tool for a long smoke. Without it, you’re flying blind. You need to know both the meat’s internal temperature and the cooking environment temperature, as they’re equally important. Budget at least $40 for a quality unit; the cheap ones drift significantly over a long cook.
5. Wood Selection: Pairing Smoke Flavor with Pork
Wood selection is one of the most nuanced aspects of the entire BBQ craft. For a 12–16 hour cook like pulled pork, the wood you choose — and how you use it — shapes a significant portion of the final flavor profile. Pork is a relatively mild meat that accepts smoke beautifully, making it one of the most versatile canvases for smoke experimentation. For a deeper dive into this topic, see our guide on BBQ wood chips and chunks and our comparison of wood chips vs. wood chunks.
The Pitmaster-Approved Pulled Pork Wood Combinations
| Combination | Ratio | Flavor Profile | Best For |
|---|---|---|---|
| Hickory + Apple | 50/50 | Bold but balanced. Classic American BBQ. | Competition, classic BBQ joints |
| Cherry + Hickory | 60/40 | Rich mahogany bark, savory-sweet smoke | Showpiece cooks, presentation |
| Pecan only | 100% | Mild, nutty, clean — most accessible | First-time smokers, kids’ parties |
| Apple + Cherry | 50/50 | Sweet, fruity, beautiful color | Tender, sweet pulled pork |
| Hickory + Pecan | 50/50 | Deep, savory, bold but not overpowering | Texas-style pulled pork |
Chips vs. Chunks: Which to Use
For a long cook like pulled pork, use chunks, not chips. Chips burn too fast — they’re gone in 10–15 minutes and require constant replenishment. Fist-sized chunks of dry, seasoned hardwood will smolder steadily for 45–60 minutes, providing consistent smoke without the attention demand. On a pellet grill, the pellets themselves are the fuel and smoke source, so this distinction doesn’t apply. See our full breakdown in the hickory vs. mesquite comparison.
Pine, cedar, spruce, and other softwoods contain resin and sap that produce acrid, toxic smoke. Elm, eucalyptus, and treated or painted wood are also strictly off limits. Always use dry, seasoned (not green) hardwoods or fruitwoods. As a general rule, if it’s a tree that produces edible fruit or nuts, it’s safe for smoking. Read our full warning about pine wood dangers in smoking.
6. The Complete Step-by-Step Smoked Pulled Pork Process
Everything covered so far — cut selection, rub chemistry, wood choice, smoker setup — converges here. This is the full, chronological process from cold pork butt to finished, pulled perfection. Follow these steps in sequence and you’ll be rewarded with pulled pork that rivals anything you’ve tasted at a restaurant.
Day Before: Trim, Inject, and Apply the Rub
Remove the pork butt from its packaging 24 hours before smoking. Pat dry with paper towels. Using a sharp boning knife, trim the fat cap to approximately ¼ inch thickness — enough to render, baste, and contribute to bark, but not so thick it insulates and prevents rub penetration. Remove any hard, irregular chunks of fat that won’t render. Score the fat cap in a 1-inch crosshatch pattern about ¼ inch deep — this allows the rub to penetrate and helps the fat render more evenly.
After trimming, prepare your injection if using one. A simple injection of ½ cup apple juice, 2 tbsp butter (melted), 1 tbsp salt, and 1 tbsp Worcestershire sauce, warmed to combine, is highly effective. Load into a meat injector and inject in a 1-inch grid pattern all across the top and sides of the butt, targeting especially the thicker areas. Apply the yellow mustard binder, then coat generously with your dry rub on all sides. Wrap in plastic and refrigerate.
Cook Day Morning: Prep and Preheat Your Smoker
Pull the pork butt from the refrigerator 45–60 minutes before it goes on the smoker. This allows it to come up slightly toward room temperature, which promotes more even cooking. Meanwhile, prep your smoker thoroughly.
Your checklist before placing the pork on the grate:
- Smoker preheated to 225°F and holding steady for at least 30 minutes.
- Wood chunks (not chips) positioned on coals or in the firebox.
- Water pan filled if your smoker has one — this moderates temperature swings and adds humidity to reduce surface drying.
- Both probes calibrated and positioned: one near the grate where the meat will sit (measuring ambient temp), one to go in the meat once placed.
- A good supply of additional charcoal/wood/pellets to last the full cook without running out.
Place the Pork on the Smoker — Fat Up or Fat Down?
The age-old fat-up vs. fat-down debate actually has a clear answer in most scenarios. Place the pork butt fat-side up on the grate. As the fat cap renders over the long cook, it bastes the meat below it continuously, keeping the exposed meat surface moist and contributing to a richer, more flavorful bark. The only exception is if your heat source comes from directly below the grate with nothing moderating it — in that case, fat-down acts as a heat shield protecting the meat from scorching.
Insert your temperature probe into the thickest part of the meat, avoiding contact with the bone (the bone reads hotter than the surrounding meat and will give you a false reading). Place the meat on the grate and close the lid. Now the long part begins. Resist the urge to open the lid frequently. Every lid lift drops the smoker temperature by 25–50°F and adds 15–30 minutes to your cook time. The mantra of low-and-slow is “if you’re lookin’, you ain’t cookin’.”
Plan your cook to finish 2–3 hours before you need to eat. Finished pulled pork can hold in a cooler (the “faux Cambro” technique) for up to 4 hours — and it actually improves during this rest. Starting too late is the #1 pulled pork mistake.
The First 4 Hours — Building Bark and Absorbing Smoke
The first phase of the cook is about bark formation and smoke penetration. This is when the rub caramelizes, the fat begins to render, and the meat absorbs the vast majority of the smoke flavor it will receive (smoke absorption drops off significantly once the meat’s surface dries out). During this phase, maintain your target temperature, check your wood/fuel every 45–60 minutes, and do not spritz for at least the first 2–3 hours. Spritzing too early slows bark formation.
After 2–3 hours, you can begin spritzing if desired. A common spritz for pork is a 50/50 mix of apple juice and apple cider vinegar in a spray bottle. Spritz lightly every 90 minutes. The purpose is to add a tiny bit of surface moisture and flavor, and the acidity of the vinegar can help bark development. Don’t over-spritz — the goal is a light mist, not drenching the surface.
Hours 5–9: Managing the Stall
At some point — usually when the internal temperature reaches 150–165°F — your thermometer will appear to stop moving. The temperature may plateau for 2–4 hours or more. This is not a malfunction. This is the stall, and every pitmaster encounters it. Understanding it prevents the panic that leads to bad decisions. See our dedicated section below for a full explanation. Your job during the stall is simply to maintain temperature and trust the process.
7. The BBQ Stall Fully Explained
The stall is arguably the most misunderstood phenomenon in low-and-slow BBQ, and it causes more cooks to be ruined (by panic-induced temperature cranking) than any other factor. Here is everything you need to know.
What Is the Stall?
The stall occurs because as the pork heats up, moisture evaporates from the meat’s surface. This evaporative cooling is so efficient that it exactly offsets the rate of heat input from your smoker — creating a thermal equilibrium that can last for 2–4 hours. It is, in essence, your pork sweating. The larger and fattier the piece of meat, the more pronounced and long-lasting the stall will be.
For a deeper understanding of how smoke and temperature interact, our analysis of smoke ring formation and meat color changes is worth reading.
What Not to Do During the Stall
- Do not panic and crank the temperature. Dramatically increasing heat will overcook the exterior before the interior finishes and kills your bark.
- Do not assume something is wrong with your thermometer. Verify with a second probe if you’re skeptical, but the stall is almost certainly real.
- Do not pull the pork early. An internal temperature of 165°F is safe for consumption, but the collagen has not yet converted to gelatin — the pork will be tough and chewy, not pull-ready.
What To Do During the Stall
You have two options:
- Wait it out: Simply maintain your temperature and let evaporative cooling run its course. This is the traditional approach and takes the longest, but results in a slightly drier, firmer bark.
- The Texas Crutch (wrap): This is the standard technique used by virtually every competition pitmaster and commercial BBQ operation. Wrapping the pork breaks the evaporative cooling cycle and dramatically accelerates the cook through and beyond the stall.
Research by barbecue scientist Dr. Greg Blonder found that a 10-pound pork butt loses approximately 1 ounce of water per minute during the evaporative phase. This cooling effect can hold internal temperature in a 10°F window for 3–6 hours, depending on the smoker’s humidity, ambient temperature, and wind. Understanding this takes the frustration out of the stall entirely — you stop wondering what’s wrong and start appreciating the physics.
8. The Texas Crutch: Foil vs. Butcher Paper
When your pork reaches 165°F — the end of the stall zone — it’s time to decide on your wrapping strategy. Wrapping at this temperature is the “Texas Crutch,” a technique that has crossed from competition BBQ into mainstream pitmaster practice. The mechanics are simple: wrapping seals in moisture, eliminates evaporative cooling, and creates a steamy environment that accelerates collagen conversion.
You can also wrap at 160°F if you want to start pushing through the stall earlier, or wait until 170°F if you want more bark formation before wrapping. The exact temperature matters less than the principle. For more context on wrapping materials, see our article on parchment paper in smokers.
✅ Aluminum Foil Advantages
- Maximum moisture retention
- Fastest cooking through stall
- Juicier finished product
- Available in every kitchen
- Great for reheating later
⚠️ Aluminum Foil Disadvantages
- Bark softens significantly
- Steaming can make texture slightly mushy
- Loses that crispy-crunchy bark exterior
✅ Butcher Paper Advantages
- Preserves bark integrity
- Allows some moisture escape (breathable)
- Produces restaurant-quality texture
- The pitmaster’s preferred choice
⚠️ Butcher Paper Disadvantages
- Slightly longer cook time than foil
- Requires purchasing (not always on hand)
- Less moisture retention than foil
How to Wrap Correctly
For foil: tear two large sheets, overlap them, place the pork in the center, and wrap tightly, crimping the edges to form a seal. Add a splash of apple juice inside before sealing if desired. For butcher paper: tear a piece roughly 4x the size of the pork, fold and wrap tightly, tucking the ends securely. Return the wrapped pork to the smoker and continue cooking.
Many competition cooks use the “paper then foil” approach: wrap in butcher paper first, then loosely wrap in a layer of foil to trap slightly more heat. This gives you most of the bark benefit of paper with slightly faster cook times. It’s particularly useful when you’re running behind schedule.

9. Resting, Pulling, and Serving: The Final 20% That Makes or Breaks It
When your probe slides into the pork with zero resistance — not just at 200°F by thermometer, but when you literally feel no tension when inserting the probe anywhere into the meat — remove it from the smoker. This probe-tender test matters more than hitting an exact temperature. Some butts are done at 198°F; others need 207°F. Trust the probe test.
The Resting Protocol
Resting pulled pork is not optional — it’s a critical step. During the cook, muscle fibers contract and push juice to the center of the meat. Resting allows the fibers to relax and reabsorb those juices, resulting in significantly moister pulled pork. Cutting or pulling immediately after removing from heat causes the juices to flood out of the meat onto your cutting board — a tragedy that every pitmaster dreads.
For pulled pork specifically, the resting period serves a second function: the residual heat continues to work on the collagen even after the pork leaves the smoker, pushing through any last resistance to achieve maximum tenderness.
The resting method used by top competition teams is the “Faux Cambro”:
- Wrap the pork in two layers of foil if not already wrapped, or add foil over the butcher paper.
- Line an empty cooler with towels.
- Place the wrapped pork inside, surround with more towels, close the lid.
- The cooler maintains temperature above 160°F (food-safe) for 3–4 hours.
Minimum rest time is 45 minutes. Optimal rest is 1.5–2 hours. This flexibility is also what makes pulled pork so practical for feeding crowds — you can finish cooking hours before eating time with no quality loss.
When you unwrap the pork after resting, you’ll find a pool of rendered fat and juice in the foil or paper. Don’t discard this. Strain it to remove any solids, skim off some (not all) of the fat, and drizzle it back over the pulled pork. This “au jus” intensifies flavor dramatically and helps keep the pulled pork moist during serving. Our guide on keeping smoked meat moist covers this and other moisture strategies in depth.
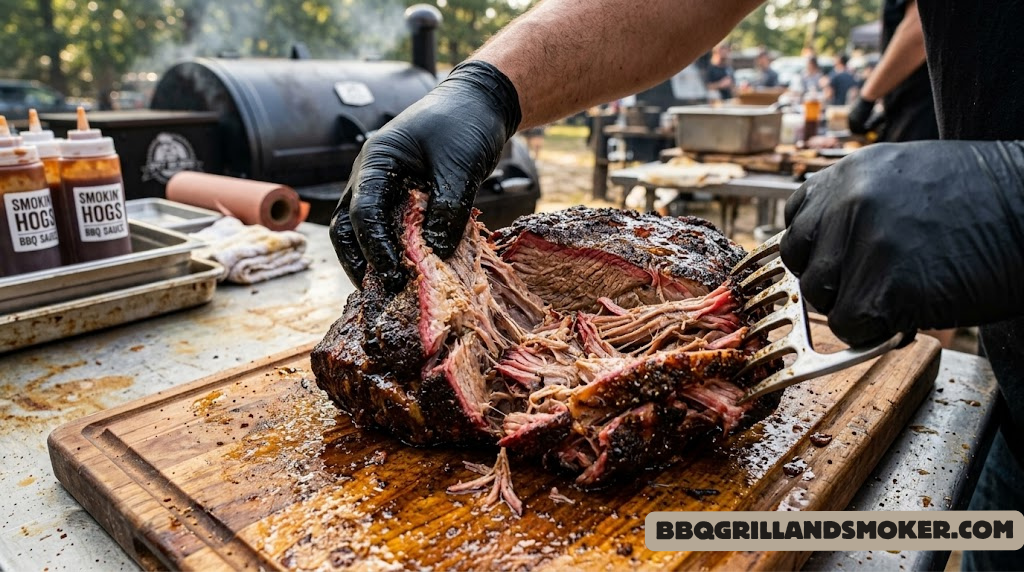
Pulling Technique
Once rested, it’s time to pull. Start by removing the bone — if your cook is done properly, it will slide out with a gentle twist and zero resistance. This is one of the most satisfying moments in BBQ. Then pull the meat by hand or with bear claws, working in the direction of the muscle fibers. Pull into medium-large strands — not shredded into sawdust, not left in huge chunks. Aim for consistency so every bite has a balance of bark and interior meat.
Serving Suggestions
Great pulled pork deserves great accompaniments. The classics exist for a reason:
- Brioche buns: Slightly sweet, buttery, holds up to juicy pork without disintegrating.
- Classic coleslaw: Creamy or vinegar-based — both cut through the richness of the pork beautifully.
- Pickled red onions: Bright acidity that complements smoke and fat.
- BBQ sauce on the side: Always serve sauce on the side so the bark isn’t overwhelmed. Our roundup of the best barbecue sauces includes options for every regional style.
- Smoked mac and cheese: The ultimate pulled pork companion — check out our smoked mac and cheese recipe.
10. Injections, Spritzing, and Moisture Management
While a great pork shoulder doesn’t require injection or spritzing to be excellent, these techniques can elevate your results from very good to exceptional — particularly for competition-style pulled pork or heritage breed pork where you’re investing in premium ingredients.
Pork Injection Formulas
| Injection Name | Ingredients | Flavor Profile | Best For |
|---|---|---|---|
| Classic Apple Butter | ½c apple juice, 2 tbsp butter, 1 tbsp salt, 1 tbsp brown sugar, 1 tsp Worcestershire | Sweet, buttery, balanced | All-purpose, family friendly |
| Savory Competition | ½c chicken broth, 2 tbsp butter, 1 tbsp salt, 1 tsp garlic powder, 1 tsp onion powder | Savory, clean, umami | Competition BBQ |
| Carolina Tangy | ¼c apple cider vinegar, ¼c apple juice, 1 tbsp hot sauce, 1 tbsp salt | Tangy, bright, spicy | Vinegar-based style BBQ |
| Honey Bourbon | ¼c bourbon, ¼c apple juice, 2 tbsp honey, 1 tbsp butter, 1 tbsp salt | Rich, sweet, complex | Showpiece cooks, special occasions |
Injection Best Practices
- Inject 12–24 hours before smoking for maximum penetration depth.
- Use a 1-inch grid pattern across the entire surface, injecting to multiple depths.
- Target the thicker areas around the bone where rub can’t penetrate.
- Warm the injection liquid slightly (not hot) — it flows more easily through the needle and absorbs better.
- Use a needle with multiple small holes (a “marinade” style injector) for more even distribution than a single large-hole needle.
Spritzing: The Science and Art
The spritz debate is lively in BBQ circles. The genuine benefits of spritzing are: slight surface moisture to slow surface drying, a minor flavor contribution (especially from apple cider vinegar), and a light glaze effect as the sugars in the spritz caramelize on the surface. The arguments against spritzing center on bark disruption — every time you open the lid and spray, you’re adding moisture that can slow bark formation.
The compromise most pitmasters land on: no spritzing for the first 2–3 hours (let the bark form), then light spritzing every 90 minutes until you wrap. After wrapping, no spritzing needed — the wrapped environment provides its own moisture.
Classic Apple Spritz: 50% apple juice + 50% apple cider vinegar. Sweet, tangy, works beautifully with hickory smoke.
Competition Cherry Spritz: ½c cherry juice + ¼c apple juice + ¼c water. Enhances color and adds subtle fruitiness to the bark.
Savory Butter Spritz: ½c water + 2 tbsp melted butter + 1 tsp Worcestershire + 1 tsp salt. Rich, savory, excellent on higher-end heritage pork.
11. Pulled Pork Troubleshooting Guide
Even experienced pitmasters encounter problems. Here is a systematic guide to diagnosing and fixing the most common pulled pork issues.
| Problem | Likely Cause | Fix It |
|---|---|---|
| Bark is soft/rubbery | Too much moisture in smoker, wrapped too early, foil instead of paper | Use butcher paper, don’t spritz excessively, unwrap for last 30 min of cook |
| Bark is too dark/bitter | Too much smoke, wood smoldering not burning clean, too much sugar in rub | Reduce wood quantity, ensure clean thin blue smoke, reduce rub sugar |
| Pork is dry/stringy | Overcooked, pulled too early, no injection, insufficient resting | Use probe tenderness test, rest for 2 hours minimum, inject next time |
| Pork won’t pull apart | Undercooked — internal temp too low, collagen not converted | Return to smoker wrapped, continue until probe-tender at 200–205°F |
| Stall lasts forever | Large cut, humid smoker, low ambient temperature | Wrap in foil (Texas crutch), consider bumping smoker temp 10–15°F |
| Smoke ring is missing | Used electric smoker, meat wasn’t cold when it went on, insufficient wood smoke | Start with cold meat, add more wood chunks, spritz with slightly acidic liquid |
| Acrid/bitter smoke flavor | Dirty burn — white/black smoke, too much wood, wet wood | Use dry seasoned wood only, use smaller amounts of wood, ensure good airflow |
| Cook took much longer than expected | Smoker temp running low, multiple large butts, cold ambient temperature | Verify smoker temp with independent thermometer, add extra time buffer |
For specific equipment issues, our troubleshooting guides cover Masterbuilt smoker not heating up, Traeger running too hot, and Camp Chef not getting hot enough.
For cook timing, our comprehensive look at assess grill mold and cleaning and barbecue maintenance essentials keep your equipment performing at its best.
12. Regional Pulled Pork Variations Across America
Pulled pork is America’s most democratic BBQ tradition — virtually every region has its own take, shaped by local history, agricultural traditions, and deeply held beliefs about the proper role of vinegar, mustard, tomato, and heat. Understanding these variations makes you a more versatile cook and a more appreciative eater.
Eastern North Carolina Style
The oldest and most purist tradition in American BBQ. The whole hog is smoked over hardwood coals (usually oak or hickory). There is no tomato sauce — only a thin, sharp sauce of apple cider vinegar, red pepper flakes, salt, and a touch of sugar. The flavor is bracingly acidic, intensely porky, and completely addictive. It’s meant to cut through the richness of the fat with each bite.
Western Carolina / Lexington Style
Known as “Lexington-style” or “Piedmont-style,” this tradition focuses on the shoulder rather than the whole hog and introduces tomato in the form of ketchup into the sauce — creating a slightly sweeter, redder “dip” that still maintains significant vinegar presence. This style influenced much of what became standard “BBQ sauce” outside the Carolinas.
South Carolina Mustard-Based
German immigrant influence in South Carolina’s Midlands region created a distinctive mustard-based sauce (Carolina Gold) — bold yellow, tangy from vinegar, sweet from brown sugar, with complex spice notes. It pairs beautifully with the smoke and fat of pork shoulder in a way that no other sauce does.
Memphis Style
Memphis pulled pork is notable for its emphasis on the rub (known as “dry rub”) and often served “wet” (with a tomato-based sauce applied) or “dry” (rub only). Memphis BBQ sauce is typically thinner than Kansas City sauce, with a forward sweet-tangy flavor and a tomato base. The rub chemistry in Memphis BBQ is considered an art form — restaurants guard their recipes jealously.
Kansas City Style
The most widely known and commercially distributed style globally. Kansas City BBQ features a thick, sweet, tomato-and-molasses sauce applied during the final hour of cooking and again at serving. The emphasis is on bark, smoke, and the balance of sweet-smoke-savory. This is the style that launched a thousand commercial sauce brands.
Texas Style
Texas BBQ is primarily a beef tradition (brisket and sausage reign supreme), but pulled pork is not uncommon. When Texas pitmasters do tackle pork butt, they treat it similarly to brisket: heavy on the black pepper and salt (salt-and-pepper rub), cooked over post oak, and wrapped in butcher paper. Sauce is often an afterthought — the meat stands on its own. Explore more in our smoker selection for low and slow ribs and brisket and our smoked beef short ribs recipe for Texas-style inspiration.
| Region | Rub Style | Sauce Style | Wood Preference | Defining Characteristic |
|---|---|---|---|---|
| Eastern NC | Simple salt/pepper | Vinegar + pepper, no tomato | Oak, hickory | Whole hog, purist tradition |
| Western NC | Brown sugar/spice | Vinegar + ketchup “dip” | Hickory | Shoulder only, slightly sweet |
| South Carolina | Mustard-based rub | Mustard (Carolina Gold) | Hickory, oak | German immigrant influence |
| Memphis | Complex dry rub | Thin tomato-vinegar | Hickory | Dry or wet, rub is paramount |
| Kansas City | Sweet spice blend | Thick sweet tomato-molasses | Hickory, oak | Sauce-forward, commercial classic |
| Texas | Salt and black pepper | Thin, tangy, optional | Post oak | Meat-first philosophy |
13. Best Smokers for Pulled Pork: Equipment Comparison Guide
The smoker you use will shape your pulled pork in meaningful ways — not just in flavor, but in the amount of attention and skill required, the maximum batch size, and the style of the finished product. Here is a practical comparison of the major smoker types for a pork butt cook.
| Smoker Type | Smoke Flavor | Ease of Use | Bark Quality | Best For | Top Pick |
|---|---|---|---|---|---|
| Offset Smoker | ⭐⭐⭐⭐⭐ | ⭐⭐ (High effort) | ⭐⭐⭐⭐⭐ | Serious pitmasters | Oklahoma Joe Highland |
| Pellet Grill | ⭐⭐⭐⭐ | ⭐⭐⭐⭐⭐ (Set & forget) | ⭐⭐⭐⭐ | Convenience, consistency | Traeger Pro 575, Camp Chef Woodwind |
| Ceramic Kamado | ⭐⭐⭐⭐⭐ | ⭐⭐⭐ | ⭐⭐⭐⭐⭐ | Best flavor efficiency | Kamado Joe Classic II, Big Green Egg Large |
| Electric Smoker | ⭐⭐⭐ | ⭐⭐⭐⭐⭐ | ⭐⭐⭐ | Beginners, apartment use | Masterbuilt 30 |
| Kettle Grill (Indirect) | ⭐⭐⭐⭐ | ⭐⭐⭐ | ⭐⭐⭐⭐ | Budget entry point | Weber 22″ Charcoal |
The pellet smoker vs. electric smoker comparison and our analysis of the Kamado Joe vs. Big Green Egg provide deeper guidance on the top options. For budget-conscious shoppers, see the Z Grills vs. Pit Boss budget comparison.
The All-Day Cook Timeline

Frequently Asked Questions
🔥 The Bottom Line: Your First Perfect Pulled Pork Awaits
Smoked pulled pork is one of the most rewarding cooks in all of BBQ — not because it’s complicated, but because the gap between effort and result is almost uniquely generous. You put in a day’s worth of patience, apply a handful of principles, and in return you get something that could sit comfortably on any competition table or restaurant menu.
The most important things to remember: buy a bone-in pork butt with good marbling, apply your rub at least 12 hours ahead, maintain a steady 225°F, don’t fight the stall (wrap through it), rest for at least 90 minutes, and use a probe tender test rather than chasing an exact temperature. Everything else is refinement.
Now go make some smoke. Your people deserve it.
