The Ultimate Smoker Guide for Beginners: Master Low-and-Slow BBQ from Day One
You’ve seen that beautiful smoke ring on competition brisket. You’ve tasted pulled pork that falls apart at the touch. You’ve been to a backyard cookout where someone quietly disappeared for six hours and came back with a rack of ribs that stopped every conversation cold. Now it’s your turn.
Smoking meat is one of the most rewarding things you can do with fire, patience, and a chunk of wood. It’s slow. It’s tactile. It’s deeply satisfying in a way that standing over a gas grill flipping burgers simply isn’t. And despite what the intimidating setups at competition events suggest, getting started doesn’t require a $3,000 offset smoker or a weekend pitmaster certification course.
This smoker guide for beginners covers every single thing you need to know to get from zero to hero: which type of smoker to buy, how to control temperature, which woods create which flavors, what meats are easiest to start with, how to nail moisture, how to read your smoke, how to season your smoker, and how to avoid the classic first-timer mistakes that turn an eight-hour cook into a disappointment.
Whether you’re eyeing a compact electric smoker, a budget-friendly pellet grill, or an old-school charcoal offset, this guide is your complete starting point. Let’s fire it up.
What Is Smoking Meat — And Why Does It Taste So Good?
At its most fundamental level, smoking meat is a cooking method that uses indirect heat, low temperatures, and wood smoke to slowly break down tough connective tissue, render fat, and infuse food with deep, complex flavor that no other cooking technique can replicate. It is the defining technique of American BBQ, with traditions stretching back thousands of years to when indigenous peoples first used smoke to preserve and flavor meat.
The science behind great smoked meat is genuinely fascinating. When you cook a tough cut like brisket or pork shoulder at temperatures between 225°F and 275°F for many hours, the collagen in the meat — that tough, chewy connective tissue — slowly converts to gelatin. This gelatin lubricates every fiber, making meat that was previously almost inedible into something rich, moist, and buttery. No amount of high-heat grilling can accomplish this. Heat alone just tightens and dries the proteins.
The Maillard Reaction and the Bark
While the inside is slowly tenderizing, the outside of your smoked meat develops what pitmasters call “the bark” — a dark, almost lacquered crust of caramelized rub, rendered fat, and smoke compounds. This bark forms via the Maillard reaction, the same chemical process responsible for browning bread, searing steak, and roasting coffee. A great bark on a brisket or pork butt is crunchy, peppery, deeply savory, and slightly sweet all at once. It’s one of the most sought-after textures in BBQ.
Grilling vs. Smoking: The Key Difference
Grilling uses direct, high heat — typically 400°F to 600°F — to cook food quickly. Smoking uses indirect, low heat — typically 225°F to 275°F — to cook food slowly over many hours. For a deep exploration of this distinction, check out our comparison of grilling vs. smoking: heat, time, and flavor mechanics.
| Feature | Grilling | Smoking |
|---|---|---|
| Temperature Range | 400–600°F | 200–275°F |
| Cook Time | Minutes | Hours (up to 18+) |
| Heat Type | Direct | Indirect |
| Ideal Cuts | Steaks, chops, fish | Brisket, ribs, pork shoulder |
| Smoke Flavor | Minimal | Heavy, complex |
| Moisture Retention | Lower | Higher (with technique) |
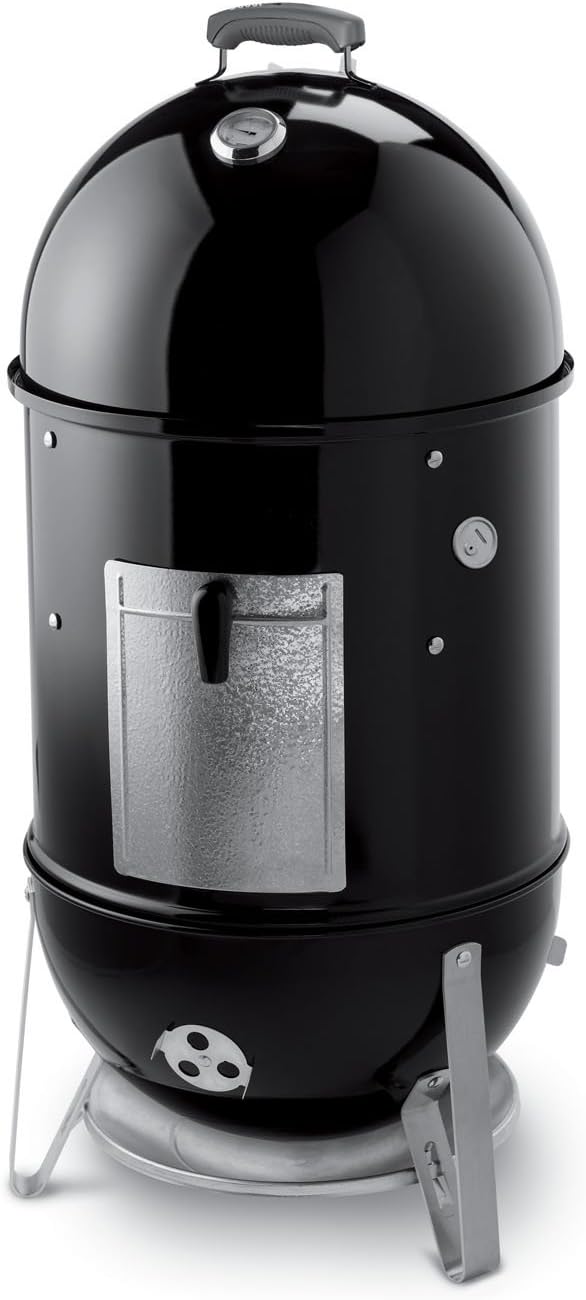
Weber Smokey Mountain 18″ Cooker
A legendary beginner smoker trusted by millions — perfectly sized, fuel-efficient, and built to last decades. One of the best entry points into charcoal smoking.
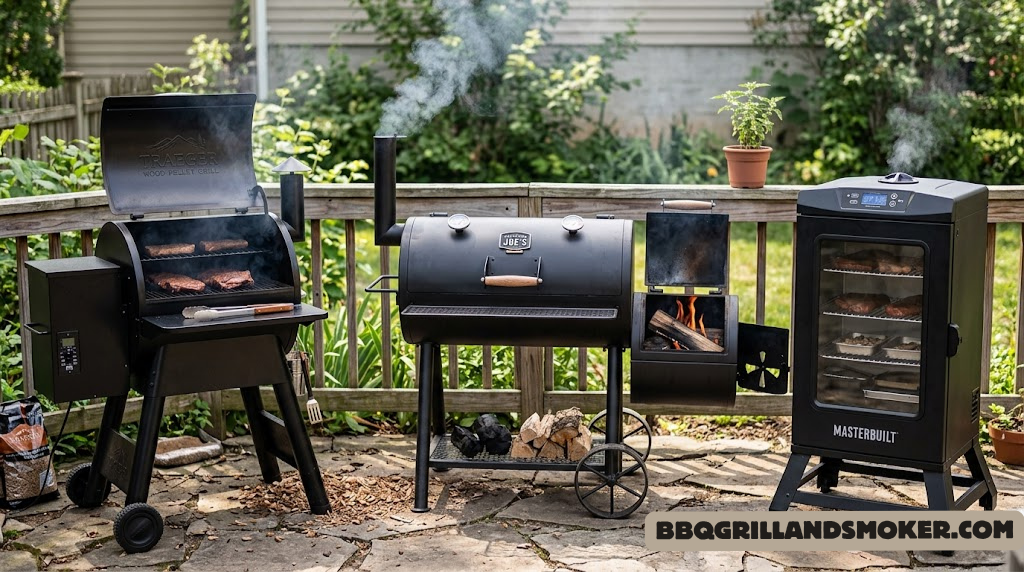
View on Amazon →Types of Smokers: A Complete Breakdown for Beginners
Before you spend a single dollar, you need to understand the five main categories of smokers and what each one demands of you in terms of skill, effort, time, and money. Each type has a completely different cooking experience. Choosing the wrong one for your lifestyle is the number one reason beginners get discouraged and abandon the hobby.
1. Offset Smokers (Stick Burners)
An offset smoker has a large main cooking chamber with a firebox attached to one side. You burn logs or wood chunks in the firebox, and the smoke and heat travel horizontally through the cooking chamber before exiting through a chimney on the opposite end. This is the classic, traditional American BBQ setup — the kind you see at renowned BBQ joints from Texas to the Carolinas.
✅ Pros
- Authentic wood-fired flavor
- Large cooking capacity
- No electricity needed
- Extremely satisfying to use
❌ Cons
- Requires constant attention
- Temperature control takes practice
- Cheap offsets have major hot spots
- Uses a lot of fuel
If you love the process as much as the result — tending the fire, splitting wood, managing airflow — an offset smoker will become your obsession. Our deep-dive offset smoker vs. pellet smoker comparison explains how the two experiences differ.
2. Pellet Smokers (Pellet Grills)
Pellet grills use compressed hardwood pellets fed automatically from a hopper into a firepot by an auger motor. An igniter rod lights the pellets, a fan circulates heat, and a digital controller maintains the temperature you set — much like an outdoor convection oven. This automation makes pellet smokers the most beginner-friendly option on the market.
✅ Pros
- Set-and-forget temperature control
- Consistent results every time
- Wi-Fi models allow remote monitoring
- Can grill, smoke, bake, roast
❌ Cons
- Requires electricity
- Lighter smoke flavor than offset
- Pellet costs add up over time
- More components to maintain
The big brands in pellet grills each have their strengths. If you’re comparing, our Pit Boss vs. Traeger comparison is a great starting point, and we’ve also reviewed standouts like the Camp Chef Woodwind WiFi 24 in detail.
3. Electric Smokers
Electric smokers use a heating element — similar to an electric oven — to generate heat, and a small tray or chip loader to add wood chips for smoke flavor. They’re the most hands-off option of all, requiring you to simply load chips, set the temperature, and walk away. The Masterbuilt series and East Oak are the most popular brands.
✅ Pros
- Extremely easy to use
- Consistent, accurate temperature
- Compact and apartment-friendly
- Very affordable entry cost
❌ Cons
- Lightest smoke flavor of all types
- Requires electricity
- Doesn’t get hot enough to sear
- Smaller cooking capacity typically
For a full look at the electric smoker category, see our roundup of the best electric BBQ smokers and our detailed East Oak electric smoker review.
4. Charcoal Smokers (Kettle & Bullet Styles)
Charcoal smokers include everything from the iconic Weber Kettle set up for indirect cooking, to the Weber Smokey Mountain bullet smoker, to the Ugly Drum Smoker (UDS). These use charcoal as the primary fuel source and wood chunks for smoke flavor. They require more attention than electric or pellet smokers but significantly less than offset stick burners.
5. Kamado Grills
Kamado grills — like the Big Green Egg or Kamado Joe — are thick-walled, egg-shaped cookers made from ceramic. They excel at holding temperature with minimal fuel, making them surprisingly good smokers. Their ceramic walls retain heat and moisture exceptionally well. They can also sear at extremely high temperatures, making them genuinely versatile. Our Kamado Joe vs. Big Green Egg comparison breaks down which is better for beginners.
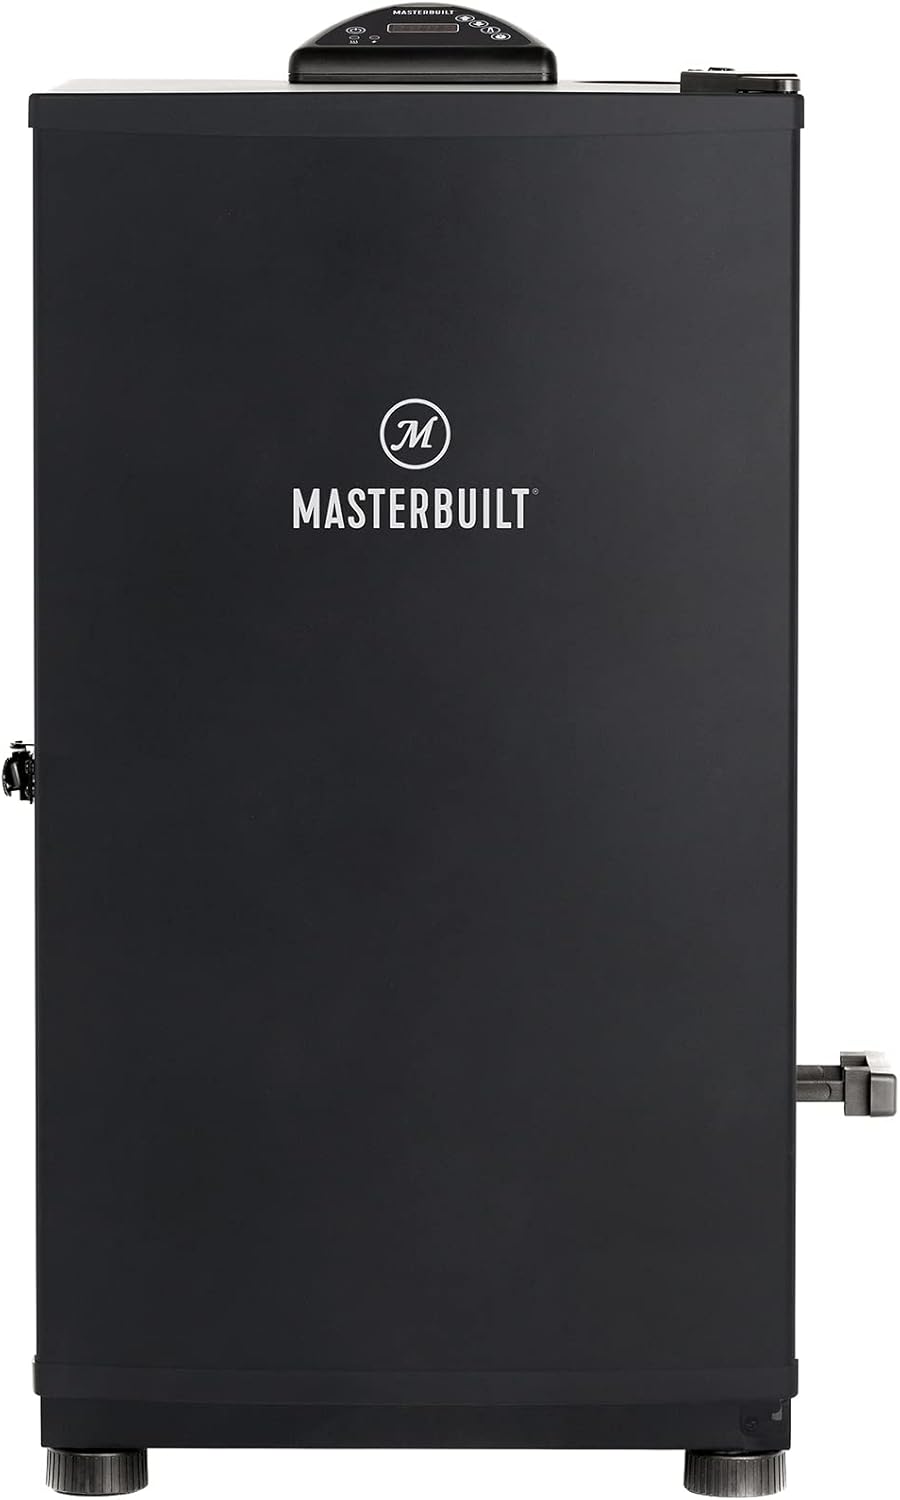
Masterbuilt 30″ Digital Electric Smoker
The most beginner-friendly smoker on the market. Digital temperature control, side chip loader, and four chrome racks. Set it and smoke it.
View on Amazon →How to Choose Your First Smoker: The Decision Framework
With five main smoker types and dozens of brands in each category, choosing your first smoker can feel paralyzing. Use this decision framework to cut through the noise and find the one that actually fits your life.
Step 1: Assess Your Commitment Level
Be completely honest with yourself. Are you someone who wants to tinker with fire for eight hours, or do you want to press a button, go to your kid’s soccer game, and come home to perfectly smoked ribs? There is no wrong answer — but buying the wrong smoker for your commitment level will ruin the experience.
🔥🔥 Medium Commitment: Pellet grill with Wi-Fi control or charcoal bullet smoker
🔥🔥🔥 High Commitment: Offset stick burner or reverse-flow smoker
Step 2: Set a Realistic Budget
Budget determines which category you can realistically shop in. Here’s a quick breakdown:
| Budget Range | Best Option | Example Models |
|---|---|---|
| Under $200 | Electric smoker or basic charcoal | Masterbuilt 30″, Weber 14″ Smokey Mountain |
| $200–$500 | Mid-range pellet or quality charcoal bullet | Pit Boss 700FB, Z Grills 450A |
| $500–$1,000 | Quality pellet grill or offset | Traeger Pro 575, Oklahoma Joe Highland |
| $1,000+ | Premium pellet or large offset | Camp Chef Woodwind 36, Weber Searwood |
If you’re on a budget, our guide to the best BBQ smokers covers the top picks across every price tier. For pellet grills specifically, the Z Grills vs. Pit Boss showdown is essential reading.
Step 3: Consider Your Space
Apartment patio? You need a compact electric or small pellet grill. Large backyard? Open your options. Smoking is best done with good ventilation regardless of smoker type — never smoke in an enclosed garage or shed.
Step 4: Think About Your Cooking Goals
Do you want to do long overnight cooks of brisket and pork shoulder? You need reliable temperature hold — pellet or quality charcoal. Do you want the flexibility to also grill steaks and burgers at high heat? Pellet grill or kamado. Do you want to enter competitions with authentic wood-fire flavor? Offset or large kamado. For guidance on smokers specifically built for low-and-slow cooking, see our smoker selection guide for ribs and brisket.

Pit Boss 700FB Wood Pellet Grill
700 sq inches of cooking space, flame broiler for direct heat searing, and PID temperature control. Exceptional value at this price point for beginners ready to step up.
View on Amazon →Wood Selection: The Secret Ingredient Behind Great Smoke Flavor
The wood you burn is just as important as the meat you’re cooking. Every wood species burns differently and produces smoke with a distinct flavor profile. Pairing the right wood with the right meat is one of the most important skills you’ll develop as a smoker. This is the difference between “that’s nice” and “oh my God, what is that?”
For a full deep-dive, our BBQ wood chips guide is the most comprehensive resource we’ve written. We also have dedicated comparisons like hickory vs. mesquite and wood chips vs. wood chunks.
The Six Essential Smoking Woods
Wood Chips vs. Wood Chunks vs. Logs
The form your wood comes in matters based on your smoker type:
- Wood chips — Small, burn fast. Best for electric and gas smokers where you need smoke for shorter periods. Need to be added frequently.
- Wood chunks — Golf ball to fist-sized pieces. Best for charcoal smokers and kamado grills. Burn longer and more consistently than chips. Do not soak them.
- Wood pellets — Compressed sawdust, designed specifically for pellet grills. 100% wood with no binders.
- Full logs — For offset stick burners only. You burn whole splits of hardwood as your primary fuel.
The Wood-to-Meat Pairing Matrix
| Meat | Best Wood | Alternative | Avoid |
|---|---|---|---|
| Beef Brisket | Post Oak, Hickory | Pecan, Mesquite | Fruitwoods alone |
| Pork Ribs | Apple, Cherry | Hickory, Pecan | Mesquite |
| Pork Shoulder | Hickory, Pecan | Apple, Cherry | Strong mesquite |
| Whole Chicken | Apple, Cherry | Pecan, Peach | Heavy hickory/mesquite |
| Salmon / Fish | Alder, Apple | Cherry, Cedar plank | Any heavy hardwood |
| Lamb | Oak, Rosemary wood | Cherry, Hickory | Overpowering mesquite |
| Turkey | Cherry, Apple | Hickory, Pecan | Mesquite |
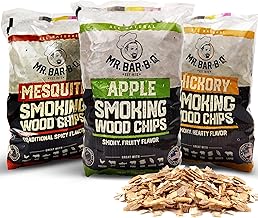
Western BBQ Smoking Wood Chips (Variety Pack)
Apple, Cherry, Hickory, and Mesquite in one set — perfect for beginners experimenting with different flavor profiles before committing to a single wood.
View on Amazon →Temperature Control: The Most Important Skill in Smoking
If you asked any competition pitmaster what separates mediocre BBQ from transcendent BBQ, the answer would be temperature control. Everything in smoking — tenderness, bark formation, moisture retention, smoke ring development — is downstream of your ability to maintain a consistent cook temperature over a long period of time.
“Control the fire and the fire will control the food. Lose control of the fire and you’ve lost control of everything.” — Competition BBQ axiom
The Low-and-Slow Sweet Spot: 225°F–275°F
The phrase “low and slow” refers specifically to the temperature range of 225°F to 275°F. Within this range, collagen converts to gelatin (above 165°F), the stall occurs and resolves (usually between 150°F and 175°F internal meat temp), and the smoke ring develops (primarily below 140°F internal temp). Most beginner cooks set their target temperature at 225°F for an authentic, slow cook, or 250°F for a slightly faster cook with similar results.
Understanding the Stall
One of the most common beginner panics happens when your brisket or pork shoulder seems to stop cooking. You’ve been at 203°F air temperature for six hours, your meat hit 165°F internal temperature, and now it’s been stuck there for four hours. Your thermometer must be broken. Something is wrong.
Nothing is wrong. This is called the stall, and it’s completely normal. As moisture evaporates from the surface of the meat, it cools the meat at the same rate that the smoker is heating it — a process called evaporative cooling. The stall can last two to six hours depending on the size of the cut and the temperature you’re cooking at. You have two options: wait it out, or wrap the meat in butcher paper or foil (the Texas Crutch) to push through faster.
Meat Internal Temperature Guide for Beginners
The Right Thermometer Setup
Never trust the built-in dial thermometer on a cheap smoker. These are notoriously inaccurate — often off by 50°F or more. You need two thermometers:
- An ambient probe sitting at grate level inside your smoker to monitor the actual cooking temperature (not what the lid thermometer claims).
- A meat probe inserted into the thickest part of whatever you’re cooking to monitor internal temperature in real time.
Wireless dual-probe thermometers like the ThermoPro TP25 or Meater Block allow you to monitor both readings from your phone without opening the smoker. Every time you lift the lid, you lose 15–25 minutes of cooking time and stability.

ThermoPro TP25 Wireless Meat Thermometer
Four probes, 500-foot Bluetooth range, and an app with pre-set temperatures for every cut. Monitor your cook from inside the house. An essential tool.
View on Amazon →Preparing for Your First Smoke: A Step-by-Step Walkthrough
Your first smoke doesn’t have to be a twelve-hour brisket odyssey. Let’s walk through the preparation process — from the night before your cook all the way to slicing the meat — so nothing catches you off guard.
Step 1: Season Your Smoker Before First Use
Before you cook a single piece of food, you need to season your new smoker. This burns off manufacturing oils, coats the interior surfaces with a protective layer of polymerized oil and smoke, and helps your smoker come to temperature faster and hold temperature more consistently in subsequent cooks. For a full guide to this process, read our article on how to season a new BBQ grill.
To season your smoker: coat the interior walls, racks, and lid with a thin layer of cooking oil (vegetable or flaxseed oil work well). Fire it up to around 275°F and run it empty for two to three hours. You’ll see smoke — that’s normal. Let it cool completely before using.
Step 2: Prepare Your Meat the Night Before
For most beginner cuts — especially chicken thighs, ribs, or pork shoulder — applying your rub the night before and letting the seasoned meat rest in the refrigerator for 8–24 hours makes a significant difference. The salt in your rub draws moisture to the surface through osmosis, which then gets reabsorbed, carrying the seasonings deeper into the meat. This process is called dry brining, and it produces noticeably more flavorful, juicy results.
Step 3: Bring Your Smoker to Temperature Before Loading Meat
Never put cold meat into a cold smoker and then light it. Always bring your smoker fully up to your target temperature before loading the meat. This is called pre-heating, and it takes anywhere from 15 minutes for an electric smoker to 45–60 minutes for a charcoal or offset smoker. Placing meat in a cold smoker that’s heating up exposes it to initial combustion products (before the fire is clean-burning) and leads to uneven cooking from the start.
Step 4: Place Meat Correctly and Insert Probes
Place your meat on the cooking grate fat-side up (for most cuts — the rendered fat will baste the meat as it cooks). Insert your meat thermometer probe into the thickest part of the cut, away from any bone (bone conducts heat and gives a falsely high reading). Position your ambient grate probe at roughly the same level as your meat to ensure you’re measuring the temperature the meat is actually experiencing.
Step 5: Maintain Temperature and Resist Opening the Lid
This is where patience becomes your most important tool. Monitor your thermometers. Adjust vents or fuel as needed. Do not open the smoker unless absolutely necessary. Every time you lift the lid you drop the temperature by 25–50°F and add 20–30 minutes to your cook time. Trust your thermometers. If your ambient temperature is holding steady, the meat is cooking. Add smoke wood when the smoke becomes thin or fades completely.
Step 6: Rest Your Meat Before Cutting
When your meat reaches target internal temperature, the biggest beginner mistake is cutting into it immediately. Don’t do it. You must rest the meat. During cooking, heat pushes all the moisture toward the center. When you rest the meat, that moisture redistributes evenly throughout. Cut too early and all that juice runs out onto your cutting board instead of staying in the meat. Rest times: 30 minutes minimum for chicken, 1–2 hours for pork shoulder and ribs, 2–4 hours for brisket (wrapped in towels in a cooler).

Oklahoma Joe’s Highland Reverse Flow Smoker
An iconic beginner-to-intermediate offset smoker with reverse-flow technology for better heat distribution. Built like a tank and priced fairly for what you get.
View on Amazon →Best Meats for Beginners: Start Here Before You Attempt Brisket
Every beginner wants to do a brisket or a rack of St. Louis ribs for their first cook. And while those ambitions are admirable, the truth is that brisket is one of the most technically challenging smokes you can attempt — a huge, expensive cut that punishes every mistake. Start with these more forgiving cuts instead, build your confidence and your understanding of your smoker, and then graduate to the showpieces.
Tier 1: Nearly Impossible to Mess Up
- Chicken thighs — Forgiving, flavorful, done in 2–3 hours at 275°F. Our BBQ chicken thighs recipe is a great first-cook reference.
- Chicken wings — Fast, delicious, teach you bark and crispiness fundamentals.
- Sausages and brats — Practically foolproof. Done in about 1.5–2 hours.
Tier 2: Great for Building Confidence
- Pork spare ribs / Baby back ribs — Typically done in 5–6 hours using the 3-2-1 method for ribs. One of the most satisfying first smokes.
- Pork shoulder / Boston butt — A large, fatty cut that is remarkably forgiving. Our complete smoked pulled pork recipe walks you through the whole cook.
- Whole chicken — Teaches you poultry smoking fundamentals. See our smoked whole chicken recipe.
Tier 3: When You’re Ready for the Big Leagues
- Beef brisket — The holy grail. Expensive, time-consuming (12–18 hours), and unforgiving of temperature errors. Attempt only after you’ve confidently completed several Tier 2 cooks.
- Beef short ribs — Rich, beefy, and delicious — but similar challenge level to brisket. See our smoked beef short ribs recipe when ready.
- Turkey — Large bird means a long cook; follow our smoked turkey breast guide for a manageable starting point.

Traeger Pro 575 Wood Pellet Grill & Smoker
WiFire technology, 575 square inches of cooking space, and legendary Traeger reliability. The Pro 575 is the most popular beginner-to-intermediate pellet grill on the market. Read our full Traeger Pro 575 review.
View on Amazon →The Smoke Ring: What It Is, What Causes It, and Why It Matters
Cut into a well-smoked brisket and you’ll notice a pink ring just beneath the surface of the dark bark. This is the legendary smoke ring — one of the most sought-after visual indicators of great BBQ. Competition judges look for it. Backyard cooks brag about it. But what actually causes it, and do you need it to have great meat?
The Chemistry of the Smoke Ring
The smoke ring is not caused by smoke flavor penetrating the meat — it’s a chemical reaction. Combustion gases (particularly carbon monoxide and nitric oxide) from your burning wood react with myoglobin (the protein responsible for meat’s red color) to form a stable pink compound called nitrosomyoglobin. This reaction only occurs at temperatures below approximately 140°F internal meat temp. Once the meat heats beyond that point, the reaction stops and the pink ring is set.
This is why your smoke ring is most prominent on slow-cooked meats that spend many hours below 140°F, and why electric smokers (which produce less combustion gas) tend to produce thinner smoke rings. For a detailed breakdown of smoke ring science, see our analysis of smoke ring formation and meat color changes.
How to Get a Better Smoke Ring
- Start with cold meat — the longer it stays below 140°F, the more time the reaction has to work.
- Use wood with more combustion gases — cherry and hickory tend to produce good rings.
- Don’t wrap the meat too early — wrapping in foil stops new smoke from reaching the surface.
- Cook at lower temperatures (225°F vs. 275°F) — the slower rise gives more time for ring development.
- Maintain good airflow — a clean fire producing thin blue smoke delivers combustion gases more efficiently than thick white smoke.
Rubs, Brines, and Marinades: Building Flavor Before the Smoke
Smoke provides one dimension of flavor. The seasoning you apply to your meat provides another, equally important dimension. Most competition pitmasters use a combination of dry brine (salt applied well in advance) and a dry rub (spice blend applied shortly before cooking). Wet marinades are less commonly used for classic BBQ cuts because the sugars in marinades can burn over long low-and-slow cooks.
The Role of Salt
Salt is the most important ingredient in any rub. Applied 24–48 hours ahead of cooking, salt draws moisture to the surface via osmosis, dissolves in that moisture to form a concentrated brine, and then gets drawn back into the meat over time — seasoning the interior deeply and improving moisture retention. Never skip the salt, and never apply it at the last minute if you have a choice.
Classic Texas-Style Brisket Rub
In Texas, the philosophy is simple: beef this good needs only two ingredients. Combine equal parts coarse kosher salt and coarsely ground black pepper. Apply generously to all sides of the brisket at least one hour before cooking. That’s it. The smoke and the beef do the rest.
All-Purpose Pork Rub
For pork ribs, shoulders, and pulled pork, a more complex rub works beautifully. Try: 3 tbsp brown sugar, 2 tbsp smoked paprika, 1 tbsp garlic powder, 1 tbsp onion powder, 1 tsp cayenne, 2 tsp black pepper, 2 tsp salt, 1 tsp dried thyme, 1 tsp dry mustard. Mix well. Apply liberally and let it set on the meat for at least 2 hours, ideally overnight. For more seasoning inspiration, see our best barbecue rubs guide and our homemade BBQ rub recipe.
When to Use Barbecue Sauce
Apply barbecue sauce only in the last 30–45 minutes of the cook. The sugar in most sauces will burn and turn bitter if exposed to heat for hours. Brush on a thin layer and let it set into a lacquered glaze in the final stages. Find your perfect sauce in our best barbecue sauces guide. If you’re gluten-sensitive, our guide on whether barbecue sauce is gluten free is worth reading before you buy.

Killer Hogs The BBQ Rub
A competition-proven rub used by championship teams across the country. Perfectly balanced sweet-savory-heat ratio for pork and chicken. Beginner-friendly and immediately impressive.
View on Amazon →Keeping Your Smoked Meat Moist: The Science of Moisture Control
Dry smoked meat is the most common beginner complaint. “It looked perfect on the outside but the inside was dry.” This almost always comes down to one or more of these factors: overcooking, cooking at too high a temperature, not resting the meat properly, or cutting against the grain. Our dedicated guide on keeping smoked meat moist covers all the variables in detail.
The Texas Crutch (Foil or Butcher Paper Wrap)
One of the most powerful moisture-saving techniques is wrapping your meat during the stall. Wrapping in aluminum foil (the “Texas Crutch”) traps steam and dramatically accelerates cooking through the stall, but at the cost of some bark texture. Wrapping in pink butcher paper (popularized by the legendary Franklin Barbecue in Austin) allows the bark to breathe slightly, maintaining better texture while still trapping moisture. For most beginners, foil wrapping is the easiest and most forgiving approach.
Spritzing / Mopping
Some pitmasters regularly spritz their meat with a liquid — apple juice, apple cider vinegar, or plain water — every hour or so during the cook. This replaces evaporated moisture, helps develop bark, and adds a subtle flavor layer. Use a simple spray bottle. Don’t go overboard — too much liquid cools the surface and can inhibit bark formation.
The Water Pan
Placing a pan of water in the smoker chamber creates a more humid cooking environment, which slows moisture loss from the meat’s surface and helps regulate temperature swings. Water pans are particularly effective in bullet-style charcoal smokers and electric smokers. Some pitmasters add apple juice, beer, or aromatics to the water pan — though whether these add meaningful flavor is debated.
Choosing the Right Cuts
High-fat, collagen-rich cuts are naturally more resistant to drying out. Pork shoulder, beef brisket point, and beef short ribs all have abundant intramuscular fat that renders during the long cook, lubricating the meat from the inside. Lean cuts like pork loin or chicken breast are far more vulnerable to drying out and require more careful temperature management.
12 Common Beginner Smoker Mistakes (And How to Avoid Every One)
Every beginner makes mistakes. The goal is to make the right ones — the ones that teach you something — and to avoid the easily preventable ones that simply waste expensive meat and time.
- Using too much smoke. Thick, white billowing smoke is bad smoke — it’s a sign of incomplete combustion that produces acrid, bitter creosote flavor. You want thin blue smoke (sometimes called “blue ribbon smoke”). Less wood, better airflow, cleaner fire.
- Trusting the built-in thermometer. The dial thermometers on most smokers are wildly inaccurate. Always use a quality dual-probe wireless thermometer at grate level.
- Opening the lid constantly. Every peek costs you temperature stability and adds cooking time. If you’re looking, you’re not cooking. Trust your thermometers.
- Not resting the meat. Cutting into meat fresh off the smoker causes all the accumulated juices to run out. Rest everything — no exceptions.
- Panicking at the stall. The stall is normal. It will pass. Do not crank up the temperature in panic. Either wait it out or wrap the meat. Both work fine.
- Starting with brisket. Save the 14-pound, $80 brisket for when you have some cooks under your belt. Start with chicken thighs and pork ribs.
- Soaking wood chips. Wet wood chips produce steam, not smoke. They delay and dilute the smoke flavor you’re trying to develop. Use dry wood always.
- Not seasoning the smoker first. A factory-fresh smoker has manufacturing oils and coatings that need to be burned off before you cook food on it. Season it first.
- Cutting against the grain. Even perfectly cooked brisket will be tough and chewy if you cut it parallel to the muscle fibers instead of perpendicular to them. Always slice against the grain.
- Not accounting for the fuel type. The flavor experience from different smoker types varies significantly. See our comparison of pellet smoker vs. electric smoker to understand the differences.
- Underestimating cook time. Smoked meats are done when they’re done — internal temperature is the only reliable indicator, not the clock. Always plan for extra time and use a cooler to rest longer if needed.
- Not keeping the smoker clean. Grease buildup in your smoker creates off-flavors, fire hazards, and eventually clogs important components. Clean your smoker after every two to three cooks. Our barbecue maintenance essentials guide has the full protocol.

Weber iGrill 3 Thermometer
Four meat probes, Bluetooth connectivity, and the Weber app that guides you through cooks. Eliminates the two biggest beginner mistakes: lid-opening and trusting the built-in thermometer.
View on Amazon →Smoker Safety, Cleaning & Maintenance: Protect Your Investment
A well-maintained smoker will last decades and produce consistently better results than a neglected one. Safety is also non-negotiable — smokers involve high heat, combustion, and in many cases, pressurized gas lines.
Essential Safety Rules
- Never smoke indoors or in enclosed spaces — including garages with the door open. Carbon monoxide from combustion is odorless, invisible, and lethal.
- Keep the smoker at least 10 feet from your home, wooden fences, and overhead structures.
- Never leave an offset smoker or charcoal smoker completely unattended — have someone check on it regularly even if you’re using a remote thermometer.
- Use heat-resistant gloves whenever handling grates, meat, or anything in or around the smoker. Welding gloves offer better protection than typical BBQ gloves. Our best BBQ tools guide has glove recommendations.
- Keep a fire extinguisher accessible near your smoking area. Grease fires can ignite quickly.
- Check gas lines regularly on propane and natural gas smokers. Our guide to BBQ safety features covers leak detection and pressure regulators.
How to Clean Your Smoker
After every cook: scrape the grates while still warm, empty the ash pan (charcoal smokers), and wipe down the interior with a dry cloth. After every 3–4 cooks: remove grates, scrub them with a stiff wire brush (or use our guide on how to clean barbecue grates), scrape grease from the interior walls, empty and clean the grease tray, and wipe down all exterior surfaces. Pellet grills require additional steps — see our pellet grill maintenance guide for the full protocol.
Long-Term Storage
If you live in a climate with harsh winters, invest in a quality smoker cover and store your smoker in a protected location when not in use for extended periods. Moisture is the enemy — it causes rust, deteriorates gaskets, and damages electronic components on pellet grills. A good cover pays for itself in extended smoker lifespan.
Common Troubleshooting Issues
New to a specific smoker and running into issues? We have detailed troubleshooting guides for the most popular brands: Traeger running too hot, Masterbuilt not heating up, Pit Boss ERH code, and Camp Chef not getting hot enough.

BBQ Grill Cleaning Kit (Brush, Scraper & Grate Tools)
A complete cleaning set with multiple brush sizes, a heavy-duty grate scraper, and a cleaning stone. Everything you need to keep your smoker clean and performing at its best.
View on Amazon →Frequently Asked Questions: Smoker Guide for Beginners
Q: What is the easiest type of smoker for a complete beginner?
An electric smoker is the most beginner-friendly option — it holds temperature automatically with a simple dial or digital controller, requires no fire management skills, and produces consistent results with minimal attention. If you want better smoke flavor and slightly more involvement, a pellet grill is the next step up and still extremely easy to use.
Q: What temperature should I smoke at for most meats?
The standard low-and-slow smoking temperature is 225°F to 250°F for most cuts. Chicken and turkey can be cooked at higher temperatures (275°F to 325°F) to help crisp the skin. The exact temperature matters less than maintaining it consistently throughout the cook.
Q: How long does a beginner smoke take?
Cooking times vary enormously by cut and temperature. Chicken thighs at 275°F are done in about 2–3 hours. Baby back ribs at 225°F take 5–6 hours. Pork shoulder for pulled pork at 225°F takes 10–14 hours. Beef brisket at 225°F can take 14–18 hours for a full packer. Always cook to internal temperature, not by the clock.
Q: Do I need to soak wood chips before using them?
No. Soaking wood chips is one of the most persistent myths in BBQ. Wet wood produces steam before it eventually burns — this delays smoke production and adds water vapor to the cooking environment rather than clean smoke flavor. Use dry wood chips and chunks for better, more consistent smoke from the moment they contact the heat source.
Q: What is the smoke ring and do I need it?
A smoke ring is a pink layer beneath the bark of smoked meat, caused by a chemical reaction between combustion gases and myoglobin in the meat. It’s an aesthetic indicator of good process, not a flavor indicator. You do not need a smoke ring for excellent-tasting smoked meat — it’s a bonus, not a requirement.
Q: What wood should a beginner start with?
Start with apple or cherry wood for versatility — both are mild, slightly sweet, and pair well with almost everything from chicken to pork to even light beef cuts. Once you’re comfortable with those, experiment with hickory for stronger pork flavor, or oak for beef. Avoid mesquite until you fully understand its intensity.
Q: How do I control temperature in a charcoal smoker?
Temperature in a charcoal smoker is controlled through airflow — more air means higher temperature, less air means lower temperature. Open the bottom intake vent to raise temperature; close it to lower temperature. The top exhaust vent should remain almost fully open during a smoke to allow combustion gases to escape. Our guide to charcoal grill temperature control covers this in full detail.
Q: What is the Texas Crutch and should I use it?
The Texas Crutch is the practice of wrapping meat in aluminum foil during the stall to push through faster and retain moisture. It’s particularly useful for beginners because it eliminates the stall completely and helps prevent drying out. The trade-off is softer bark than an unwrapped cook. For your first few smokes, using the crutch is a smart move.
Q: Is it safe to use parchment paper in a smoker?
Unbleached parchment paper is generally safe in a smoker up to around 420°F — but since most smoking happens at 225°F to 275°F, you’re well within safe limits. Many beginners use parchment in the drip tray for easier cleanup. However, don’t use it directly over a heat source. See our article on using parchment paper in a smoker for complete guidance.
Q: How many pounds of smoked meat do I need per person?
Plan for about 1/3 pound of cooked smoked meat per person for pulled pork or brisket (they lose significant weight during cooking — roughly 30–40%). This means you need about 1/2 to 2/3 pound of raw meat per person. Our full guide on how many pounds of BBQ per person accounts for different cuts and serving contexts.
Q: What accessories does a beginner smoker need to start?
The essential accessories are: a dual-probe wireless thermometer (ambient + meat), heat-resistant gloves, a good quality meat slicing knife, a cutting board large enough for brisket, pink butcher paper or heavy-duty foil, and a spray bottle for spritzing. Optional but useful: a chimney starter (for charcoal), an ash vacuum, and a water pan. See our full list of must-have BBQ accessories.
Q: Can you grill and smoke on the same unit?
It depends on the smoker type. Pellet grills and kamado grills are the most versatile — they can smoke at 200°F and grill at 600°F+. Offset smokers and bullet charcoal smokers are primarily smoking tools but can be configured for direct grilling. Electric smokers typically cannot reach high enough temperatures for proper grilling. For a full comparison of direct vs. indirect cooking methods, see our guide to direct and indirect grilling methods.
Your First Smoke is Closer Than You Think
If you’ve made it through this guide, you now know more about smoking meat than the vast majority of people who call themselves backyard BBQ enthusiasts. You understand the science of low-and-slow cooking. You can choose the right smoker for your lifestyle and budget. You know which woods to pair with which meats. You have a framework for your first cook, from seasoning your smoker the night before to resting your meat properly at the end.
All that’s left is the fire. Pick up a pack of chicken thighs, grab your thermometer, fire up that smoker, and do your first cook this weekend. You will make mistakes. Your temperature will bounce around. Your smoke might be too heavy for the first hour. You might panic at the stall. And despite all of that — or maybe because of it — you will pull something off that smoker that tastes better than anything you’ve ever made on a gas grill.
That’s the beginning. And from there, there’s a whole world of smoked brisket, competition ribs, whole hog, cold-smoked cheese, and smoked salmon waiting for you. Every cook teaches you something new. The journey is the point.
If you’re still shopping for gear, bookmark our best BBQ smokers roundup, our best BBQ tools guide, and the best gifts for grill masters — great for treating yourself or sharing with the person who gifted you that smoker. Now go make some smoke.
Ready to Start Smoking?
Browse our complete guides to find the perfect smoker, accessories, and recipes for your first cook.
Start Your BBQ Journey →