
How to Grill Chicken Perfectly: The Definitive Method for Juicy, Charred, Never-Dry Results
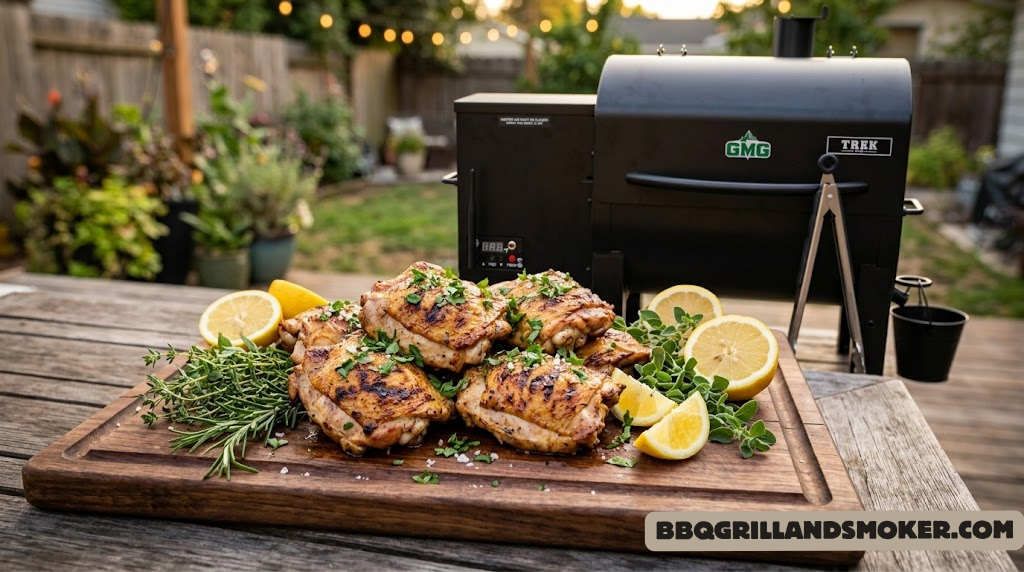
Grilling chicken sounds simple. In practice, it’s one of the most unforgiving techniques in all of outdoor cooking. Get it wrong and you end up with hockey-puck breasts or bloody thighs. Get it right and you have something extraordinary — smoky, lacquered skin with dripping-juicy meat that makes everyone come back for seconds.
This guide covers everything: the science behind chicken’s tendency to dry out, the exact setup for gas and charcoal grills, a cut-by-cut temperature and timing chart, six step-by-step illustrated techniques, common errors that even experienced grillers repeat, and a full FAQ for every question you’ve ever had while standing over a hot grill wondering why your chicken is still pink.
If you’ve been battling dry breasts, flare-ups, or undercooked thighs, this is the end of that struggle. Let’s get into it.
Before we dive into the step-by-step method, it’s worth understanding why chicken behaves the way it does over live fire. Chicken muscle fibers contract rapidly when exposed to high heat, squeezing out moisture like a sponge being wrung dry. Unlike beef, which can be served at 130°F, chicken must reach a safe internal temperature of 165°F — a point at which lean breast meat has already lost a significant percentage of its water content unless you’ve taken protective steps. Those protective steps are exactly what separates a mediocre grilled chicken from a legendary one.
If you want to explore Direct vs Indirect Grill Methods in depth, that guide breaks down the physics and best use cases for each approach — knowledge that applies directly to everything in this article.
Choosing the Right Chicken Cut for the Grill
Not all chicken cuts behave the same way over fire. Selecting the right one for your cooking goal — quick weeknight dinner versus showstopping backyard spread — changes your entire approach. Here’s a breakdown of the most popular cuts and how they perform on the grill.
Bone-In, Skin-On Thighs: The Crowd Favorite
Thighs are arguably the most forgiving cut for grilling. The higher fat content and connective tissue mean they stay moist even if you overshoot the target temperature by 10 to 15 degrees. The skin renders beautifully over medium-high heat, turning crispy and deeply caramelized. If you want the best grilled chicken thighs BBQ recipe experience, bone-in, skin-on is your starting point.
Boneless Skinless Breasts: High-Risk, High-Reward
Breasts are the most purchased but most commonly ruined cut. They’re pure protein with almost no fat to shield them from heat. Every minute over the ideal temperature pushes them toward dryness. That doesn’t mean you should avoid them — it means you need to respect the technique. A simple 30-minute salt brine and a two-zone fire are all that stand between a perfectly juicy breast and a chalkboard eraser.
Drumsticks: Easy, Reliable, Underrated
Drumsticks are dense, the bone helps regulate internal temperature, and the extra fat near the joint keeps them tender. They take longer than thighs but are similarly forgiving. They’re also the easiest cut to handle on a grill without tongs slipping — a practical advantage when you’re managing multiple pieces.
Whole Chicken: The Ultimate Challenge
A whole bird on the grill is a serious undertaking but delivers unmatched results. Spatchcocking (removing the backbone so the bird lays flat) solves the biggest problem — uneven cooking between breast and thigh — and is now the standard technique for whole-chicken grilling. For a complete guide to smoking a whole chicken, the principles overlap significantly with grilling.
Wings: High Heat, Fast Cook, Maximum Fun
Wings thrive at high direct heat with careful attention. The combination of fat and skin means they can handle temperatures that would ruin a breast. The goal is crispy, rendered skin without burning — which means watching them closely and flipping frequently.
| Cut | Fat Level | Grill Difficulty | Safe Internal Temp | Approx. Cook Time | Best Method |
|---|---|---|---|---|---|
| Boneless Breast | Low | ⭐⭐⭐⭐ | 165°F (74°C) | 12–16 min | Two-Zone |
| Bone-In Thigh | High | ⭐⭐ | 165°F+ (preferred 175°F) | 30–40 min | Two-Zone |
| Boneless Thigh | Medium | ⭐⭐ | 165°F+ | 12–18 min | Direct |
| Drumstick | Medium | ⭐⭐ | 165°F+ | 25–35 min | Two-Zone |
| Wings | High | ⭐⭐⭐ | 165°F+ | 20–25 min | Direct/High |
| Spatchcock Whole | Variable | ⭐⭐⭐⭐ | 165°F breast / 175°F thigh | 45–60 min | Two-Zone |

Weber Spirit II E-310 Gas Grill
The gold-standard three-burner grill that makes two-zone chicken cooking effortless. Consistent heat, porcelain grates, and superb build quality.
Check Price on Amazon →Prep, Brine, and Marinate: The Foundation of Great Grilled Chicken
The single biggest difference between home grillers and professional pitmasters isn’t their equipment — it’s their prep work. Spending 30 minutes in the kitchen before you ever light a match can transform your results dramatically.
The Science of Brining
Brining works through osmosis and protein denaturation. When you submerge chicken in a salt solution, the salt ions penetrate the muscle fibers and alter the protein structure so they retain more water during cooking. A simple wet brine of 4 tablespoons of kosher salt per quart of cold water for 30–60 minutes is all you need for breasts. Thighs benefit too but are more forgiving if you skip it.
Quick Brine Ratio: 1 tablespoon kosher salt per cup of water. Submerge the chicken, refrigerate for 30 to 60 minutes, then rinse and pat dry before grilling.
Dry Brining: The Better Method
If you have time, dry brining is actually superior to wet brining. Simply season the chicken generously with kosher salt (and optionally garlic powder, smoked paprika, and black pepper), then let it rest uncovered on a rack in the refrigerator for 2 to 24 hours. The salt draws out surface moisture, which then gets reabsorbed along with the salt, seasoning the meat deeply from within. The dry surface also leads to significantly better browning and crispier skin — critical goals when you’re grilling.
Marinades: Flavor, Not Tenderizing
Many people believe marinades tenderize chicken. In practice, acidic marinades only affect the surface — they don’t penetrate deeply enough to significantly change the texture of the meat. What marinades do brilliantly is add layers of flavor to the exterior. An oil-based marinade with herbs, garlic, citrus zest, and a small amount of acid (lemon juice, vinegar, or yogurt) gives you incredible complexity without the tenderizing myths.
Marinate chicken for at least 2 hours, or up to 24 hours for bone-in pieces. Pat the chicken dry before grilling — excess moisture creates steam instead of the Maillard reaction crust you’re looking for. Choosing the right barbecue sauce or marinade base significantly shapes the final flavor profile.
Pounding Breasts Flat
One of the most underused prep techniques: pound boneless skinless breasts to an even thickness (about ¾ inch) before grilling. The tapered end of a raw breast cooks much faster than the thick center, which means one part is overdone while the other is still catching up. Ten seconds with a meat mallet creates an evenly thick piece that cooks uniformly. This simple step alone eliminates the most common complaint about dry grilled chicken.
✅ Wet Brine Pros
- Fast results (30 min)
- Works on frozen-thawed chicken
- Adds internal moisture
- Easy for beginners
❌ Wet Brine Cons
- Can waterlog the skin
- Needs rinsing and drying
- Less browning potential
- Requires large container
Step 1 – Set Up Your Grill for Two-Zone Cooking
Creating the Two-Zone Fire
The most important setup concept for grilling chicken is the two-zone fire. One side of the grill is hot (direct heat) for searing and crisping skin; the other side has no flame directly below (indirect heat) for gentle, even cooking through to the bone. This setup is non-negotiable for any bone-in piece and is the safest approach for boneless breasts too.
For Gas Grills
Light one side of the burners to medium-high (about 400–450°F). Leave the other side completely off. Preheat with the lid closed for 10–15 minutes. The unlit side will come up to a gentle ambient temperature of around 300–350°F — perfect for the indirect phase.
For Charcoal Grills
After your coals ash over (about 20–25 minutes), bank them all to one side using a charcoal rail or simply pushing them with a long-handled tool. The empty side is your indirect zone. For temperature control on charcoal grills, understanding charcoal temperature management will make this process far more predictable.
Target Grill Temperature: 375–425°F on the direct side. Use the hand test if you don’t have a thermometer — you should be able to hold your hand 5 inches above the grate for no more than 2–3 seconds on the hot side.
For Pellet Grills
Set your pellet grill to 375°F and let it preheat for 15 minutes. Many pellet grills don’t have a true sear zone — if yours doesn’t, you can sear first on a cast iron skillet or use a torch to finish the skin. That said, most pellet grill chicken is outstanding even without a dedicated char, thanks to the smoke infusion. Check out the comparison between pellet grill vs charcoal grill to understand how each platform affects chicken differently.
Always oil the grates right before adding chicken. Fold a paper towel into a thick pad, dip it in high smoke-point oil (avocado oil is ideal), and use tongs to wipe the hot grates. This is the most reliable way to prevent sticking, as discussed in detail in this guide on preventing chicken from sticking to the grill.

ThermoPro TP25 Wireless 4-Probe Thermometer
Monitor up to four pieces of chicken simultaneously from 500 feet away. Eliminates guesswork completely — the single most important tool for perfect grilled chicken.
Check Price on Amazon →Step 2 – Season the Chicken Right Before Grilling
Oil, Salt, and Rub Application
Timing your seasoning matters more than most people realize. For a dry-brined chicken, you’re already salted — add your rub and a light coat of oil right before it hits the grill. For chicken that wasn’t dry-brined, season at the last minute or 40+ minutes before cooking. The danger zone is seasoning 10–30 minutes ahead: the salt draws out moisture but it doesn’t have time to be reabsorbed, leaving wet, poorly browning chicken.
Building a Killer Dry Rub
A well-balanced dry rub adds flavor, creates a bark-like crust, and helps the skin render and crisp. The classic ratio for chicken is:
- 2 parts smoked paprika (color, mild heat, smokiness)
- 1 part kosher salt (if not pre-brined)
- 1 part brown sugar (caramelization, color)
- ½ part garlic powder
- ½ part onion powder
- ¼ part black pepper
- ¼ part cayenne (optional, adjust to heat preference)
- ¼ part dried oregano or thyme
Apply the rub generously — don’t be shy. Press it firmly into all surfaces, including under the skin when working with bone-in pieces. If you want to explore professionally crafted blends, the guide to the best barbecue rubs covers commercial options that rival homemade recipes. You can also check our homemade BBQ rub recipe for a from-scratch formula.
Key Rule: Let your seasoned chicken come to room temperature for 20–30 minutes before grilling. Cold-center chicken takes longer to cook, increasing the window of drying out the exterior while waiting for the interior to catch up.
Step 3 – Sear Over Direct Heat for Char and Crust
The Sear: Building the Crust That Seals in Flavor
Place the chicken skin-side down on the hot (direct heat) side of the grill. Close the lid and resist the urge to move it for the first 3–4 minutes. You’re developing the Maillard reaction — the complex browning that creates hundreds of flavor compounds. Lifting and moving the chicken before a crust forms prevents browning and causes tearing.
When to Flip
The chicken will tell you when it’s ready to flip. Properly seared chicken releases naturally from the grate without resistance. If you feel the chicken pulling and sticking when you try to turn it, it’s not ready. Wait another 60–90 seconds and try again. Once it releases freely, flip it and sear the other side for 2–3 minutes.
Flare-Up Warning: Fat dripping from chicken skin can cause significant flare-ups on a gas grill. Keep a spray bottle of water nearby and have the indirect zone ready as a refuge. To learn how to prevent flare-ups on a gas grill, that dedicated guide covers the full technique.
Sear Timing by Cut
- Boneless breast: 3–4 minutes per side on direct heat, then move to indirect
- Bone-in thigh: 4–5 minutes skin-side down, 2–3 minutes bone-side, then indirect
- Boneless thigh: 3–4 minutes per side, can finish on direct
- Drumstick: 3–4 minutes per side rotating, then indirect
- Wings: 3–4 minutes per side on direct, keep rotating
Step 4 – Finish with Indirect Heat Until Done
Moving to the Indirect Zone
After searing both sides, move the chicken to the indirect zone. This is where the magic happens — the ambient heat of the closed grill lid slowly and evenly cooks the chicken through to the bone without scorching the exterior. The indirect zone effectively turns your grill into an oven, but with the benefit of wood smoke and the residual char flavor from the sear.
Lid Discipline: The Rule That Changes Everything
Keep the lid closed during the indirect phase except to check the temperature. Every time you open the lid, you drop the grill temperature by 25–50°F and add cooking time. The circulating hot air inside the closed lid is what cooks the meat gently and evenly — disrupting it is counterproductive. Check the temperature once, note the progress, close the lid, and wait.
Basting with Sauce
If you’re applying barbecue sauce, do it only in the last 5–7 minutes of cooking. Most commercial sauces contain sugar that burns easily, and applying it too early creates a scorched, bitter crust rather than the glossy, lacquered finish you’re after. Apply one coat, close the lid for 2–3 minutes, apply another coat, and then check for doneness. Using the best barbecue sauces makes a tremendous difference in the final result.
For deeper insight on how direct versus indirect cooking affects different proteins, including chicken, the comparison guide on direct vs indirect grill methods is an excellent companion read.
Grilling vs Smoking: Heat & Flavor MechanicsStep 5 – Check Internal Temperature with a Probe Thermometer
Temperature Is the Only Reliable Doneness Test
Color, texture, and timing are all unreliable indicators of doneness for chicken. A meat thermometer is not optional — it’s the single most important tool you own as a griller. Insert the probe into the thickest part of the meat, avoiding contact with bone (bone conducts heat differently and gives a false reading), and wait for the temperature to stabilize.
Temperature Targets by Cut
| Cut | USDA Minimum | Recommended Pull Temp | Resting Rise | Final Temp |
|---|---|---|---|---|
| Boneless Breast | 165°F | 160–162°F | 3–5°F | 165°F |
| Bone-In Breast | 165°F | 162–164°F | 2–4°F | 165°F+ |
| Bone-In Thigh | 165°F | 170–172°F | 3–5°F | 175°F+ |
| Boneless Thigh | 165°F | 168–170°F | 3–5°F | 173°F+ |
| Drumstick | 165°F | 170–172°F | 3–5°F | 175°F+ |
| Wings | 165°F | 172–175°F | 2–3°F | 175°F+ |
Pro Move — Pull Temp: Pull chicken from the grill 3–5°F before your target. Carryover cooking during the rest period will bring it the rest of the way. This prevents overshooting and drying out the meat.
Why do we recommend higher temperatures for thighs and drumsticks than the USDA minimum? Dark meat contains more connective tissue and collagen, which begins to break down at around 170–175°F. At 165°F, thighs are technically safe but can have a slightly rubbery, unpleasant texture. Cooking them higher produces a more tender, enjoyable result without compromising juiciness because of the protective fat content.

Weber 7429 Char-Basket Charcoal Rail Set
Makes creating the perfect two-zone charcoal fire effortless. Stack coals on one side in seconds. Essential for every serious charcoal griller.
Check Price on Amazon →Step 6 – Rest the Chicken Before Cutting
Why Resting Is Non-Negotiable
Cutting into chicken immediately off the grill is the most common final mistake — and one of the most expensive. During cooking, the muscle fibers tighten and force moisture toward the center of the meat. Resting allows those fibers to relax and the moisture to redistribute evenly throughout. Cut too soon and that moisture floods out onto your cutting board instead of staying in your chicken.
How to Rest Without Losing Heat
Place the grilled chicken on a wire rack over a rimmed baking sheet — not directly on a plate. A plate traps steam and softens the skin you worked hard to crisp. The wire rack allows air circulation around the chicken, preserving the texture of the exterior while the interior relaxes. Tent loosely with aluminum foil only if you need to keep chicken warm for longer than 10 minutes — tight tenting steams the skin soft.
| Cut | Minimum Rest Time | Ideal Rest Time | Maximum Hold |
|---|---|---|---|
| Boneless Breast / Thigh | 3 min | 5–7 min | 15 min (loosely tented) |
| Bone-In Thigh / Drumstick | 5 min | 7–10 min | 20 min (loosely tented) |
| Wings | 2 min | 3–5 min | 10 min |
| Spatchcock Whole Chicken | 10 min | 12–15 min | 30 min (loosely tented) |
10 Common Mistakes That Ruin Grilled Chicken (And How to Fix Them)
Even experienced backyard grillers fall into familiar traps with chicken. Here are the ten most widespread errors and the precise corrections for each.
1. Skipping the Brine or Dry Brine
The single highest-impact prep step. Brined chicken retains significantly more moisture during cooking. A 30-minute wet brine or overnight dry brine is the difference between acceptable and exceptional. There is no reason to skip it.
2. Cold Chicken on the Grill
Placing refrigerator-cold chicken directly on a hot grill creates an enormous thermal gradient — the outside chars before the interior reaches temperature. Take chicken out of the refrigerator 20–30 minutes before grilling to temper it. This alone can shave 5–8 minutes off cooking time.
3. Too High Heat, Whole Time
Grilling chicken entirely on direct high heat is the most reliable path to burnt skin and raw interiors. The two-zone method solves this completely. Sear with direct heat, finish with indirect. If you’ve been struggling with this, reading up on why your grill isn’t heating evenly can also reveal contributing equipment issues.
4. Lifting and Checking Too Often
Every time you lift the lid, you disrupt the cooking environment and extend total cook time. Trust the process. Set a timer and check the temperature, not the appearance. Appearance is a tertiary indicator at best.
5. Using a Dirty Grill
Residue from previous cooks is one of the primary causes of chicken sticking. Always preheat your grill with the lid closed for 10–15 minutes to loosen old residue, then brush the grates thoroughly with a stiff-wire grill brush right before oiling. The guide on how to clean barbecue grates covers this comprehensively.
6. Applying Sauce Too Early
Sugar burns at around 320°F. Most grill surfaces exceed this easily. Sauce applied more than 7 minutes before the end creates a blackened, bitter crust. Apply only in the final 5–7 minutes.
7. Not Using a Meat Thermometer
There is no acceptable substitute for an accurate instant-read or leave-in probe thermometer when grilling chicken. The cut, time of year, ambient temperature, and exact grill temperature all affect cook time. Temperature is the only reliable truth. Poor equipment can be a factor too — see best BBQ tools for thermometer recommendations.
8. Cutting Chicken Without Resting
Already covered in Step 6, but worth repeating: the rest period is not optional. It is the final phase of cooking. Skipping it costs you a quarter of the dish’s potential quality.
9. Marinating Too Long in Acidic Marinades
Acid (citrus juice, vinegar, wine) begins to “cook” the protein on the surface of the chicken over time. Breasts marinated in a highly acidic mixture for more than 4–6 hours develop a mushy, grainy exterior texture. Oil-based marinades are safer for long brines; acid-forward marinades should be kept to 2–4 hours for breasts.
10. Choosing the Wrong Equipment
A grill that doesn’t hold temperature well, has thin grates that can’t sear properly, or doesn’t have a lid creates fundamental cooking challenges. Investing in quality equipment matters. If you’re evaluating options, the comparison between the best barbecue grills covers a wide range of price points and performance profiles.
Quick Fix Summary: Brine it, temper it, two-zone it, don’t touch it, check the temp, rest it. Those six rules solve 90% of all grilled chicken problems.

Traeger Pro 575 Wood Pellet Grill
Set-it-and-forget-it precision for perfectly cooked chicken with genuine wood smoke flavor. WiFIRE technology lets you monitor and adjust from your phone.
Check Price on Amazon →Adding Smoke Flavor to Grilled Chicken
Even on a gas grill, you can infuse meaningful wood smoke flavor into chicken. The key is using the right wood type, the right amount, and understanding how the technique changes between gas and charcoal setups. Smoke is, in many ways, the secret ingredient that elevates grilled chicken from good to extraordinary.
Best Wood Choices for Chicken
Chicken has a relatively delicate flavor compared to brisket or pork shoulder. Overpowering it with strong woods like hickory or mesquite can result in an acrid, bitter taste. Lighter, fruitier woods are almost universally preferred:
| Wood Type | Flavor Profile | Intensity | Best For | Recommended? |
|---|---|---|---|---|
| Apple | Sweet, mild, fruity | Low | All cuts, especially thighs | ✔✔✔ |
| Cherry | Sweet, slightly tart, rich color | Low-Medium | Whole chicken, spatchcock | ✔✔✔ |
| Peach | Floral, delicate, sweet | Low | Breasts, wings | ✔✔✔ |
| Pecan | Nutty, slightly sweet | Medium | All cuts | ✔✔ |
| Hickory | Strong, bacon-like | High | Use sparingly for breasts | ✔ |
| Mesquite | Earthy, intense, bold | Very High | Not ideal for chicken | ✗ |
The deeper comparison of hickory vs mesquite and wood chips vs wood chunks are excellent resources for dialing in your smoke setup. For chicken specifically, wood chips in a foil packet or a smoke box work best on gas grills. On charcoal, throw a handful of soaked chips directly on the coals just before you put the chicken on.
Using a Smoke Box on a Gas Grill
Fill a stainless steel smoke box with pre-soaked wood chips (soak for 30 minutes to slow combustion and create more smoke). Place the smoke box directly on a burner grate underneath the cooking grate, directly over a lit burner. Once the chips begin to produce steady smoke (about 5–7 minutes after the grill is lit), add your chicken to the indirect zone. The comparison between different smoke box types in the smoke box material and performance guide helps you choose the right tool.
For a complete exploration of how smoking compares to grilling in terms of flavor outcome, the grilling vs smoking guide is invaluable reading.
BBQ Wood Chips Guide Smoker Guide for Beginners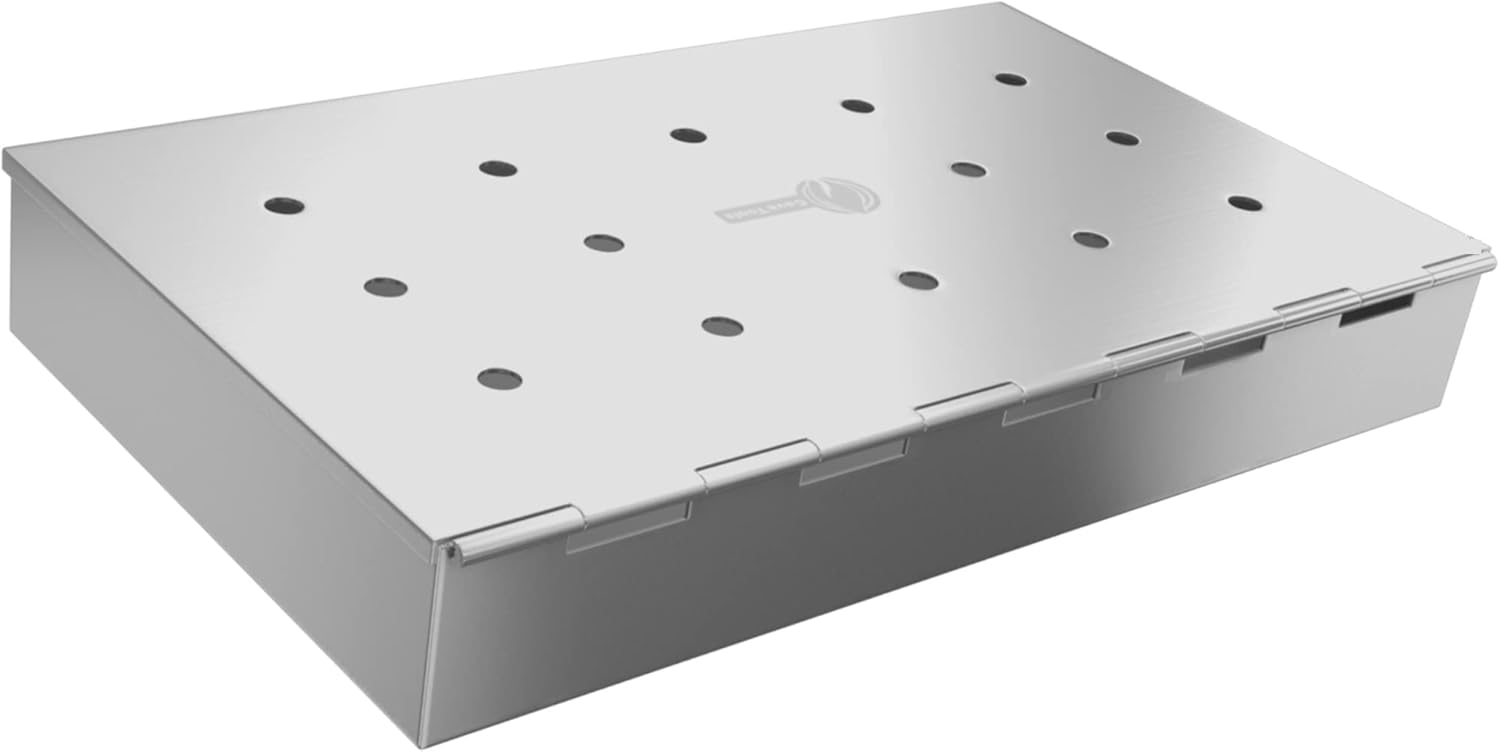
Cave Tools BBQ Smoke Box for Wood Chips
Heavy-gauge stainless steel construction that fits under your grill grate and produces consistent, controlled smoke on any gas grill. No soaking required.
Check Price on Amazon →The Complete Cut-by-Cut Grilling Reference Chart
Use this chart as a quick reference at the grill. All temperatures assume a properly calibrated, two-zone setup at 375–425°F on the direct side and 300–350°F on the indirect side with the lid closed.
| Cut | Thickness / Weight | Direct Heat (per side) | Indirect Heat | Pull Temp | Rest Time | Total Approx. |
|---|---|---|---|---|---|---|
| Boneless, Skinless Breast | ~6–8 oz, ¾” thick | 3–4 min/side | 8–12 min | 160°F | 5 min | 14–20 min |
| Boneless, Skinless Breast (large) | >10 oz, thick end >1″ | 4–5 min/side | 12–18 min | 160°F | 5 min | 20–28 min |
| Bone-In, Skin-On Breast | ~10–14 oz | 4–5 min/side | 20–28 min | 163°F | 7 min | 28–38 min |
| Boneless, Skinless Thigh | ~4–6 oz | 3–4 min/side | 5–8 min | 170°F | 5 min | 11–16 min |
| Bone-In, Skin-On Thigh | ~6–10 oz | 4–5 min skin-side, 3 min bone-side | 18–25 min | 172°F | 7 min | 25–33 min |
| Drumstick | ~4–6 oz each | 3–4 min, rotate 4x | 15–20 min | 172°F | 7 min | 27–36 min |
| Wing (whole) | ~2–3 oz each | 3–4 min/side, repeat | 5–8 min | 175°F | 3 min | 14–20 min |
| Spatchcock Whole Chicken | 3.5–5 lbs | 5–6 min skin-side, 3–4 min bone-side | 35–50 min | 160°F breast / 172°F thigh | 12–15 min | 43–60 min |
Note: These times are estimates based on average grill performance. Your specific grill, ambient temperature, humidity, and exact cut weight will affect actual cook times. Always use an instant-read thermometer as your final authority.
Gas Grill vs Charcoal: Does It Affect Chicken Timing?
Yes, somewhat. Charcoal grills tend to run hotter in the direct zone and can produce more radiant heat, which can shorten sear time by 30–60 seconds per side. However, the indirect zone on a charcoal grill can be less stable than on a gas grill, sometimes requiring slightly longer finish times. The flavor comparison between gas and charcoal grill flavor outcomes covers these nuances in detail. If you’re deciding between fuel types, the pellet grill vs gas grill comparison is also highly relevant.
Grill a Perfect Steak Too Grill Veggies Like a Pro Grilled Salmon RecipeAdvanced Techniques: Spatchcocking, Butterflying, and Compound Butters
Spatchcocking a Whole Chicken
Spatchcocking — the technique of removing the backbone so the chicken lies flat — is the most transformative change you can make to whole-bird grilling. A spatchcocked chicken cooks in roughly half the time of a trussed whole bird, browns more evenly across the entire skin, and presents spectacularly on the grill. All you need are a pair of sturdy kitchen shears.
- Place the chicken breast-side down on a cutting board.
- Cut along both sides of the backbone with kitchen shears and remove it entirely. Save it for stock.
- Flip the chicken breast-side up and press firmly down on the breastbone with the heel of your hand until it cracks flat.
- Season under and over the skin, then proceed with the two-zone method above.
Compound Butter Under the Skin
One of the most luxurious and effective moisture-retention techniques: make a compound butter by combining softened butter with herbs (thyme, rosemary, parsley), garlic, lemon zest, salt, and pepper. Carefully slide your fingers between the skin and the breast meat to create a pocket, then stuff the compound butter under the skin. As the chicken grills, the butter melts and self-bastes the breast meat from inside, producing incredibly moist, richly flavored results.
The Reverse Sear Method for Thick Breasts
For unusually thick chicken breasts (over 1.25 inches), the reverse sear method works brilliantly. Instead of searing first and finishing indirectly, start on the indirect zone until the internal temperature reaches 145–150°F, then move to direct heat for a quick final sear. This ensures the interior is evenly cooked before you apply the high heat that can char the exterior, and it produces remarkable results on those larger, denser pieces.
Marinating Techniques for Maximum Flavor Penetration
To get marinade flavor deeper into the meat rather than just on the surface, use a fork to pierce the chicken all over before marinating, or use a commercial meat tenderizer (the kind with needles, not chemical tenderizers). This creates channels for the marinade to penetrate more deeply. A yogurt-based marinade is particularly effective because the mild acidity slowly breaks down surface proteins over 8–24 hours without the aggressive denaturation that pure lemon juice causes.
If you enjoy pairing grilled chicken with other backyard classics, the BBQ grilled corn on the cob recipe and grilled burger recipe make perfect accompaniments for a full cookout spread.
Equipment That Makes a Genuine Difference
The right tools don’t just make grilling easier — they produce measurably better results. Here’s an honest breakdown of the equipment that genuinely matters for grilling chicken.
Grill Type
For most home grillers, a quality gas grill with at least two burners (enabling two-zone cooking) is the most practical and reliable option. The Weber Spirit II E-310 is arguably the benchmark in its category. For charcoal enthusiasts, the Weber 22″ Kettle remains the most versatile and reliable option at any price point. For pellet grill owners, the Traeger Pro 575 or Camp Chef Woodwind WiFi 24 both deliver outstanding chicken results.
Grill Grates
The material of your grill grates affects browning, heat retention, and sticking behavior more than most people realize. The detailed comparison between cast iron vs stainless steel grill grates covers this thoroughly. Cast iron retains heat better and produces more aggressive sear marks; stainless heats faster and requires less maintenance. Both work well for chicken with proper oiling technique.
Essential Chicken-Grilling Tools
| Tool | Purpose | Priority |
|---|---|---|
| Instant-Read Thermometer | The only reliable doneness check | ⭐ Essential |
| Long-Handled Tongs (16″) | Flipping without burning your arm | ⭐ Essential |
| Grill Brush (stainless) | Pre-cook grate cleaning | ⭐ Essential |
| Basting Brush / Silicone | Sauce and oil application | ⭐ Essential |
| Smoke Box | Adding wood smoke to gas grills | ⭐ Highly Recommended |
| Charcoal Rail (charcoal only) | Creating consistent two-zone fire | ⭐ Recommended |
| Wireless Leave-In Probe | Monitoring temp without opening lid | ⭐ Recommended |
| Poultry Shears | Spatchcocking, breaking down whole birds | Useful |
| GrillGrates / Sear Plates | Better sear marks and reduced flare-ups | Useful |
For a comprehensive look at the full suite of tools that improve your grill game across all proteins, the guide to must-have BBQ accessories and the best barbecue tools comparison are essential bookmarks.
Compare BBQ Tool Sets Best BBQ Tools
MEATER Plus Wireless Smart Meat Thermometer
100% wireless. Insert and monitor via Bluetooth from 165 feet. Guided cook mode walks you through every cut, including every chicken piece. Perfect for beginners and pros alike.
Check Price on Amazon →Food Safety and Health Considerations for Grilled Chicken
Beyond just cooking chicken to temperature, there are food safety practices that every griller should follow religiously when working with poultry, which carries higher food safety risks than most other proteins.
Cross-Contamination Prevention
Raw chicken should never share surfaces, tools, or platters with cooked chicken or any other food. Use separate cutting boards (color-coded helps), dedicated tongs and utensils for raw chicken, and always wash hands thoroughly after handling raw poultry. The platter you carried the raw chicken out to the grill must not be the one you use to carry the cooked chicken inside — this is one of the most common contamination errors at backyard cookouts.
Storage and Handling Before Grilling
Keep raw chicken at 40°F or below until ready to cook. If brining, keep it in the refrigerator — room-temperature brining creates a food safety risk. Don’t marinate at room temperature for more than 30 minutes. Chicken left in the temperature danger zone (40°F–140°F) for more than two hours should be discarded.
Charcoal Grilling Health Considerations
Charcoal and gas grilling produce heterocyclic amines (HCAs) and polycyclic aromatic hydrocarbons (PAHs) when meat is cooked at high temperatures. For chicken, reducing these compounds is straightforward: avoid charring the meat aggressively, marinate before grilling (marinades reduce HCA formation by up to 90% in some studies), trim excess fat, and use indirect cooking to minimize fat dripping directly onto coals or flames. The detailed analysis of health impacts of charcoal grilling covers this comprehensively for those who want more background.
Safe Internal Temperature: The Science
The USDA recommends 165°F for chicken because that temperature kills pathogens like Salmonella and Campylobacter instantaneously. However, food science recognizes that it’s actually time at temperature that defines safety — chicken held at 155°F for 47 seconds is statistically equivalent in safety to 165°F held instantaneously. This is why the concept of “pull temperature” makes scientific sense: pulling at 160–162°F and letting carryover bring it to 165°F during rest is a legitimate technique, not a shortcut.
Three Proven Grilled Chicken Recipes Worth Knowing
Classic BBQ Grilled Chicken Thighs
Dry-brine bone-in thighs for 4–24 hours with salt, smoked paprika, and brown sugar. Bring to room temperature. Oil the grates. Sear skin-side down for 5 minutes over direct medium-high heat, flip for 3 minutes, then move to indirect. Apply one coat of your favorite sauce at 12 minutes remaining and another at 5 minutes remaining. Pull at 172°F, rest on a wire rack for 7 minutes. This is the definitive recipe approach covered in our complete grilled chicken thighs BBQ recipe.
Herb-Lemon Spatchcock Chicken
Spatchcock a 4-pound chicken. Slide compound butter (softened butter, rosemary, thyme, garlic, lemon zest, salt) under the breast and thigh skin. Season the outside with smoked salt and pepper. Grill skin-side down over direct heat for 6 minutes, bone-side down for 4 minutes, then move to the indirect zone, skin-side up, for 35–50 minutes until the breast reads 160°F and the thigh reads 172°F. Rest 12 minutes. The skin will be shattering-crisp and the interior extraordinarily juicy.
Honey Sriracha Wings
Pat wings dry (very dry — this is critical for crispy skin). Toss with baking powder (yes, baking powder — it raises the pH and dramatically improves browning), salt, garlic powder, and smoked paprika. Grill over direct medium-high heat, rotating every 3 minutes until crispy and at 175°F, about 20–25 minutes total. Toss immediately in a sauce of melted butter, honey, sriracha, lime juice, and fish sauce. Serve within 5 minutes while the skin is at its crispiest.
For more grilling inspiration across all proteins, the perfect steak guide, grilled lamb chops recipe, and BBQ grilled shrimp skewers are all worth bookmarking for a complete backyard repertoire.

Killer Hogs The BBQ Rub – Champion Pitmaster Formula
The go-to rub for competition-level results on grilled chicken. A perfect balance of sweet, savory, and heat that creates an outstanding bark on any cut.
Check Price on Amazon →Frequently Asked Questions About Grilling Chicken
What temperature should a grill be for chicken?
For most chicken cuts, you want your direct heat zone at 375–425°F (190–218°C). The indirect zone, where you’ll finish cooking, should settle at around 300–350°F (149–177°C) with the lid closed. If you’re cooking boneless breasts exclusively, a slightly lower direct heat of 350–375°F reduces the risk of exterior charring before the interior cooks through.
How long does it take to grill chicken?
Total grill time varies significantly by cut. Boneless skinless breasts take 14–20 minutes total. Bone-in thighs take 25–35 minutes. Drumsticks take 27–36 minutes. Wings take 14–20 minutes. Spatchcocked whole chicken takes 43–60 minutes. These are estimates — always verify doneness with an instant-read thermometer rather than relying solely on time.
How do I keep grilled chicken moist and juicy?
Five practices make the biggest difference: (1) Brine the chicken before grilling — even 30 minutes in a salt-water solution increases moisture retention dramatically. (2) Don’t overcook it — use a thermometer and pull at 160°F for breasts. (3) Use the two-zone method with indirect heat for the final cooking phase. (4) Let the chicken rest at least 5 minutes before cutting. (5) If working with breasts, pound them to an even thickness so every part cooks simultaneously.
Should I close the lid when grilling chicken?
Yes, for the vast majority of the cooking process. Closing the lid turns your grill into a convection oven, circulating hot air that cooks the meat evenly from all sides. The only time to open the lid is to sear with a flip, apply sauce, or check the temperature. Opening the lid repeatedly during the indirect cooking phase significantly extends cook time and creates uneven results.
Can I grill chicken from frozen?
Technically yes, but it’s not recommended for optimal results. Grilling from frozen significantly extends cook time (up to 50% longer), makes it very difficult to apply seasonings effectively, and increases the risk of exterior charring before the interior reaches a safe temperature. If you must grill from frozen, use exclusively indirect heat, extend your cook time accordingly, and verify internal temperature carefully. The comprehensive guide on grilling frozen meat covers this topic fully.
Why does my grilled chicken always come out dry?
The most common causes of dry grilled chicken are: cooking entirely on direct high heat without an indirect phase; overcooking past 165°F for breasts; skipping a brine; cooking cold chicken directly from the refrigerator; and cutting the chicken without resting. Fix these five things and dry chicken becomes a problem of the past. A thermometer is the most important single investment you can make to prevent this issue.
When should I add BBQ sauce to grilled chicken?
Add barbecue sauce only in the last 5–7 minutes of cooking. Most commercial sauces are high in sugar, which burns quickly at grill temperatures. Apply the sauce during the indirect cooking phase near the end, not during searing. Apply one coat, close the lid for 2–3 minutes to allow it to set and caramelize slightly, then apply a second coat and finish cooking. This builds a lacquered, glossy finish without burning.
Do I need to flip chicken multiple times when grilling?
For most cuts, two flips (once on each side during the searing phase) are sufficient. The exception is wings and drumsticks, which benefit from more frequent rotation (every 3–4 minutes) due to their irregular shapes. Over-flipping during the early searing phase prevents the Maillard crust from forming and can cause tearing if the chicken hasn’t yet released from the grate naturally. For the indirect finishing phase, no additional flipping is necessary.
How do I stop chicken from sticking to the grill?
Three steps prevent sticking: (1) Preheat the grill thoroughly with the lid closed for 10–15 minutes — a fully hot grate sticks far less than a lukewarm one. (2) Clean the grates with a stiff brush right before cooking to remove old residue. (3) Oil the grates immediately before adding chicken — use a folded paper towel dipped in high smoke-point oil (avocado, grapeseed, or vegetable) gripped in tongs. Never spray cooking spray onto a hot grill — this is a flare-up and fire hazard.
Can I grill chicken thighs and breasts at the same time?
Yes, but you need to manage them separately. Thighs take significantly longer than breasts and benefit from higher final temperatures. Start the thighs first — about 10–12 minutes before the breasts on a standard two-zone setup. Use a leave-in probe thermometer in the breasts so you can pull them as soon as they hit 160°F, while letting the thighs continue to 172°F. Alternatively, cook them in separate batches, which gives you more control and keeps the grill less crowded for better heat circulation.
What’s the best wood for smoking grilled chicken?
Apple wood is the most universally recommended choice for chicken — its mild, sweet, slightly fruity smoke complements rather than overwhelms the lighter flavor of poultry. Cherry wood is an excellent alternative, adding a slightly deeper, more complex smokiness and contributing to beautiful mahogany skin color. Avoid mesquite for chicken — its intense, earthiness can easily overpower the delicate meat, resulting in a harsh, acrid flavor especially on breasts.
Conclusion: Your Best Grilled Chicken Starts Today
Grilling chicken perfectly isn’t about luck — it’s about understanding the process and applying a handful of non-negotiable techniques consistently. Brine for moisture. Season at the right time. Build a two-zone fire. Sear for crust, finish with indirect heat for even cooking. Check temperature with a probe, not a guess. Rest before you cut.
These six pillars are the entire foundation of extraordinary grilled chicken. Apply them to any cut, any grill, any recipe, and you will produce results that are leagues ahead of what most home grillers put on the table.
The investment is modest: a good thermometer, a little prep time, and the willingness to keep the lid closed. The payoff — moist, flavorful, gorgeously charred chicken with crispy skin — is enormous.
From here, expand your backyard mastery. Explore whole smoked chicken, graduate to grilling a perfect steak, or dive into the world of smoking for beginners. The skills you’ve built here transfer directly to everything else on the grill.